
The PackageMangement PowerShell module implements a provider interface that software package management systems use to manage software packages. You can use the cmdlets in the PackageMangement module to work with a variety of package management systems. You can think of this module as providing an API to package management providers such as PowerShellGet, discussed in the Exploring PowerShellGet and PowerShell Gallery recipe.
The key function of the PackageMangement module is to manage the set of software repositories in which package management tools can search, obtain, install, and remove packages. The module enables you to discover and utilize software packages from a variety of sources (and potentially varying in quality).
This recipe explores the PackageManagement module from SRV1.
This recipe uses SRV1—a domain-joined server that you partially configured in the Installing RSAT Tools on Windows 10 and Windows Server 2019 recipe.
- Review the cmdlets in the
PackageManagementmodule:Get-Command -Module PackageManagement
- Review the installed providers with
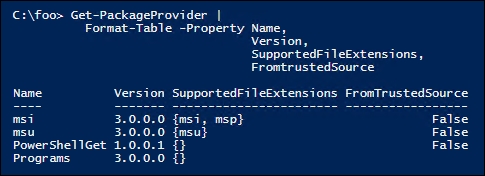
Get-PackageProvider:Get-PackageProvider | Format-Table -Property Name, Version, SupportedFileExtensions, FromtrustedSource - Get details of a packages loaded on
SRV1of theMSUtype (representing Microsoft Updates downloaded by Windows Update):Get-Package -ProviderName 'msu' | Select-Object -ExpandProperty Name
- Get details of the
NuGetprovider, which provides access to developer library packages. This step also loads theNuGetprovider if it is not already installed:Get-PackageProvider -Name NuGet -ForceBootstrap
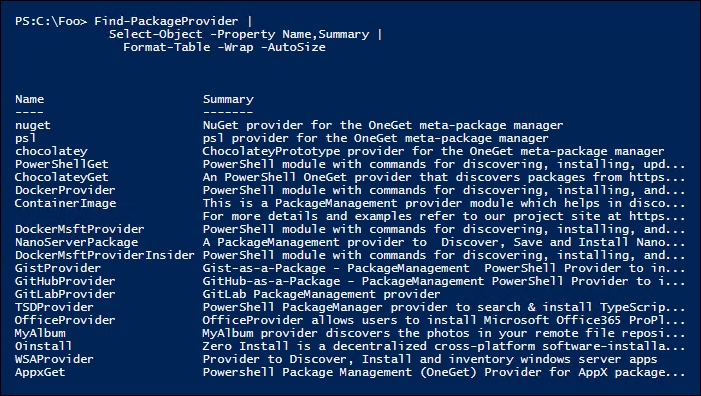
- Display the other package providers available on
SRV1:Find-PackageProvider | Select-Object -Property Name,Summary | Format-Table -Wrap -AutoSize - Chocolatey is a popular repository for Windows administrators and power users. You have to install the provider before you can use it, as follows:
Install-PackageProvider -Name Chocolatey -Force
- Verify that the
Chocolateyprovider is now available:Get-PackageProvider | Select-Object -Property Name,Version
- Display the packages now available in
Chocolatey:$Packages = Find-Package -ProviderName Chocolatey "$($Packages.Count) packages available from Chocolatey"
In step 1, you review the cmdlets contained in the PackageManagement module, which looks like this:

In step 2, you review the package providers installed by default in Windows Server 2019, which looks like this:
In step 3, you examined the packages downloaded by the msu provider. In this case, you only see one update, but you may see more, and it looks like this:

In step 4, you examine details of the NuGet provider. If the provider doesn't exist, then using the -ForceBootstrap parameter installs the provider without asking for confirmation, like this:

In step 5, you search for additional package providers, like this:
In step 6, you install the Chocolatey package provider, which looks like this:

In step 7, you examine the list of package providers now available to confirm that the Chocolatey provider is available, which looks like this:

In step 8, you check to see how many packages are available to download from Chocolatey, as follows:
