
iSCSI is an industry-standard protocol that implements block storage over a TCP/IP network. With iSCSI, the server, or initiator, provides a volume shared via iSCSI. Effectively, the shared volumes are iSCSI logical unit numbers. The iSCSI client then sees that disk as locally attached. From the iSCSI client, you can manage the disk just like locally-attached storage.
Windows Server 2019 includes both iSCSI target (server) and iSCSI initiator (client) features. You set up an iSCSI target on a server and then use an iSCSI initiator on a client system to access the iSCSI target. You can use both Microsoft and third-party initiators and targets, although if you mix and match, you need to test very carefully that the combination works in your environment.
With iSCSI, a target is a single disk that the client accesses using the iSCSI Client. An iSCSI target server hosts one or more targets, where each iSCSI target is equivalent to a LUN on a Fiber Channel SAN. The iSCSI initiator is a built-in component of Windows Server 2019 (and Windows 10). The iSCSI target feature is one you install optionally on Windows Server 2019.
You could use iSCSI in a cluster of Hyper-V servers. The servers in the cluster can use the iSCSI initiator to access an iSCSI target. Used via the Cluster Shared Volume, the shared iSCSI target is shared between nodes in a failover cluster that enables the VMs in that cluster to be highly available.
In this recipe, you create an iSCSI target on the SRV1 server. Run this recipe from SRV1.
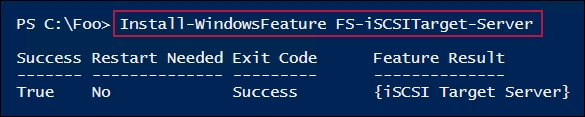
- Install the iSCSI target feature on
SRV1:Install-WindowsFeature FS-iSCSITarget-Server
- Explore the iSCSI target server settings:
Get-IscsiTargetServerSetting
- Create a folder on
SRV1to hold the iSCSI virtual disk:$NIHT = @{ Path = 'C:iSCSI' ItemType = 'Directory' ErrorAction = 'SilentlyContinue' } New-Item @NIHT | Out-Null - Create an iSCSI disk (that is, a LUN):
$LP = 'C:iSCSISalesData.Vhdx' $LN = 'SalesTarget' $VDHT = @{ Path = $LP Description = 'LUN For Sales' SizeBytes = 100MB } New-IscsiVirtualDisk @VDHT - Create the iSCSI target:
$THT = @{ TargetName = $LN InitiatorIds = 'DNSNAME:FS1.Reskit.Org' } New-IscsiServerTarget @THT - Create the iSCSI disk target mapping:
Add-IscsiVirtualDiskTargetMapping -TargetName $LN -Path $LP
In step 1, you add the FS-iSCSITarget-Server feature to SRV1, which looks like this:
In step 2, you get the iSCSI target server settings for SRV1, which looks like this:

In step 3, which creates no output, you ensure you have a folder on SRV1 to hold the new iSCSI disk volume. In step 4, you create the iSCSI virtual disk, which looks like this:

In step 5, you create the iSCSI target on SRV1, which looks like this:

In step 6, you complete the creation of the iSCSI target by adding an iSCSI virtual disk target mapping.
In step 3, you create the new LUN, using New-IscsiVirtualDisk. When using this command, you must specify a VHDX file extension. Windows Server 2019 doesn't support VHD files for new iSCSI targets. If you have older VHD files you want to use as an iSCSI virtual disk, you can create a target that points to it. You just can't create new iSCSI virtual disks.
The virtual disk you created in step 4 is uninitialized and contains no filesystem. In order to use the iSCSI disk, you use the iSCSI initiator to mount and manage the drive as if it were local. You'll see this in the Using an iSCSI target recipe.
You can also increase security by using Challenge Handshake Authentication Protocol (CHAP) authentication. You can specify the CHAP username and password on both the initiator and the target to authenticate the connection to an iSCSI target. If the security of iSCSI traffic is an issue, you could consider securing iSCSI traffic using IPSec.
If you aren't familiar with iSCSI and iSCSI targets, see https://docs.microsoft.com/en-us/windows-server/storage/iscsi/iscsi-target-server for an overview. And for more information on iSCSI, see https://en.wikipedia.org/wiki/ISCSI.