With multiple schedules, you can easily optimize sales or support processes, automate follow-up on outstanding cases and reminder notifications for a task, and incorporate all your business requirements within a single process. For example, when case origin is Phone and priority is high, then you can execute multiple groups of scheduled actions, such as the following:
- Sending a reminder e-mail after 1 day to the case owner if a case is not closed
- Sending a reminder e-mail to the case owner and account owner after 2 days if a case is still open
- Sending a satisfaction survey e-mail to case contacts 2 days after the case closure
Let's look at a business scenario. Alice Atwood is working as a system administrator at Universal Containers. She has received a requirement to send out e-mail reminders to the task assignee 1 day and 2 days before the task's due date if the task has not yet been completed.
Follow these instructions to achieve this using Process Builder:
- Process Builder doesn't allow you to create a new e-mail alert, but it allows you to use an existing e-mail alert that you have created in the past for the same object on which you created a process. First of all, create an Task reminder notification e-mail template by navigating to Setup (Gear Icon) | Setup | ADMINISTRATION | Email | Email Templates, as shown in the following screenshot:

- The second step is to create an e-mail alert on the Opportunity object by navigating to Setup (Gear Icon) | Setup | PLATFORM TOOLS | Process Automation | Process Builder | Workflow Actions | Email Alerts. Click on the New Email Alert button and save it with the name Email to Task assignee. It should look like what is shown the following screenshot:

- To create a process, navigate to Setup (Gear Icon) | Setup | PLATFORM TOOLS | Process Automation | Process Builder, click on the New button, and enter the following details:
- Name: Enter the name of the process. Enter Task reminders in Name.
- API Name: This will be autopopulated based on the name.
- Description: Write some meaningful text so that other developers or administrators can easily understand why this process has been created.
- This process starts when: Configure the process to start when a record is created or edited. In this case, select A record changes.
- Once you are done, click on the Save button; it will redirect you to the process canvas that allows you to create the process.
- After Define Process Properties, the next task is to select the object on which you want to create a process and define the Evaluation Criteria. For this, click on the Add Object node. It will open an additional window on the right-hand side of the process canvas screen, where you have to enter the following details:
- Object: Start typing and then select the Task object.
- Start the process: For Start the process, select when a record is created or edited. This means that Process will fire whenever a record gets created or edited.
- Recursion - Allow process to evaluate a record multiple times in a single transaction?: Select this checkbox only when you want the process to evaluate the same record up to five times in a single transaction. In this case, leave this box unchecked.
- Once you are done, click on the Save button.
- After defining the Evaluation Criteria, the next step is to add the Process Criteria. Once the process criteria are true, only then will the process execute the associated actions. To define the process criteria, click on the Add Criteria node. It will open an additional window on the right-hand side of the process canvas screen, where you have to enter the following details:
- Criteria Name: Enter a name for the criteria node. Enter Only for open tasks as the criteria name.
- Criteria for Executing Actions: Select the type of criteria you want to define. You can select either Formula evaluates to true or Conditions are met (a filter to define the process criteria) or No criteria-just execute the actions!. In this case, select Conditions are met.
- Set Conditions: This field lets you specify which combination of the filter conditions must be true for the process to execute the associated actions. In this case, select [Task].Status Does not equal Completed.
- Conditions: In the conditions section, select All of the conditions are met (AND). This field lets you specify which combination of the filter conditions must be true for the process to execute the associated actions.
- Under Advanced, select Yes to execute the actions only when specified changes are made.
It will look like what is shown in the following screenshot:

- Once you are done, click on the Save button.
- To add the scheduled time, click on Set Schedule available under SCHEDULED ACTIONS, and set Set Time for Action to Execute to 2 Days Before ActivityDate (the Task Due Date), as shown in the following screenshot:

- The next step is to add a scheduled action to send an e-mail. For this, we will use the Send an Email action available under the process. To add schedule actions, click on Add Action under SCHEDULED ACTIONS. This will open an additional window on the right-hand side of the process canvas screen, where you have to enter the following details:
- Action Type: Select the type of action. In this case, select Email Alerts.
- Action Name: Enter a name for this action. Enter Email to Task Assignee- 2 Days in Action Name.
- Email Alert: Select the existing e-mail alert. In this case, select the e-mail alert (Email_to_Task_assignee) that you created in step 2.
It will appear as shown in this screenshot:
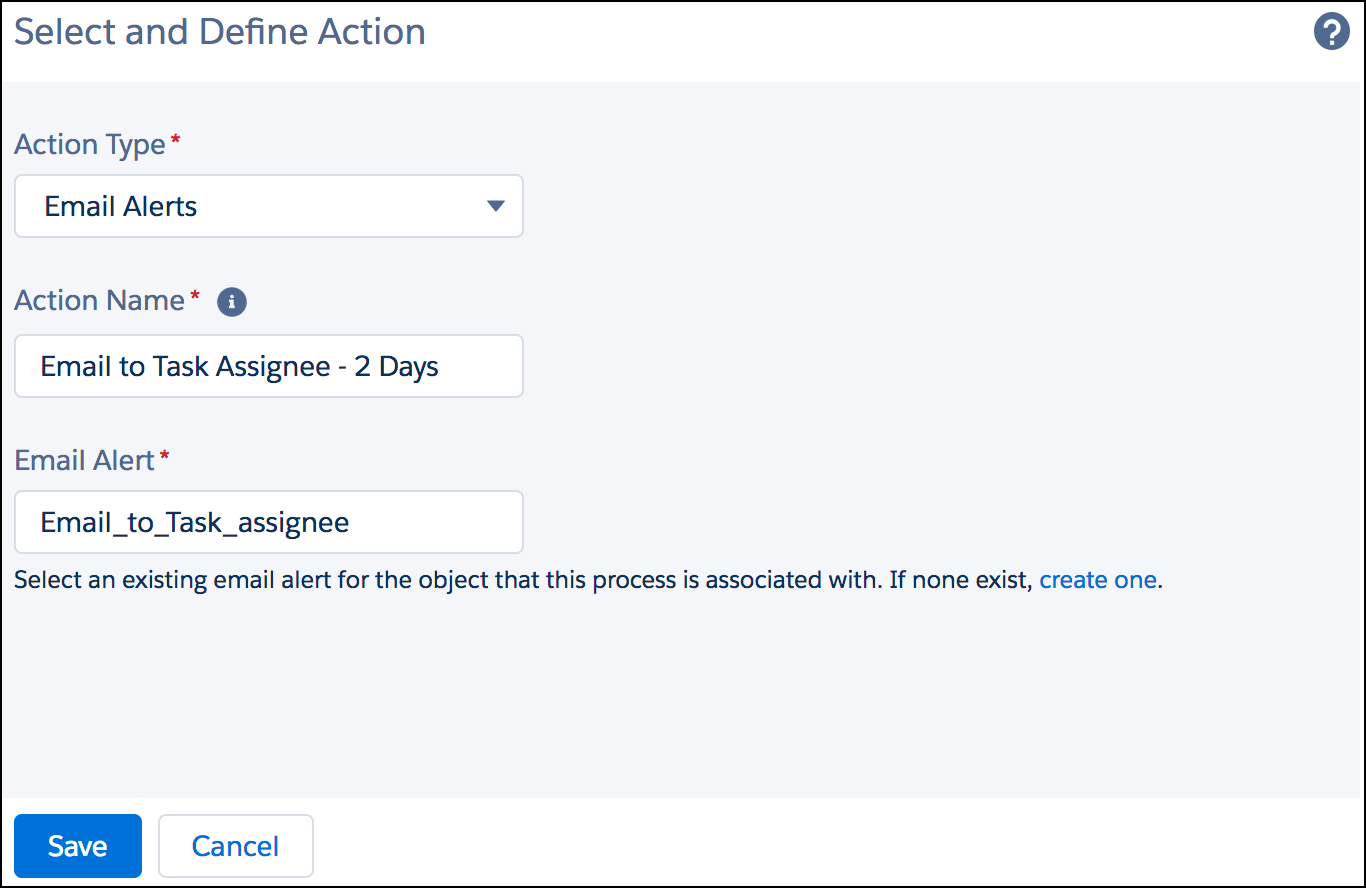
- Once you are done, click on the Save button.
- Repeat steps 9, 10, and 11 to add one more scheduled action for 1 day before.
- Once you are done with the process creation, the final step is to activate it. To activate a process, click on the Activate button on the button bar. Finally, the process will appear as shown in this screenshot:

Now onward, this process will send reminder e-mails to the task assignee 1 and 2 days prior to the task completion date, and the e-mail alert will look like what is shown in the following screenshot:

These time-dependent actions will automatically be removed from the queue if the assignee closes a task before the due date.