Chapter 18. Creating Web Part Connections
Exploring Web part connections
Managing Web part connections
Web part connections, as the name suggests, is a mechanism to connect Web parts together in a source-target–like arrangement. The source Web part is used to provide parameter values to the target Web part, and based on these values, the target Web part can perform operations on the data it exposes. The source Web part, called the data provider, implements an interface to send rows of data to the target Web part, called the data consumer. SharePoint allows you to identify data consumers placed either on the same page as a data provider or on different Web pages.
While SharePoint Designer provides an advanced user interface to create Web part connections between Web parts on a Web page, the capability to create Web part connections is inherent to SharePoint itself. For example, if you have two custom lists that contain related data in your SharePoint site, you can create a Web part connection between Web parts for these lists using the SharePoint Web site interface in a Web browser.
This chapter discusses how you can connect two or more Web parts by using Web part connections to interface with each other for performing operations such as filtering, sorting, etc. I show you how you can use the SharePoint Web site user interface to create basic Web part connections between two or more Web parts on the same page.
Later, using SharePoint Designer, I talk about how the Web part connections are implemented on Web pages. While SharePoint sites allow you to create basic Web part connections for filtering data, SharePoint Designer abilities regarding Web part connections are unique, as you can use parameter values from the source Web part to perform a number of operations besides just filtering data. As shown in Chapter 17, you can combine advanced XSLT formatting expressions and Web part connections to create heavily customized and branded views of data.
First, follow these steps to create a Web part connection between two Web parts by using the SharePoint (WSS v3) Web site user interface itself:
Create two custom lists on your SharePoint Web site by choosing Site Actions
 Create. You might not see the Site Actions menu in the SharePoint site if you're not authorized to perform editing operations on the Web site.
Create a column in the source custom list that serves as the parameter to be passed to the target custom list for filtering data. When the lists are created and some sample data has been inserted into the lists, go back to the home page of the Web site.
Choose Site Actions
 Edit Page to open the Web page in Edit mode.
Click the Add Web Part bar to open the Add Web Parts Web page, as shown in Figure 18.1, select the custom lists you created in step 1, and then click Add. The Web parts for the custom lists are inserted on the SharePoint Web page.
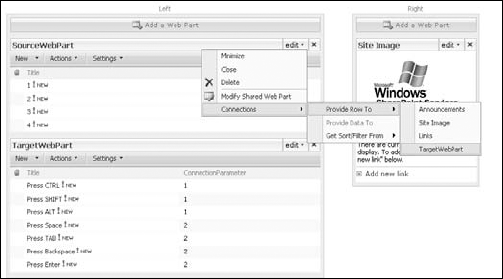
On the SourceWebPart, choose Edit
 Connections
  Provide Row To
  TargetWebPart, as shown in Figure 18.2, to open the Configure Connection Web page dialog box.
In the first screen of the Configure Connection Web page dialog box, choose the column you want to send to the target Web part in the connection for filtering and then click Next.
Choose the column that contains matching data in the target Web part and then click Next.
The page is refreshed and the source Web part now has radio buttons that, when selected, filter the target Web part based on the selected column value. The Web part connections make filtering of data by using user input fairly easy to implement by using the SharePoint Web sites.
SharePoint Designer takes the Web part connection abilities provided by SharePoint to the next level by allowing you to create filtered views of data by using Web part connections for data sources other than SharePoint lists and libraries, such as database connections, XML files, BDCs, etc. It does so by providing you with the abilities to create Web part connections between Data Form Web Parts. In fact, you can use SharePoint Designer to connect any two Web parts that support Web part connections. For example, you can have the SharePoint List View Web Part connect to the Data Form Web Part to pass data from a SharePoint list to a non-SharePoint data source, such as a table in a custom database. This allows for greater integration between data sources of various types.
Now that you understand the basic concepts of Web part connections, I take you through some steps to create a Web part connection by using SharePoint Designer and then have a cursory look at the HTML code that makes the Web part connections work.
Figure 18.1. Adding Web parts to a SharePoint Web page by using the site user interface
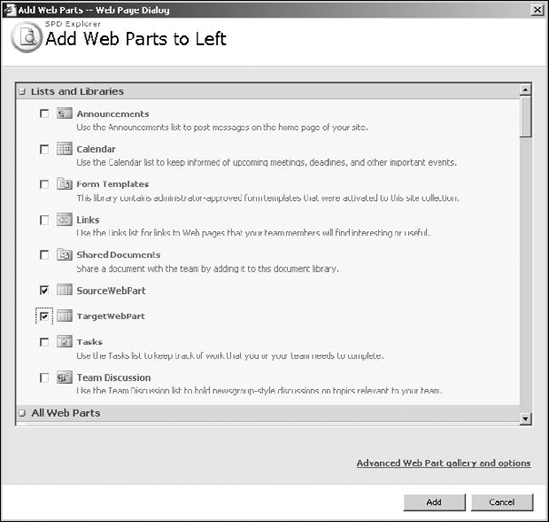
Figure 18.2. Connecting Web parts by using the SharePoint user interface