
5.5. Working with Layers
A layer in SharePoint Designer is basically a <div> tag that's absolutely positioned inside the Web page. You can drag and drop layers anywhere around the Web page with relative ease and thus layers provide a very simple design surface for laying out Web pages.
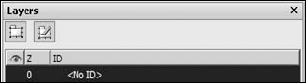
You use the Layers task pane shown in Figure 5.24 to work with layers. You access this task pane by choosing Task Panes ![]() Layers.
Layers.
Figure 5.24. The Layers task pane
To create a new layer and configure its settings, follow these steps:
Open a Web page and then place the cursor where you want to insert the layer. To easily understand the layer positioning, choose View
 Formatting Marks
  Show.
Show.Choose View
 Formatting Marks and ensure that all menu options except Show and Positioned Absolute are disabled.
Click the Insert Layer button in the Layers task pane. A layer (a <div> tag) is created on the Web page. Also, the anchor formatting mark appears, showing the location where the layer was actually inserted. The newly created layer is displayed in the Layers list in the Layers task pane.
Drag the layer to the location where you want to place it for absolute positioning.
To create another layer inside the Web page, place the cursor outside the existing layer and then click the Insert Layer button.
To create a nested layer (a layer inside the existing layer), place the cursor inside the existing layer and then click the Insert Layer button.

You can also nest layers by using the Layers task pane to drag the layer you want to nest into the parent layer. To un-nest the layer, simply drag the layer into the Layer list header.
You can now place your text, pictures, or other content inside the layer and then position it by using Layers. Using this method, you can easily lay out and format Web pages.
NOTE
It's important to understand that because layers are absolutely positioned, any content on the page that's not absolutely positioned might appear to have moved when you view the Web page in a browser. It's best that when you use layers heavily, you absolutely position all content on the Web page to maintain formatting.
The cool feature about layers is that along with the ability to position them in the horizontal plane, they can also be positioned vertically — in other words, you can overlap them (in the Z dimension). Every time a layer is created, a z-index attribute is set for it. The layers with higher z-index values appear on top of layers with lower z-index values.
The Z column in the Layer task pane shows the z-index value for a layer. You can change this value by right-clicking on a layer in the Layer task pane and then choosing Modify Z-Index from the popup menu, which also has these options:
Cut, Copy and Paste: Allows you to cut, copy, and paste the layer from one location to another
Visibility: You can choose whether you want the layer to be visible or hidden by using this menu option. The menu options set the visibility style (such as visibility:hidden) for the <div> tag associated with a layer. If a layer is set to be hidden, it's represented with a closed eye in the first column in the Layers list. If it's set to visible, it's represented with an open eye.
Modify Z-Index: Used to modify the Z order of the layer
Modify ID: Used to modify the ID for the layer
Borders and Shading: Opens the Borders and Shading dialog box for setting properties for layer borders and background
Positioning: Opens the Position dialog box
The real functionality of setting layer visibility becomes apparent when you change the visibility of a layer to show or hide it dynamically. SharePoint Designer provides a feature called Behaviors that enables you to implement such functionality without having to manually write code.