First of all, you have to activate web services, which can be accessed by navigating to Advanced features | Enable web services. Second, you have to enable the Web services authentication plugin (Plugins | Authentication | Manage authentication). Once this has been done, go to Plugins | Web services | Overview, which acts as a dashboard to set up Moodle web services.
Moodle supports three ways of how external entities can connect via web services:
- Enable web services for mobile devices (we will be dealing with this later)
- Allow an external systems to control Moodle
- Users as clients with token
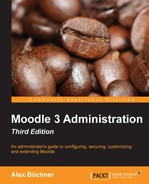
Two checklists are shown, one for each approach. The following screenshot shows the list for external systems—the one for token-based clients is, with one exception, a subset thereof:
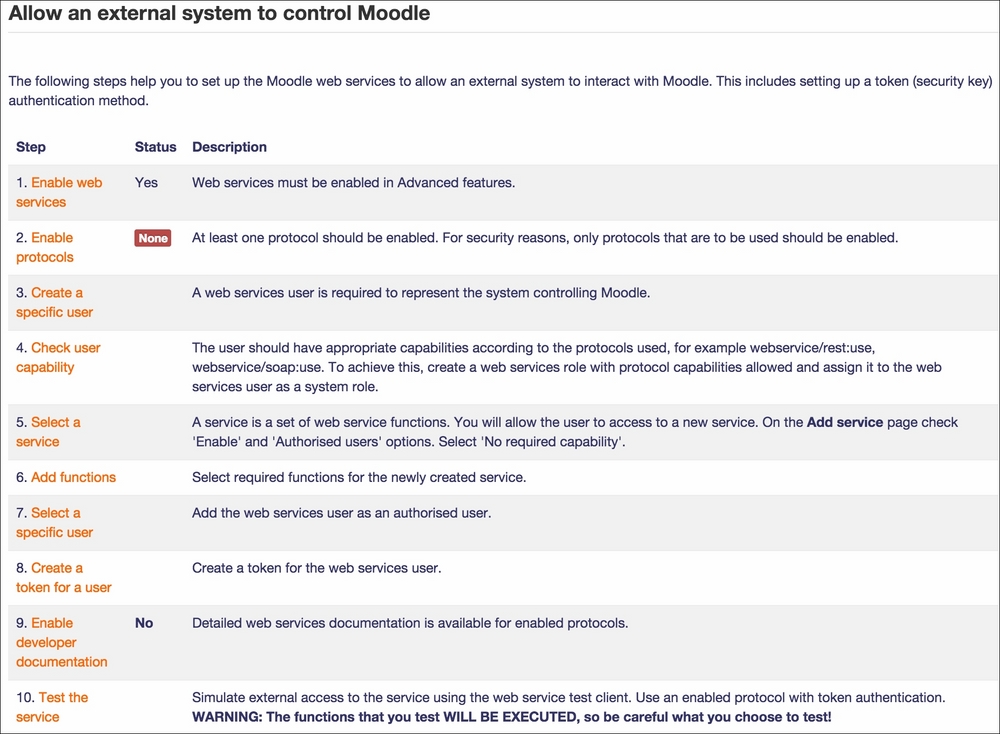
We have already enabled web services and also have to enable protocols. Moodle supports four web services protocols—SOAP, REST, XML-RPC, and AMF. We are not going to provide any details on them; for more information, check out https://docs.moodle.org/dev/Creating_a_web_service_client. At least one protocol has to be enabled, which one depends entirely on the external application and the protocols supported. Clicking on the Enabled protocols link in the overview table when you go to Plugins | Web services | Manage protocols will guide you to this screen. Enable a protocol by toggling the show/hide icon in the Enable column. Here, SOAP protocol has been enabled, which is common in, but not limited to, Microsoft-based environments as shown in the following screenshot:

It is expected that more web service protocols will be added in the future, in particular, a Java and .Net-compatible WSDL. Now that we have enabled web services and at least one protocol, let's cover the setting up of two types of web service accesses that we have already mentioned.