
Workflow and action tracking is enabled through the diagnostics settings of Logic Apps and uses Azure Log Analytics. To enable the custom tracking of action properties, you can use the Logic Apps designer and code view to set different actions' tracked properties, which can then be passed through Azure Log Analytics and the Logic Apps Management portal.
The following is the step-by-step guide to enabling tracking for Logic Apps using Log Analytics and the Logic Apps Management portal:
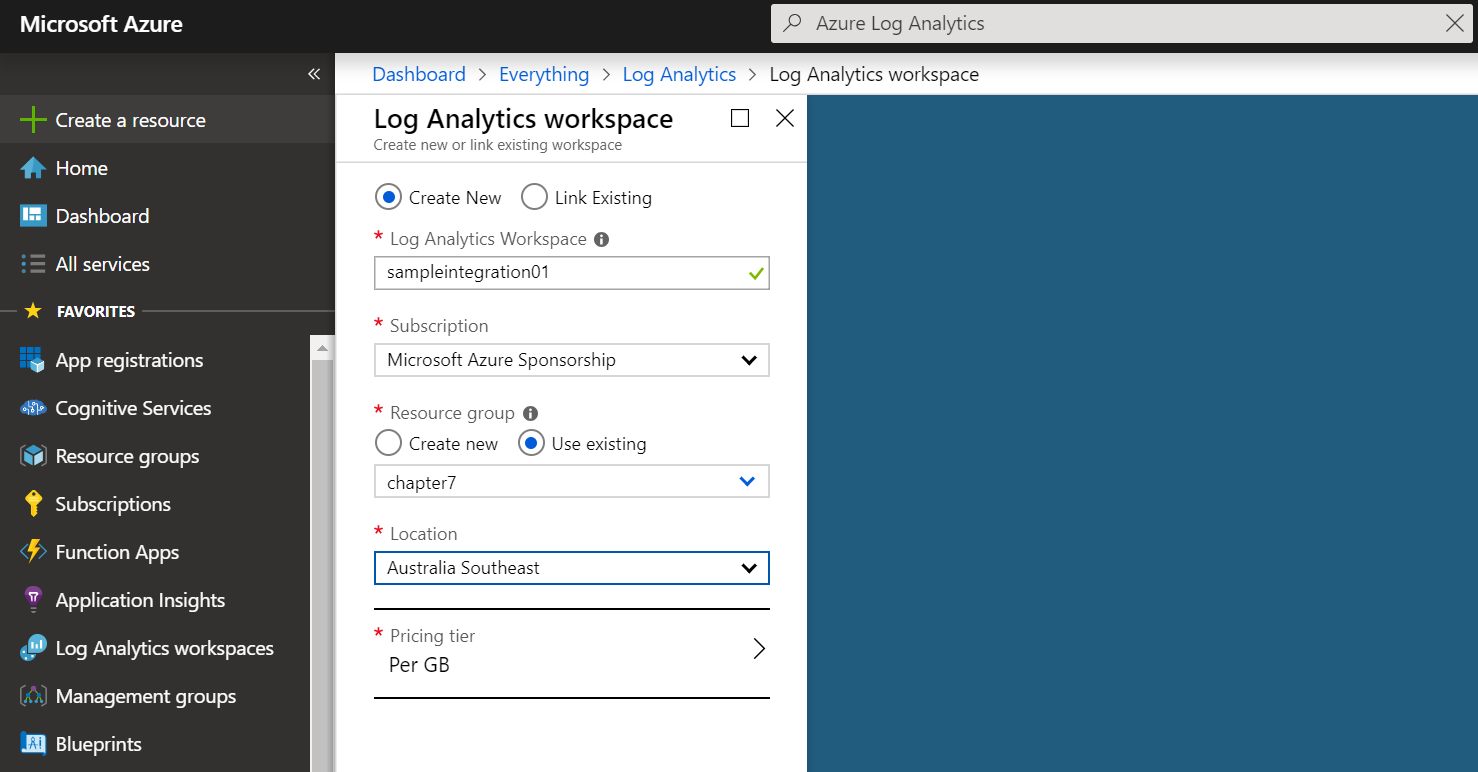
- The first step is to create an Azure Log Analytics instance within your Azure subscription. To do this, log into the Azure portal and in the search blade, search for Azure Log Analytics.
- In Azure Log Analytics, create the blade, enter a proper workspace name for the Azure Log Analytics resource, select a Resource group, appropriate Subscription, Location, and Pricing tier, and click on OK to create a Log Analytics workspace in the resource group:
- In the next step, add Logic Apps Management Solution to the Azure Log Analytics workspace resource. To do this, you need to navigate to the Log Analytics instance in your resource group. In the Configure monitoring solutions section, click on View solution.
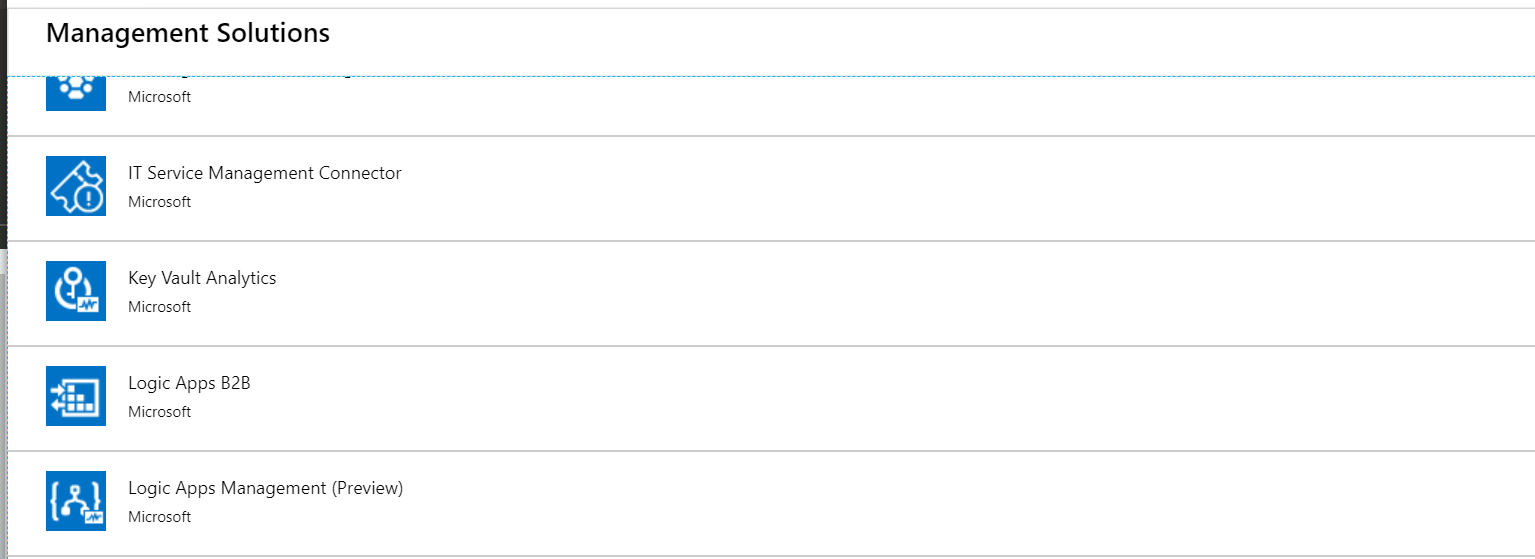
- Click on Add and this will open up the list of different management solutions under the Azure Log Analytics workspace. Select Logic Apps Management (preview) for Logic Apps monitoring and then click on Create:
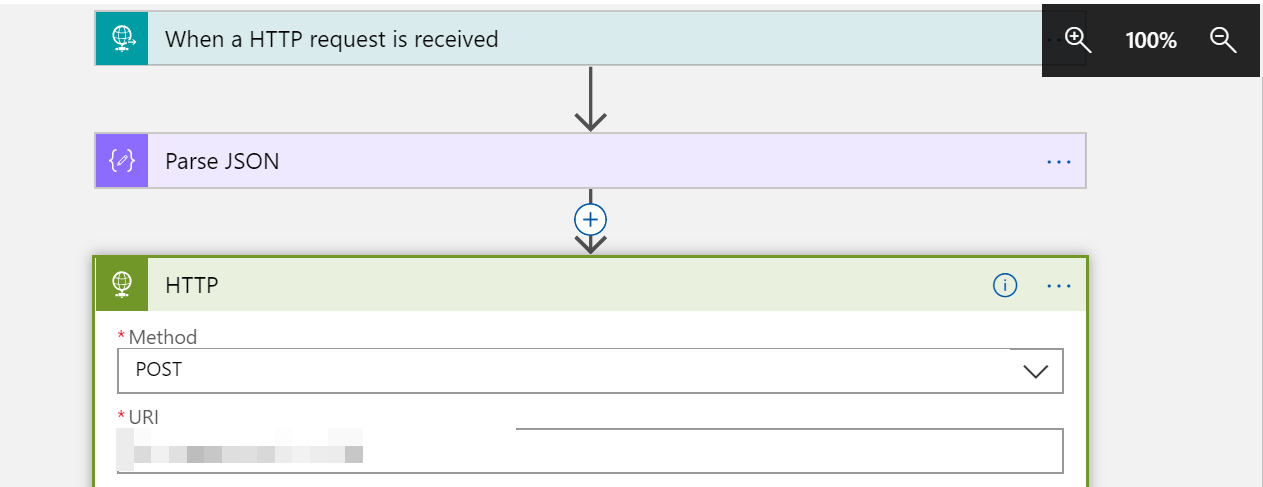
- In the steps discussed previously, we have completed the initial setup for Logic Apps Management solution with the Azure Log Analytics workspace solution. The next step is to publish tracked properties from Logic Apps workflow using the tracked properties' built-in features. To do this, we have created a Logic Apps instance with a request trigger and a set of actions, including Parse JSON and HTTP, to send the request message to an external HTTP endpoint:
- The next step is to configure action-level tracking with a Logic Apps workflow definition. To work with tracking properties, open the Logic Apps code view and add the tracked properties in an HTTP action definition.
- Once the action-tracking configuration is completed, click on the Save button to save the Logic Apps workflow definition.
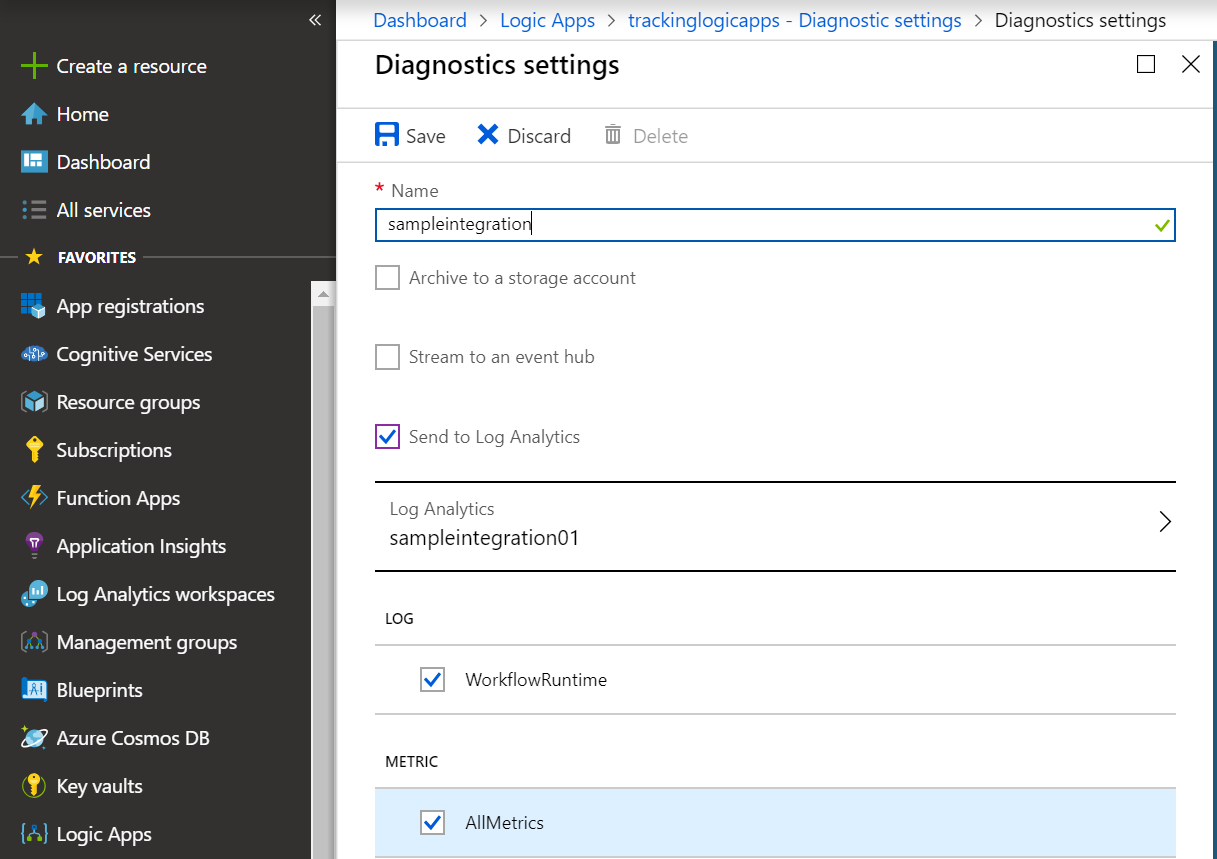
- The last thing to do is to enable the diagnostic feature with Logic Apps. To do this, navigate to the Logic Apps resource in the Monitoring section and click on Diagnostics settings.
- On the Diagnostics settings page, click on Turn on diagnostics. Fill in the Name field and click on Send to Log Analytics. We also need to enable the tracking of WorkflowRuntime and AllMetrics. Once completed, you can save the Diagnostics settings page by clicking on the Save button:
- This completes the tracking of actions and Logic Apps instances with Azure Log Analytics. To test the tracking, we will post data to a Logic Apps endpoint and validate the Logic Apps Management Solution through Log Analytics. After sending test data to the request-triggered logic app, we can see the tracked properties are being captured in the Log Analytics workspace and displayed through Logic Apps Management Solution:

In this section, we have covered Logic Apps tracking with an Azure Log Analytics workspace along with content types in Logic Apps. We have also discussed how to work with the Logic Apps expression language using Logic Apps' built-in functions.
In the next section, we'll discuss how to create custom connectors for Azure Logic Apps. We will discuss the process of creating custom connectors for an enterprise-owned API and using them in Logic Apps definitions, just like any other standard connector.