CHAPTER 13 Crucial Password Hacks
Computer security is a remarkably fragile thing. You can erect firewalls, encrypt communications, even physically lock your laptop, but in most security situations, there’s only one thing sitting between an intruder and your network or computer: a password. In other words, your precious data, your private thoughts, your confidential memos, your secret ideas are protected by just a measly few characters.
That doesn’t seem like much of a barrier when you look at it in such a stark light, but it’s actually not as bad as all that. Or I should say that it’s not as bad as all that provided you have a password that’s up to the job. A good strong password that can’t be guessed at, figured out, or hacked means you’ve set up an all-but-impenetrable barrier that will keep your data and systems safe.
This chapter is devoted to achieving this optimal password state. You learn not only how to create strong passwords, but also how to enforce good password hygiene among the people whose computing lives you’re responsible for.
Bulletproof Your Password
![]()
When you first install or start Windows Vista or Windows XP, the administrator-level account you create doesn’t require a password. Given all the security concerns of the past few years, this is more than a little odd. If you didn’t bother assigning a password to this account, you should fix this gaping security hole as soon as possible. In fact, it’s a good idea to assign passwords to all your user accounts on all your network computers.
However, it’s not enough to just use any old password. You can improve the security of Windows—and, hence, of your entire network—by making each password robust enough that it is impossible to guess and is impervious to software programs designed to try different password combinations. Such a password is called a strong password. Ideally, you want to build a password that provides maximum protection while still being easy to remember.
Lots of books will suggest absurdly fancy password schemes (I’ve written some of those books myself), but there are really only three things you need to know to create strong-like-bull passwords:
• Use passwords that are at least 8 characters long—Shorter passwords are susceptible to programs that just try every letter combination. You can combine the 26 letters of the alphabet into about 12 million 5-letter word combinations, which is no big deal for a fast program. If you bump things up to 8-letter passwords, however, the total number of combinations rises to 200 billion, which would take even the fastest computer quite a while. If you use 12-letter passwords, as many experts recommend, the number of combinations goes beyond mind-boggling: 90 quadrillion, or 90,000 trillion!
• Mix up your character types—The secret to a strong password is to include characters from the following categories: lowercase letters, uppercase letters, numbers, and symbols. If you include at least one character from three (or, even better, all four) of these categories, you’re well on your way to a strong password.
• Don’t be too obvious—Because forgetting a password is inconvenient, many people use meaningful words or numbers so that their password will be easier to remember. Unfortunately, this means that they often use extremely obvious things such as their name, the name of a family member or colleague, their birth date, their Social Security number, or even their system username. Being this obvious is just asking for trouble.
Set a Minimum Password Length and Strength
![]()
Okay, so you know how to create a strong password, and you can certainly pass along that information to the other people in your home or business, but how can you be sure that they’ll take up the strong password gospel?
The truth is you can’t, and surveys of password use over the years have been remarkably consistent: most users are lazy and they prefer to use simple passwords that are easy to remember. If the user operates a standalone PC, it’s their funeral. But it’s more likely these days that the user is part of a network, and a brain-dead password puts not only that PC at risk, but it puts the entire network at risk.
If it’s your network you’re worried about, you can take matters into your own hands and set up password policies that ensure your users protect their PCs with strong passwords. There are two policies you can implement:
• Minimum Password Length—This policy sets the minimum number of characters for the password. You enter a value that represents the number of characters, and that value can be as high as 14 or as low as 1. (If you use 0, it means no password is required.) A good choice here is 8.
• Password Must Meet Complexity Requirements—If you enable this policy, Windows examines each new password and accepts it only if it meets the following criteria: It doesn’t contain all or part of the person’s username; it’s at least six characters long; and it contains characters from three of the following four categories: uppercase letters, lowercase letters, digits (0–9), and nonalphanumeric characters (such as $ and #).
Follow these steps to implement these policies:
1. Log on to the computer you want to work with.
2. In Windows Vista, select Start, type secpol.msc, press Enter, and then enter your administrator’s credentials to continue. (In XP, select Start, Run, type secpol.msc, and then click OK.) The Local Security Policy Editor appears.
3. Open the Account Policies branch.
4. Click the Password Policy branch.
5. Double-click the Minimum Password Age policy to open its property sheet.
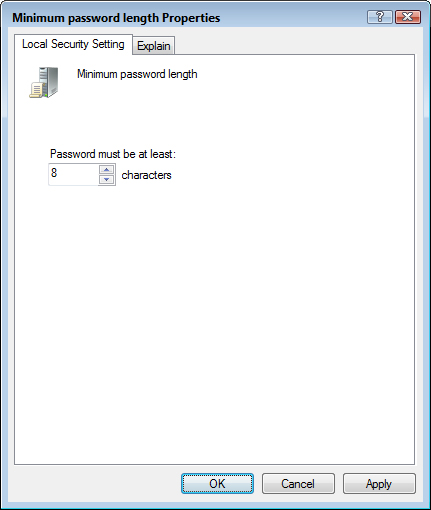
6. Use the Password Must Be at Least spin box to set the minimum number of characters in any password, as shown in Figure 13.1, and then click OK.
FIGURE 13.1 In the Minimum Password Length policy property sheet, use the spin box to set the minimum number of characters in any password.
7. Double-click the Password Must Meet Complexity Requirements policy.
8. Click Enabled and then click OK.
You can also set the minimum password length at the command prompt, which is great if you’re working on a Vista Home, Vista Home Premium, or XP Home machine. Here’s how:
1. Log on to the computer you want to work with.
2. In Windows Vista, select Start, type cmd.exe, right-click cmd.exe in the results, click Run as Administrator, and then enter your administrator’s credentials to continue. (In XP, select Start, Run, type cmd.exe, and then click OK.) The Command Prompt window appears.
3. Enter the following command, changing n to the minimum length you want to use:
net accounts /maxpwlen:n
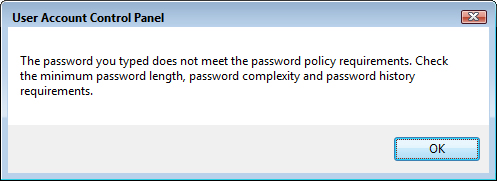
With these policies in effect, if users try to change their password to something weak, they see the dialog box shown in Figure 13.2.
FIGURE 13.2 Users see a dialog box like this one if their new password isn’t up to snuff.
Require Users to Change Their Passwords
![]()
When you create a user on a Windows system, it’s a good idea to assign a password to the new account. You could just ask the user to use that password (and, as you see at the end of this section, it’s possible to prevent the user from changing the password). However, most people are more comfortable if they can choose their own password. This will also help you in the long run because people are more likely to remember their own password, so you’ll get fewer “I forgot my password!” calls.
One common practice is to assign a standard password—usually the word password or the person’s username—and then tell the user to change it. That’s fine, but can you be sure the user will do that? No, of course not! Therefore, you can rest easier at night by forcing the user to do so.
A quick tweak of the user’s account is all you need here:
1. In Windows Vista, select Start, type lusrmgr.msc, press Enter, and then enter your administrator’s credentials to continue. (In XP, select Start, Run, type lusrmgr.msc, and then click OK.) The Local Users and Groups snap-in appears.
2. Click Users.
3. Double-click the user you want to work with.
4. If the Password Never Expires check box is activated, click it to deactivate it.
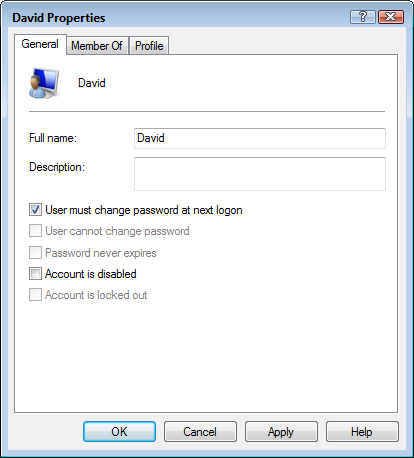
5. Activate the User Must Change Password at Next Logon check box, as shown in Figure 13.3.
FIGURE 13.3 To force a user to change a temporary password, activate the User Must Change Password at Next Logon check box.
6. Click OK.
The next time the user logs on, he’ll see a message that he is required to change his password. The user must click OK and then enter his new password.
If you want to bypass the Local Users and Groups snap-in, you can perform the same operation with the script shown in Listing 13.1.
Listing 13.1 A Script That Expires a User’s Password to Force a Password Change

This script prompts for the username, returns the user as an object, and then sets the user object’s PasswordExpired property to True. Note that you must run this script as the Administrator, as described in Chapter 12, “Taking Advantage of the Administrator Account.”
• See “Run a Script as the Administrator,” p. 141.
Prevent People from Reusing Old Passwords
![]()
In the previous tweak I showed you how to force a user to change his or her password at the next logon. Ah, but you may have noticed that there’s a rather large fly in this particular soup: the user might just enter the same password! You’d think that Windows would see that and prevent the user from doing this but, no, Windows just blithely “changes” the password and allows the user to log on. Dumb!
To prevent this, you need to implement a policy called Enforce Password History. This policy determines the number of old passwords that Windows stores for each user. By “remembering” previous passwords, Windows is able to prevent a user from reusing an old password. For example, if you set this value to 10, the user can’t reuse a password until he or she has used at least 10 other passwords.
Follow these steps to implement this policy:
1. Log on to the computer you want to work with.
2. In Windows Vista, select Start, type secpol.msc, press Enter, and then enter your administrator’s credentials to continue. (In XP, select Start, Run, type secpol.msc, and then click OK.) The Local Security Policy Editor appears.
3. Open the Account Policies branch.
4. Click the Password Policy branch.
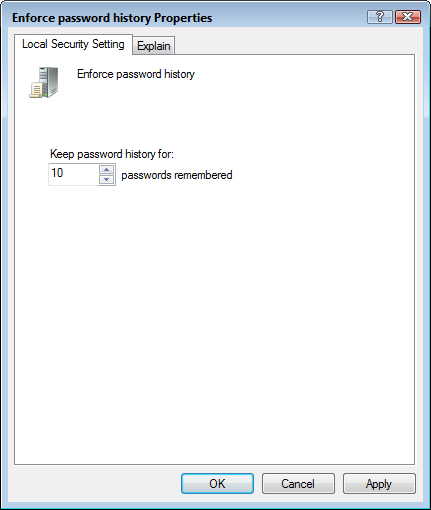
5. Double-click the Enforce Password History policy to open its property sheet.
6. Use the Keep Password History for X Passwords Remembered spin box to set the number of unique passwords the user must enter, as shown in Figure 13.4, and then click OK. Enter a number between 0 and 24.
7. Click OK.
FIGURE 13.4 In the Enforce Password History Properties sheet, use the spin box to set the number of passwords that Windows saves for each user.
You can also enable password history at the command prompt, which is great if you’re working on a Vista Home, Vista Home Premium, or XP Home machine. Here’s how:
1. Log on to the computer you want to work with.
2. In Windows Vista, select Start, type cmd.exe, right-click cmd.exe in the results, click Run as Administrator, and then enter your administrator’s credentials to continue. (In XP, select Start, Run, type cmd.exe, and then click OK.) The Command Prompt window appears.
3. Enter the following command, changing n to the number of passwords you want Windows to save:
net accounts /uniquepw:n
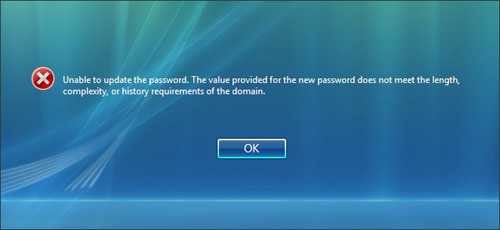
With this policy in effect, if users try to reuse a password that’s stored in their password history, they see the message shown in Figure 13.5.
FIGURE 13.5 Users see this message if they try to reuse an old password that’s saved in their password history.
Recover from a Forgotten Password

Few things in life are as frustrating as a forgotten password. To avoid this headache, Windows Vista offers a couple of precautions that you can take now in case you forget your password.
The first precaution is called the password hint, which is a word, phrase, or other mnemonic device that can help you remember your password. To see the hint in the Welcome screen, type any password and press Enter. When Vista tells you the password is incorrect, click OK. Vista redisplays the Password text box with the hint below it.
The second precaution you can take is the Password Reset Disk. This is a USB flash drive or floppy disk that enables you to reset the password on your account without knowing the old password. To create a Password Reset Disk, follow these steps:
1. Log on as the user for whom you want to create the disk.
2. Press Windows Logo+R to open the Run dialog box, type control nusrmgr.cpl, and click OK.
3. In the Tasks pane, click Create a Password Reset Disk. This launches the Forgotten Password Wizard.
4. Insert the flash drive or floppy disk. (If you’re going the floppy route, note that you’ll need a blank, formatted disk.)
5. Click Next. The Create a Password Reset Disk dialog box appears.
6. Select the drive that contains the flash disk, or drive A if you’re using a floppy disk.
7. Click Next. The Current User Account Password dialog box appears.
8. Type the current user’s password and click Next. Windows Vista creates the password reset disk.
9. Click Next.
10. Click Finish.
The password reset disk contains a single file named Userkey.psw, which is an encrypted backup version of your password. Be sure to save this disk in a secure location and, just to be safe, don’t label the disk. If you need to use this disk, follow these steps:
1. Start Windows Vista normally.
2. When you get to the Welcome screen, leave your password blank and press the Enter key. Windows Vista will then tell you the password is incorrect.
3. Click OK.
4. Click the Reset Password link.
5. In the initial Password Reset Wizard dialog box, click Next.
6. Insert the password reset disk, select the drive, and click Next.
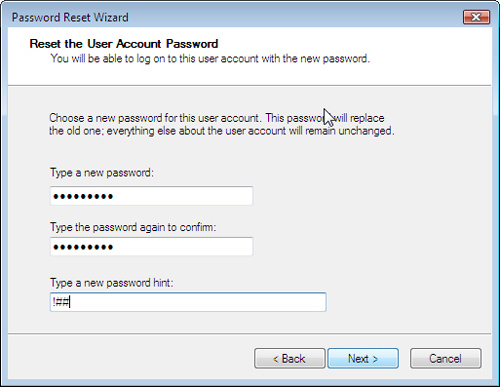
7. In the Reset the User Account Password dialog box (see Figure 13.6), type a new password (twice), type a password hint, and click Next.
8. Click Finish.
FIGURE 13.6 You can use a password reset disk to recover from a forgotten password.