
CHAPTER 7 Keeping the Bad Guys at Bay
Some folks claim that you can never be too thin nor too rich. Other folks might give you an argument about one or both assertions, but I doubt anyone would take you to task if you added a third item to the list: Your Windows PC can never be too secure. There are just too many threats out there, and too many ways that the defenses in Windows can be breached.
With that in mind, this book gives you lots of ways to tweak Windows security. You learned about a few security tips in Chapter 2, “Crucial Security Tweaks,” and you’ll learn a few more in Chapter 8, “Configuring Internet Security,” and Chapter 9, “Maintaining Your Privacy on the Web.”
In this chapter, I focus on protecting your PC from direct attacks: that is, when an unauthorized cracker sits down at your keyboard and tries to gain access to your system. Sure, it may be unlikely that a malicious user would gain physical access to the computer in your home or office, but it’s not impossible. My hope is that the techniques you learn here will help to keep these bad guys at bay.
Sneakily Hide Usernames in the Logon Screen
![]()
When you start most Windows PCs, you end up at the logon screen so that you can choose your username and log on by entering your password. The screen you see depends on the version of Windows you’re using:
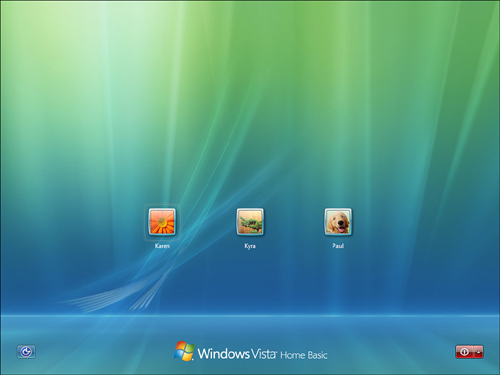
• Windows Vista—In all versions of Vista, the logon screen always displays icons for each user account, and each icon shows the name of the account. Figure 7.1 shows a typical Windows Vista logon screen.
FIGURE 7.1 The Windows Vista logon screen shows the names of the computer’s user accounts.
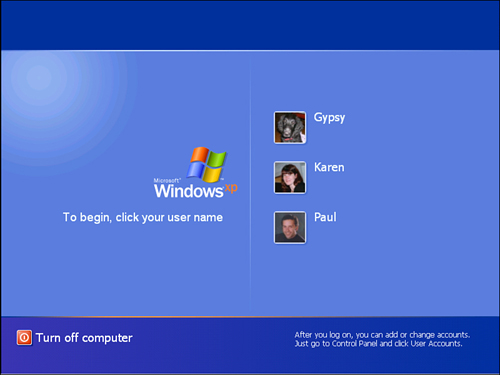
• Windows XP Home—In XP Home, the logon screen also shows account icons and usernames, as shown in Figure 7.2.
FIGURE 7.2 The Windows XP Home logon screen also shows the names of the computer’s user accounts.
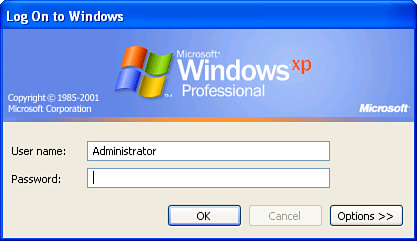
• Windows XP Professional—In XP Pro, you see the Log On to Windows dialog box, and the User Name text box always shows the name of the last user who logged on, as shown in Figure 7.3.
FIGURE 7.3 The Windows XP Pro logon dialog box shows the name of the last user who logged on.
This may not seem all that important, but that logon screen is actually helping any would-be cracker a great deal. Why? The nefarious nogoodnik now has an important advantage because he knows the names of all your user accounts (or, in the case of XP Pro, one of your accounts). Yes, the evildoer must still guess an account’s password, but you can make things a heckuva lot harder by forcing the snoop to also guess a username on your system. How do you do that? By tweaking Windows so that it doesn’t display usernames in the logon screen. Sneaky!
You do that by following these steps:
1. Open the Run dialog box, type gpedit.msc, and then click OK. (In Windows Vista, you need to enter your administrator’s credentials to continue.) The Group Policy Editor appears.
2. Open the Computer Configuration branch.
3. Open the Windows Settings branch.
4. Open the Security Settings branch.
5. Open the Local Policies branch.
6. Open the Security Options branch.
7. Double-click the Interactive Logon: Do Not Display Last User Name policy.
8. Click the Enabled option.
9. Click OK to put the new setting into effect.
If you don’t have access to the Group Policy Editor, open the Registry Editor and create (if it’s not there already) a DWORD setting named DontDisplayLastUserName with the value 1 in the following key:
HKLMSoftwareMicrosoftWindowsCurrentVersionPoliciesSystem
The next time you start your computer, no usernames appear in the logon screen. Figure 7.4 shows the tweaked Vista logon screen.
FIGURE 7.4 With the Do Not Display Last User Name policy enabled, the logon screen no longer shows the names of the computer’s user accounts.

Rename Built-In Accounts for Better Security
Windows Vista and Windows XP come with a built-in Administrator account. This account is all-powerful on Windows, so the last thing you want is for some malicious user to gain control of the system with Administrator access. This is why Vista systems come with the Administrator account disabled by default. (Alas, this isn’t the case in Windows XP.) However, later in this book I show you how to activate the Administrator account in Vista.
• See “Activate the Administrator Account,” p. 136.
Both Vista and XP also come with a built-in account called Guest, which you can enable to give people temporary access to your computer. (The Guest account is disabled by default in both Vista and XP.)
• See “Use the Guest Account to Give Folks Temporary Access,” p. 130.
If the Administrator and Guest accounts are disabled, you have no worries about these accounts. However, if the accounts are enabled, black-hat hackers have one foot in your digital door already because they know the names of two accounts: Administrator and Guest. Now all they have to do is guess the password associated with one of these accounts. If you’ve protected the Administrator and Guest accounts with strong passwords, you almost certainly have nothing to fret about here.
However, you can close the door completely on malicious intruders by taking away the one piece of information they know: the name of each account. By changing the account names from Administrator and Guest to new names that are completely unobvious, you add an extra layer of security to your Windows system.
Here are the steps to follow to change the names of these accounts:
1. Select Start, right-click Computer (or My Computer, in XP), and then click Manage. (In Vista, you need to enter your UAC credentials at this point.) The Computer Management snap-in appears.
2. Open the System Tools, Local Users and Groups, Users branch.
3. Right-click the Administrator account, and then click Rename.
4. Type the new account name, and then press Enter.
5. Right-click the Guest account, and then click Rename.
6. Type the new account name, and then press Enter.
Sniff Out Logon Failures
![]()
A big part of keeping any computer secure involves keeping an eye on what users do with the computer. For Windows, this means tracking events such as logon failures, because repeated failures might indicate a malicious user trying different passwords. This type of tracking is called auditing.
Unfortunately, Windows implements only a small subset of its auditing features, and even those that it does implement aren’t all that useful. For example, Windows audits logon successes, but not logon failures. In this tweak, I show you how to enable security auditing for logon failures, and then I explain how to track auditing events.
To enable the policy for auditing logon failures, follow these steps:
1. Open the Run dialog box, type gpedit.msc, and then click OK. (In Windows Vista, you need to enter your administrator’s credentials to continue.) The Group Policy Editor appears.
2. Open the Computer Configuration branch.
3. Open the Windows Settings branch.
4. Open the Security Settings branch.
5. Open the Local Policies branch.
6. Open the Audit Policy branch.
7. Double-click the Audit Account Logon Events policy to open its property sheet.
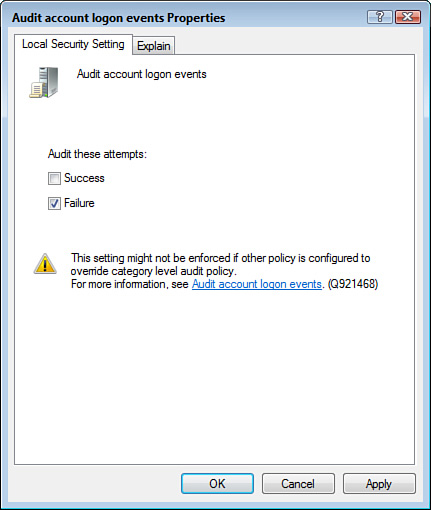
8. Activate the Failure check box, as shown in Figure 7.5.
FIGURE 7.5 In the Audit Account Logon Events policy property sheet, activate the Failure check box.
9. Click OK.
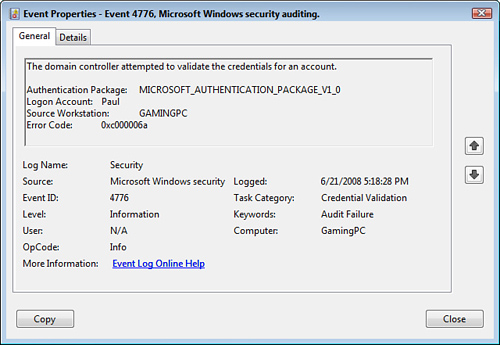
The Audit Account Logon Events policy enables you to track when users log on to their account on a Windows PC. If you track failures for this policy, the resulting Failure Audit event returns an Error Code value, as shown in Figure 7.6. Table 7.1 tells you what the various error codes mean.
Table 7.1 Error Codes Returned for Account Logon Failure Events
FIGURE 7.6 An example of a failed Account Logon event.
After you’ve enabled this security auditing policy, you can start tracking them to look for suspicious behavior. You do this using Windows’ Event Viewer, which you open by displaying the Run dialog box, typing eventvwr.msc, and clicking OK. In the Event Viewer window, open the Windows Logs branch and click Security. This displays the events in the Security log, which is where the auditing events appear.
Unfortunately, the Security event log likely has tens of thousands of items. How do you look for suspicious behavior in such a large database? The trick is to filter the log to show just the events you want. Here how:
• Windows Vista—Display the Action pane and then click Filter Current Log. In the Keywords list, select Audit Failure. In the Logged list, select a timeframe (such as Last 24 Hours). Click OK.
• Windows XP—Select View, Filter to open the Security Properties dialog box with the Filter tab displayed. In the Event Types group, deactivate all the check boxes except Failure Audit. Use the controls in the From and To section to set the time frame, and then click OK.
An even easier way to look for logon failures is to use the script shown in Listing 7.1:
Listing 7.1 Extracting Logon Failures from the Security Log
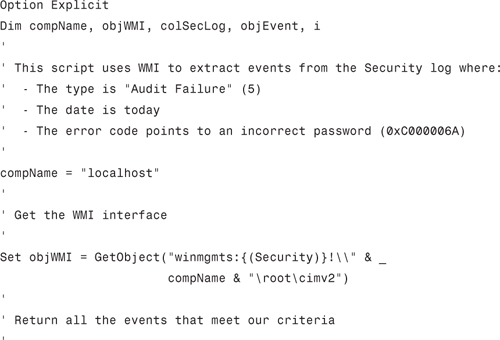
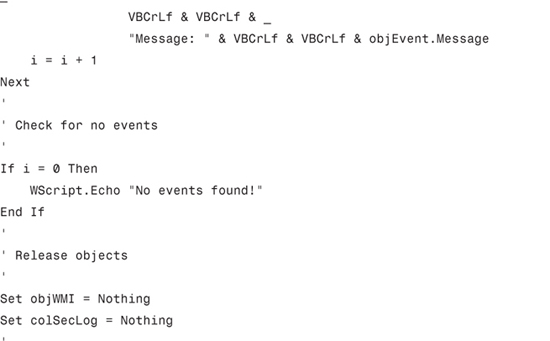
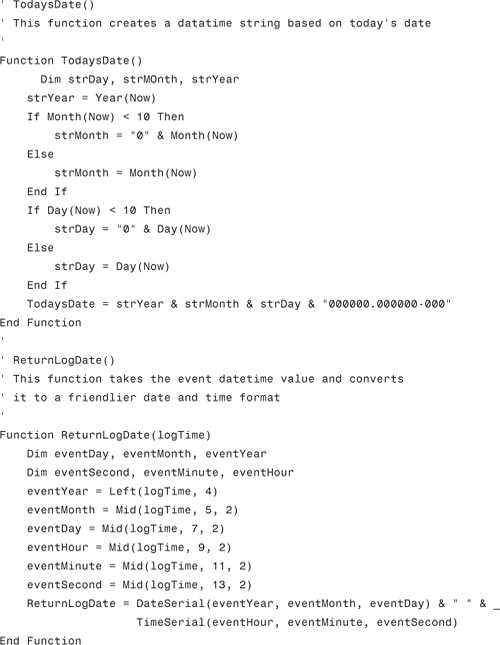
To use this script, download the file from my website and store it on your hard drive. If you’re running XP, double-click the VBS file to run the script. If you’re running Vista, you need to open an Administrator-level Command Prompt session (as described in Chapter 36, “Running the Command Prompt”) and run the VBA file from there. Here’s how:
• See “Running Command Prompt as the Administrator,” p. 427.
1. Use Windows Explorer to open the folder where you stored the script.
2. Right-click an empty section of the Address bar and then click Copy Address.
3. In your elevated Command Prompt session, type cd followed by a space.
4. Click the system menu icon in the upper-left corner (or press Alt+spacebar), and then select Edit, Paste. Command Prompt pastes the folder address.
5. Press Enter to switch the command prompt to that folder.
6. Type the name of the VBS file (including the .vbs extension) and press Enter to run the script.
• For an easier way to switch the command prompt to a folder, see “Open a Folder at the Command Prompt,” p. 262.
• For a more direct way to run a script with elevated permissions, see “Run a Script as the Administrator,” p. 141.
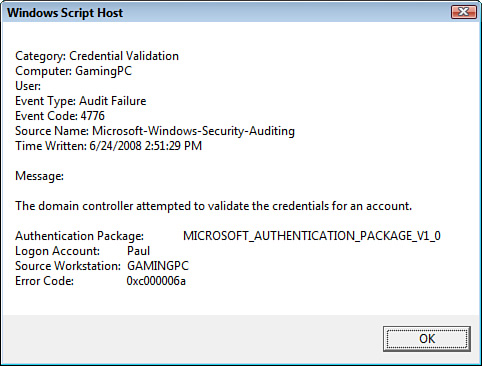
Figure 7.7 shows an example of a failed logon alert generated by this script.
FIGURE 7.7 A failed logon alert generated by the script in Listing 7.1.
Max Out Security by Encrypting Important Data
![]()
If a snoop can’t log on to your Windows PC, does that mean your data is safe? No, unfortunately, it most certainly does not. If a cracker has physical access to your PC—either by sneaking into your office or by stealing your computer—the cracker can use advanced utilities to view the contents of your hard drive. This means that if your PC contains extremely sensitive or confidential information—personal financial files, medical histories, corporate salary data, trade secrets, business plans, journals or diaries—it wouldn’t be hard for the interloper to read and even copy that data.
If you are worried about anyone viewing these or other for-your-eyes-only files, Windows enables you to encrypt the file information. Encryption encodes the file to make it completely unreadable by anyone unless the person logs on to your Windows Vista account. After you encrypt your files, you work with them exactly as you did before, with no noticeable loss of performance.
Follow these steps to encrypt important data:
1. Use Windows Explorer to display the icon of the folder containing the data that you want to encrypt.
2. Right-click the folder icon and click Properties to open the folder’s property sheet.
3. Click the General tab.
4. Click Advanced. The Advanced Attributes dialog box appears.
5. Click to activate the Encrypt Contents to Secure Data check box.
6. Click OK in each open dialog box. The Confirm Attribute Changes dialog box appears.
7. Click the Apply Changes to This Folder, Subfolders and Files option.
8. Click OK. Windows encrypts the folder’s contents.