The devil is in the details, a fact that also applies to games. It is the little things, or a lack thereof, that your users will notice the most. This is why elements, small in appearance, such as particle or sound effects, are really important when it comes to achieving what we want to transmit with our product.
A particle system is nothing more than a bunch of small images in an orchestrated motion, following a set of rules specified upfront. The aim is to give the impression of a more complex effect. Through particles, we can add fire, explosions, smoke, or magical spells to our creations. Among Libgdx's wonders, you will find the fantastic particles subsystem, the power of which we will learn to harness throughout this recipe.
This recipe illustrates the process of effect creation through Particle Editor to render them later within a Libgdx app.
Before getting your hands dirty, you need to get the hang of Particle Editor, which is the official Libgdx tool to produce particle effects. As such, it is distributed along with the framework's main package. Simply access the list of stable releases at http://libgdx.com/releases and get the latest release. Once you have the package, unzip it in a folder of your choice.
As usual, you need to import the sample projects in your Eclipse workspace.
Particle systems are composed of a list of emitters that spawn and control particles. A particle is generally a texture along with a myriad of parameters, such as color, speed, direction, and so on, that define its behavior during its lifetime.
We will execute two steps here. First, we will give an overview of the helpful Particle Editor. Later, we will show you how to include fancy effects in your Libgdx applications.
Follow these steps to create juicy effects with Particle Editor:
- To run Particle Editor from Windows, open up a console, access the uncompressed libgdx release folder, and enter the following command:
java -cp gdx.jar;gdx-natives.jar;gdx-backend-lwjgl.jar;gdx-backend-lwjgl-natives.jar;extensionsgdx-toolsgdx-tools.jar com.badlogic.gdx.tools.particleeditor.ParticleEditorMac and GNU/Linux users must replace semicolons with colons and backslashes with forward slashes, as follows:
java -cp gdx.jar:gdx-natives.jar:gdx-backend-lwjgl.jar:gdx-backend-lwjgl-natives.jar:extensions/gdx-tools/gdx-tools.jar com.badlogic.gdx.tools.particleeditor.ParticleEditor - The top-left panel is the most important panel because it shows what your system will look like when rendered with Libgdx.
- Below that panel, you have the Effect Emitters panel that contains the list of emitters. Every emitter has an editable name; you can add or remove them using the New and Delete buttons. The draw order is controlled with the Up and Down buttons.
- Particle systems are saved as plain text files. You can save them by clicking on Save; click on Open to access them later.
- To the right of the window, you will find the Editor Properties and Emitter Properties panels. Feel free to play around, and see the effects on the left. There is always a great deal of tweaking and experimentation when it comes to particle effects. Do not panic if you feel overwhelmed because we will go through all the details later in this chapter. For this recipe's purposes, we already have some premade particle systems, as shown in the following screenshot:
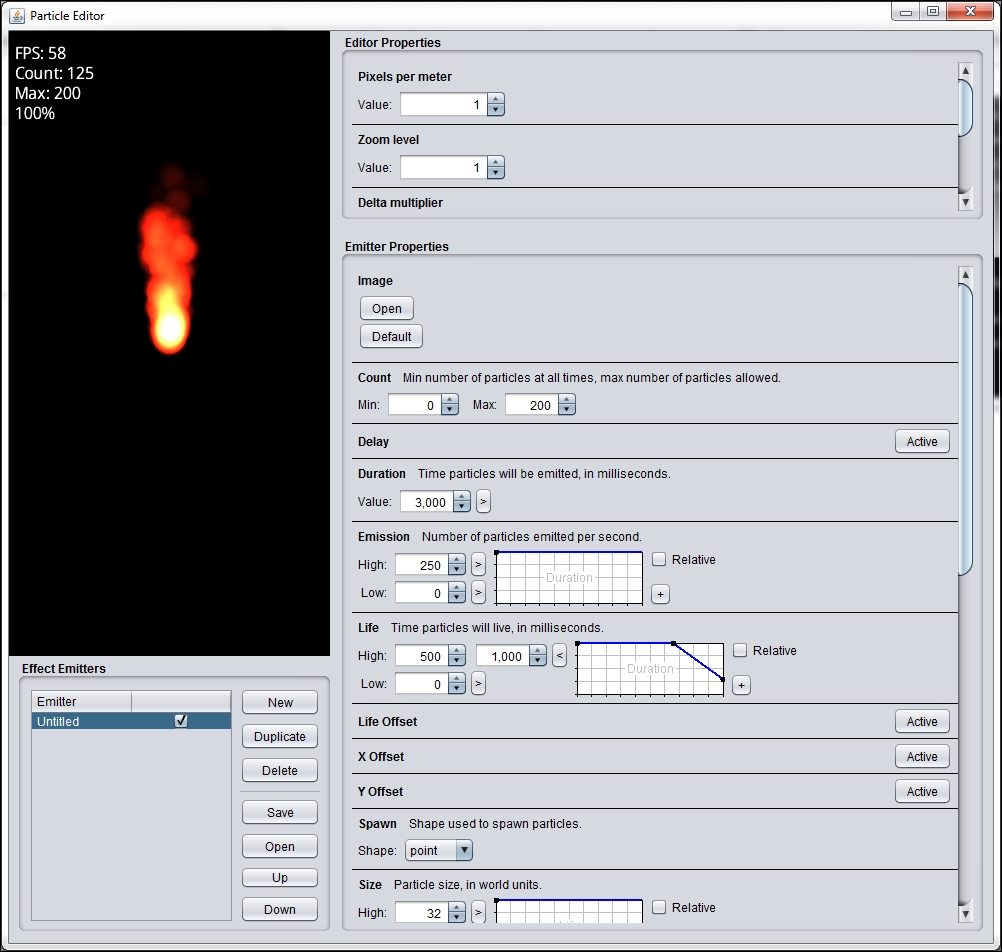
This is a program capture; the cropped text is not important
The code for this recipe is located inside the ParticleEffectsSample.java file, while the necessary assets are found under the assets folder in the android project. We will proceed to load a collection of particle systems and render them, one at a time, at the mouse or touch coordinates. To iterate through the effects, the user can click or tap the screen.
Just like the past recipes, we first define a few static constants to handle stretching the render area to fit different-sized screens. Right after, we add a few member variables. We are already familiar with most of them: a camera to visualize the scene, a viewport to define the render area, and a batch to send our draw calls. Then, we have a classic Java array of ParticleEffect objects, which contains all the information and state of our particle systems. Finally, we add a currentEffect member that will serve as an index to access the array; we also add touchPos to cache the user's mouse/touch coordinates and translate them from the screen to the world space:
private ParticleEffect[] effects;
private int currentEffect;
private Vector3 touchPos;
In the create() method, we first construct the camera, viewport, batch, and touchPos objects. Then, we create the array of ParticleEffect objects and start populating it. For every effect, we instantiate an object of ParticleEffect, and then call its load() method, passing in the file handle for our locally stored particle system's text files. The currentEffect member variable starts pointing to the first element in the array. The start() method of ParticleEffect gets the party started by kicking off the effects simulation.
With the Gdx.input.setInputProcessor() method, we tell Libgdx that our ParticleEffectsSample instance will listen to input events. As will be demonstrated later, this will allow us to iterate through the effects when the user clicks or touches the screen. Consider the following code:
public void create() {
…

  effects = new ParticleEffect[3];
  currentEffect = 0;

  effects[0] = new ParticleEffect();
  effects[0].load(Gdx.files.internal("data/fire.particle"),
Gdx.files.internal("data"));

  effects[1] = new ParticleEffect();
  effects[1].load(Gdx.files.internal("data/stars.particle"), Gdx.files.internal("data"));

  effects[2] = new ParticleEffect();
  effects[2].load(Gdx.files.internal("data/ice.particle"), Gdx.files.internal("data"));

  for (ParticleEffect effect : effects) {
    effect.start();
  }

  Gdx.input.setInputProcessor(this);
}
ParticleEffect implements the Disposable interface and, thus, should be disposed when appropriate. We proceed to do so in the dispose() method:
public void dispose() {
  batch.dispose();

  for (ParticleEffect effect : effects) {
    effect.dispose();
  }
}
The first step is to grab the current mouse/touch coordinates with the Gdx.input.getX() and Gdx.input.getY() methods. These come in the screen space, so we need to call the camera's unproject() method to convert them to the world space and be able to set the position of the effects correctly. In order to do this, we iterate over the effects array calling the setPosition() method, which just takes a set of 2D coordinates.
Particle effects have finite lifetimes, one-shot spells, explosions, and so on. However, for our demo, we want to make sure they play indefinitely. This is why we check whether they have finished with the isComplete() method and, if this is the case, kick them off again with the reset() method.
Finally, it is time to render the selected effect. We set the projection matrix of the batch and add a pair of begin() and end() calls. In between, we call the draw() method of the effects array element, pointed by the currentEffect position, passing in the batch and the time passed since the last game's loop iteration:
public void render() {
…

  touchPos.set(Gdx.input.getX(), Gdx.input.getY(), 0.0f);
  camera.unproject(touchPos);

  for (ParticleEffect effect : effects) {
    effect.setPosition(touchPos.x, touchPos.y);

    if (effect.isComplete()) {
      effect.reset();
    }
  }

  batch.setProjectionMatrix(camera.combined);
  batch.begin();
  effects[currentEffect].draw(batch, Gdx.graphics.getDeltaTime());
  batch.end();
}
The touchdown() method is declared by the InputListener interface and implemented by ParticleEffectsSample to react upon user clicks and screen tapping. Every time a user carries out this action, we increment the currentEffect member variable by 1 unit, while making sure we do not go past the bounds of the effects array. The module operation returns a number between 0 and array.length – 1, which makes the index go back to the start after the last effect.
public boolean touchDown (int screenX, int screenY, int pointer, int button) {
currentEffect = (currentEffect + 1) % effects.length;
return true;
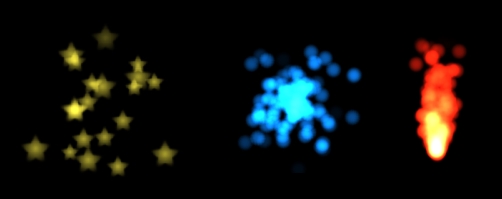
}The result is shown in the following screenshot. It is a great practice to play around with Particle Editor and modify the sample source to add your newly created particle systems.
Let's take a closer look at Particle Editor and the tools it offers us to control what our particle systems look like.
The Editor Properties panel simply provides a way of tweaking the particle previewer. The parameters in this panel are as follows:
- Pixels per meter: This constant is used to translate between pixel units to world space units.
- Zoom level: This controls the previewer camera zoom.
- Delta multiplier: This is the factor that scales the delta time passed in to the
draw()method ofParticleEffect. It can be useful to preview the effect in slow motion and notice little details.
The Emitter Properties panel, as its name points out, actually contains the parameters that define the behavior of the particle systems:
- Image: This is the texture used as a base to render the particles. As it is shown in the example, it is usually better to use grayscale textures and tint them through the effect's properties. It is good to experiment with different shapes and preview the results.
- Count: This defines the minimum number of particles that will initially be spawned and the maximum number that will ever be active at once. Be wary of using big numbers here as it affects memory consumption, CPU performance, and rendering times.
- Delay: If Active, the effect will not start emitting any particle for the given amount of time in milliseconds.
- Duration: This is the time in milliseconds for which the effect will keep emitting particles.
- Emission: This is the number of particles emitted per second.
- Life: This is the time in milliseconds for which each one of the emitted particles will remain active.
- Life Offset: When enabled, this makes the effect start at the given value, in milliseconds, throughout its lifetime.
- X Offset and Y Offset: This is the distance along the x and y axes from the effect's position, in world units, where the particles will be emitted.
- Spawn: This is the shape used to spawn the particles; the available ones are point, line, square, and ellipse.
- Size: This is the particle size in world units.
- Velocity: If enabled, this sets the particle speed in world units per second.
- Angle: If enabled, this sets the particle emission angle in degrees.
- Rotation: If enabled, this rotates the particle textures by the given value, in degrees.
- Wind: When enabled, a horizontal force in world units per second is applied to the particles.
- Gravity: When enabled, a vertical force in world units per second is applied to the particles.
- Tint: This multiplies the texture color by the set color. As previously mentioned, grayscale textures give the best results.
- Transparency: This is an alpha value that the particles will adopt over time.
- Additive: When checked, the additive blending mode will be used to render the particles, which results in a high color range and is good for the effects.
- Attached: If enabled, the existing particles will follow the movement of the emitter.
- Continuous: When checked, the emitters will automatically restart every time they are finished.
- Aligned: When enabled, textures will be rotated to face the direction of each particle's movement.
Some properties feature an expand (>) button that, when clicked, adds another value input. When expanded, the first input becomes the minimum value, while the second input represents the maximum value. The effect will then adopt a random value within the range. This can be disabled by clicking on the collapse (<) button, as shown in the following screenshot:

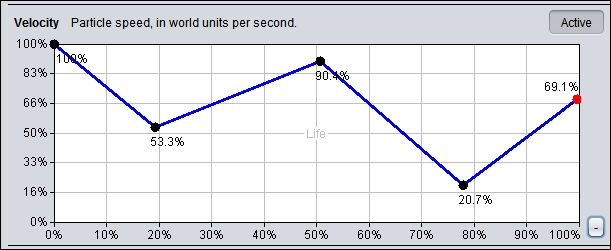
Other particles include a chart that can be expanded or collapsed with the + and – buttons, respectively. The x axis represents the lifetime in percentage, while the vertical axis shows the property value. These charts provide great power to control how our systems behave over time and achieve awesome results. The user can add new nodes by clicking on a segment, and delete them with a double click. It is pretty easy to shape up the chart the way we want just by dragging the nodes around:
It is perfectly normal to feel a bit scared with such a vast variety of options. For those who are not visual effects artists, at the end of the day, it is just a matter of experimentation with the properties and a constant check of the results in the previewer.
Surely you appreciate that our example is quite easy. Even though this approach works flawlessly for most situations where we occasionally fire a single one-shot effect, it does not scale well enough. Games such as space shooters or action platformers might require dozens of simultaneous onscreen effects at a given time. Constantly creating and deleting ParticleEffect objects is not sustainable, especially when it comes to mobile devices, because of the tremendous stress the garbage collector will go through. It is not rare to experience severe stalls every few seconds, and you do not want that now, do you?
Luckily enough, Libgdx comes with a particle pooling mechanism that elegantly takes care of our concerns. The ParticleEffectPool class instantiates a number of PooledEffect objects. Any time, we can request the pool for an effect and use it normally. Once we are done, we put it back in the pool. Since the pool allocates all the objects upfront, there are exactly zero runtime allocations and garbage collection operations.
PooledEffectsSample.java illustrates how to use particle pooling. The user can click/touch the screen to spawn explosions and can do so repeatedly without any memory overhead or additional allocation. We will limit ourselves to commenting the differences with our previous example.
First, add ParticleEffectPool and a collection of PooledEffect references to keep track of the active effects:
private ParticleEffectPool pool;
private Array<PooledEffect> activeEffects;
Pools can only have instances of the same effect, and we need to provide some sort of a model when initializing them. In the create() method, we first instantiate and load our explosion particle effect from the explosion.particle file. Then, we call the ParticleEffectPool constructor passing in explosionEffect, the initial number of allocated effects, and the maximum number of effects the pool can expand to:
ParticleEffect explosionEffect = new ParticleEffect();
explosionEffect.load(Gdx.files.internal("data/explosion.particle"), Gdx.files.internal("data"));
pool = new ParticleEffectPool(explosionEffect, 10, 100);
activeEffects = new Array<PooledEffect>();
Within our render() method, we iterate through the active effects and check whether they have finished playing. If they have, we delete them from the list and put them back into the pool with the free() method. If they are still playing, we update and draw them, just like before:
float deltaTime = Gdx.graphics.getDeltaTime();

batch.setProjectionMatrix(camera.combined);
batch.begin();

for (int i = 0; i < activeEffects.size; ) {
  PooledEffect effect = activeEffects.get(i);

  if (effect.isComplete()) {
    pool.free(effect);
    activeEffects.removeIndex(i);
  }
  else {
    effect.draw(batch, deltaTime);
    ++i;
  }
}

batch.end();
Every time the user clicks or touches the screen, we try to fetch a new effect from the pool using the obtain() method of ParticleEffectPool and add it to the active collection. As we saw before, the pool initially allocates memory for 10 instances. If we try to obtain more than this, it will make the pool grow, though never exceeding its maximum size, which, in this case, is 100 elements. We then convert the interaction coordinates into world space units and set the effect position:
public boolean touchDown (int screenX, int screenY, int pointer, int button) {
PooledEffect effect = pool.obtain();
if (effect != null) {
touchPos.set(screenX, screenY, 0.0f);
camera.unproject(touchPos);
activeEffects.add(effect);
effect.setPosition(touchPos.x, touchPos.y);
}
return true;
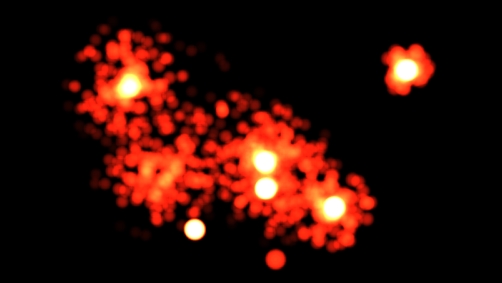
}Following this method, we can end up with a situation like the one shown in the following screenshot, with very little overhead. Let the fireworks begin!