You've learned how to add a 3D object to our project. But how can you pose it the way you want it to look for your scene? With a little time and patience, you'll be posing characters like a pro in no time!
Follow the directions in the Adding existing 3D objects to a page recipe before following the steps in this recipe.
This recipe will walk us through moving a character into a custom pose:
- Be sure that the Object tool under Operation is selected.
- Click on the 3D object to manipulate, if it is not already selected.
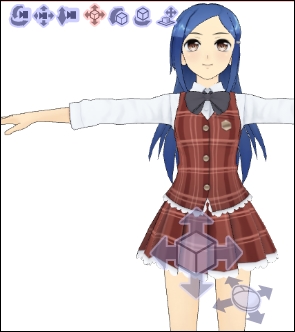
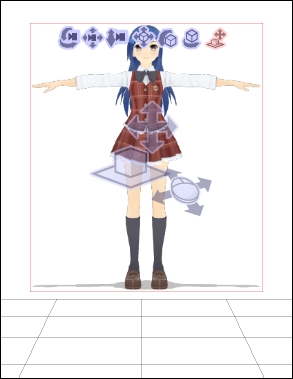
- To move the entire object up, down, left, or right, hover the mouse cursor over the fourth icon in the top-left corner of the box around the selected object. Click and hold the left mouse button; then, drag to move the object in the desired direction. The following screenshot shows the location of the icon used to move the object up, down, left, or right. It is highlighted in pink and also shown over the 3D character.
- To rotate the object along the y axis (or the horizon line), hover the mouse cursor over the fifth icon in the top-left corner of the box around the selected object. Click on it, hold the left mouse button, and drag. The object will rotate along the y axis, as shown in this screenshot:
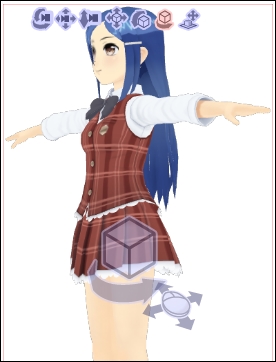
- To rotate the object along the x axis (straight up and down vertically), hover the mouse cursor over the sixth icon in the top-left corner of the box around the selected object. Click and drag. The object will rotate vertically around its center, as shown in the following screenshot:
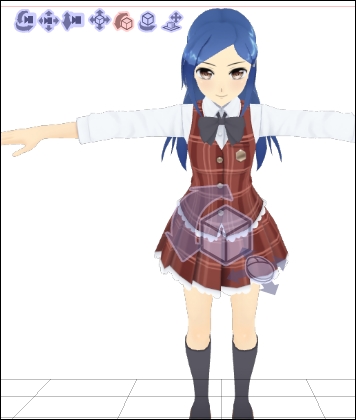
- To move the object back and forth in 3D space, hover the mouse cursor over the seventh icon in the top-left corner of the box around the selected object. Click and hold the left mouse button; then drag it. The icon is shown as follows, highlighted in pink, and the character has been moved back—away from the camera:
- To move one part of a character, click on the part to be moved. For this recipe, we'll move the character's arm down. To do this, we'll click on the upper arm portion of the character to select it.
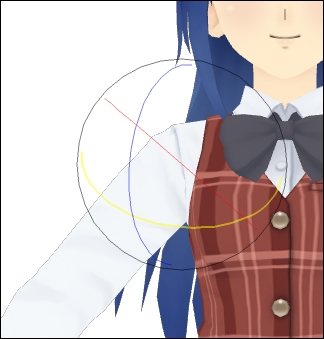
- When a portion of the character is selected, a sphere with three lines circling it will appear. Each of these three lines represents one axis (x, y, and z) and controls the rotation of that portion of the character. This set of lines is shown here:
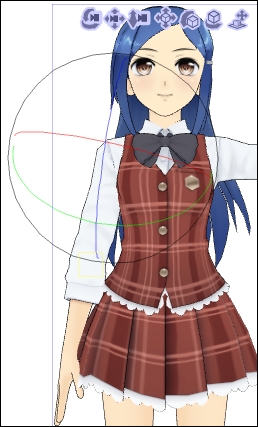
- Use the lines of the sphere to rotate the part of the character to the desired position. For a more precise movement, the scroll wheel on the mouse can be used as well. In the following screenshot, the arm has been rotated so that it is down at the character's side:
Tip
Do you keep accidentally moving a part of the model that you don't want to move? Put the cursor over the part of the model that you'd like to keep in place, and then right-click. A blue box will appear on that part of the model, and the piece will be locked in to place. Right-click again to unlock the part.
In this recipe, we covered how to move and rotate a 3D object and portions of 3D characters. This is the start of being able to create your own custom poses and saving them for reuse. It's also the way to pose the drawing doll models in Manga Studio to make pose references for your comic artwork. In the 3D-Body Type folder of the materials library, you will find Female and Male drawing dolls that can be posed just as the premade characters can. These generic dolls are great for getting that difficult pose down. Then use the next recipe, Adjusting the 3D camera, to get the angle you need, and draw away!
The following screenshot shows a drawing doll 3D object that has been posed in a custom stance. Later in this chapter, we will save this pose as a material so that we can use it for other characters.
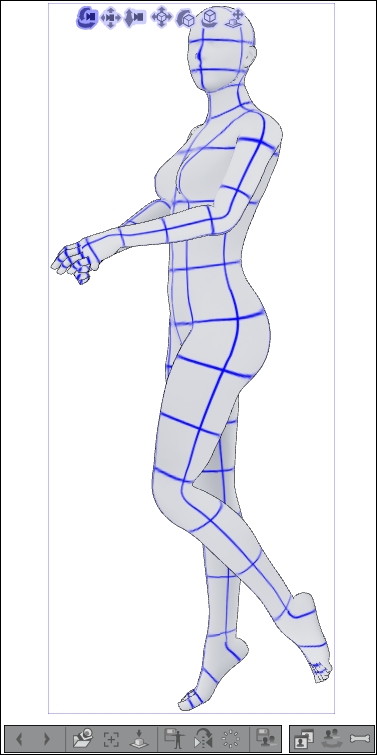
The preceding pose was relatively easy to achieve. The figure was rotated along the x axis, and then the head and neck joints were both rotated individually so that the doll looked toward the camera. Both its arms were rotated down and then inward. The hands were posed. The ankle joints were selected and the feet were rotated so that the toes were pointed. Then the knee of the near leg was rotated to bend it. The hip of the near leg was also rotated so that the leg was lifted slightly, giving a "cutesy" look to the pose.
Tip
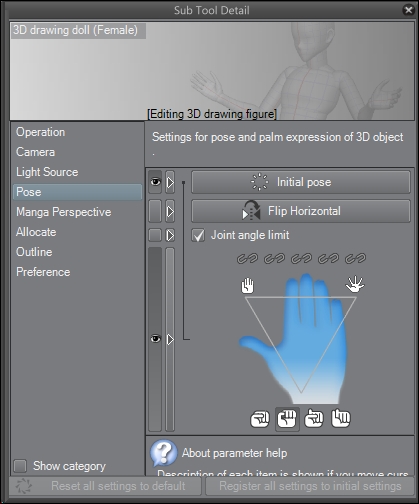
Having trouble posing a character's hands exactly the way you want them? Open the Sub Tool Detail palette and click on Pose in the left-hand-side menu. In this area, you will find a menu with a picture of a hand. This is a quick controller for the fingers. Select the hand that you wish to pose. Along the bottom of the menu are some preset hand poses for things such as closed fists. At the top of each finger on this menu is an icon that looks like chain links. Click on one of them to lock the finger that it is over and prevent it from moving. The triangle area over the large blue hand symbol controls how open and closed the fingers are. You will find this menu much easier than rotating each joint individually, I'm sure!