
Getting the look of light from a fire, moonlight, or a neon sign can be tricky. This recipe will give you some tips and tricks on how to get this look!
The following steps will show you how to make a colored light effect:
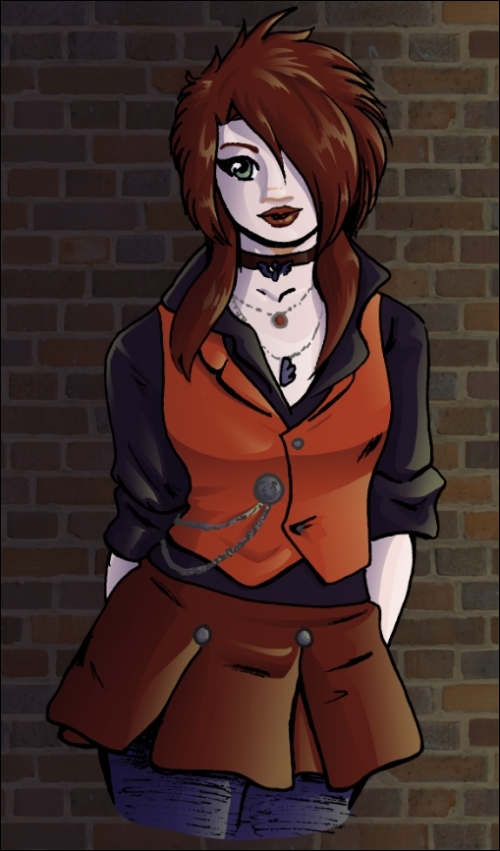
- Start with a drawing with flat colors laid down on their own layer, and a separate layer of line work.
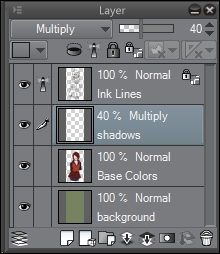
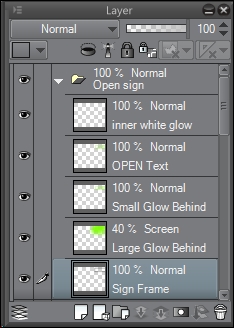
- Make a new raster layer above the flat colors but below the ink lines. Change the blending mode to Multiply and adjust the opacity from 35% to 45%. The actual number will vary depending on your personal style and the colors of the piece. The following screenshot shows the order of the layers and the settings for the shadows layer:
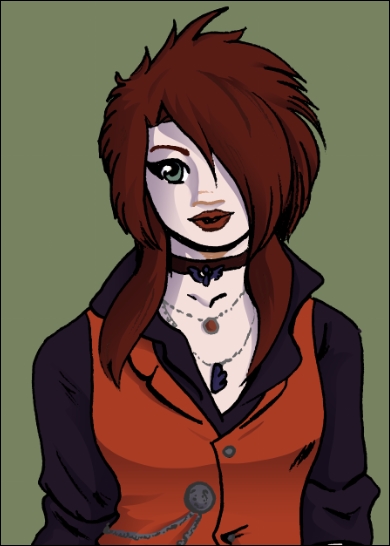
- Select a shading color and mark in the shadows for your drawing. As shown in the following example, I decided that this will be a nighttime scene, lit by two neon signs, so I used a dark blue-violet color for the shading:
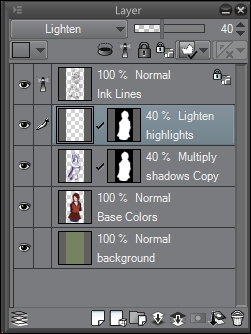
- Once the shadows are done, create a new layer for the highlights. Change the blending mode to Lighten or Screen. As with the shadow layer, change the opacity from 35% to 45%. This screenshot shows the order of the layers and the settings for the new layer:
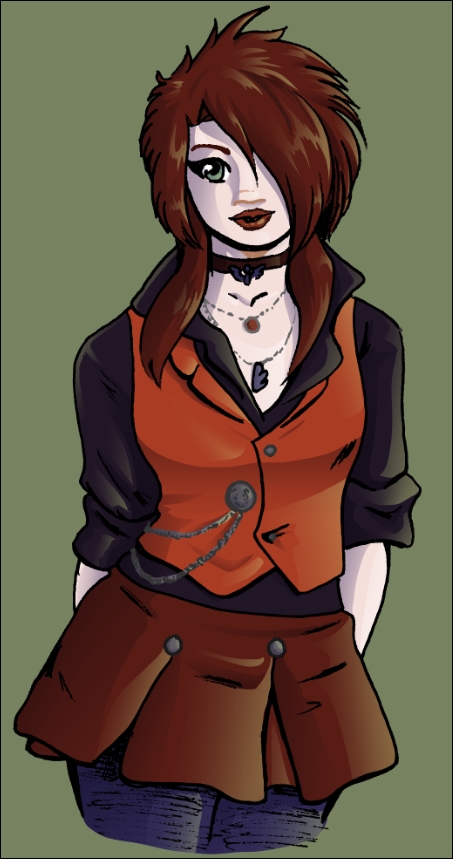
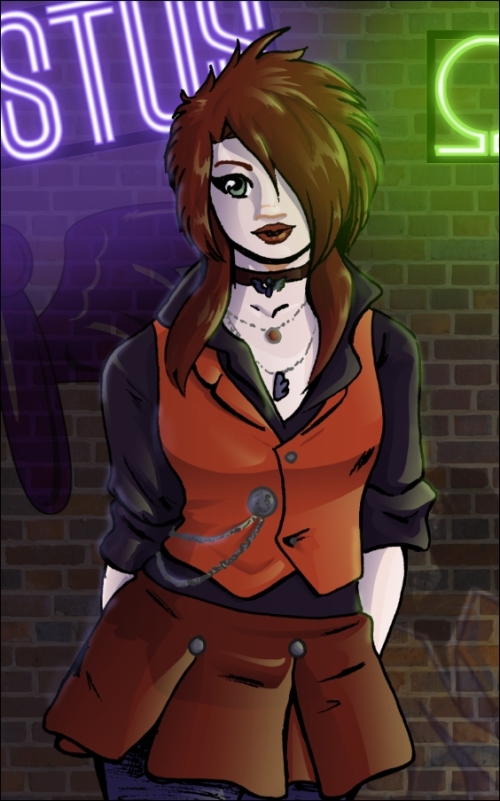
- Choose a light color and highlight the drawing. For this piece, the highlight color will come from a yellow-green neon sign on the right-hand side of the character. Because of this, a yellow-green color was chosen for the highlights on the girl, as shown here:
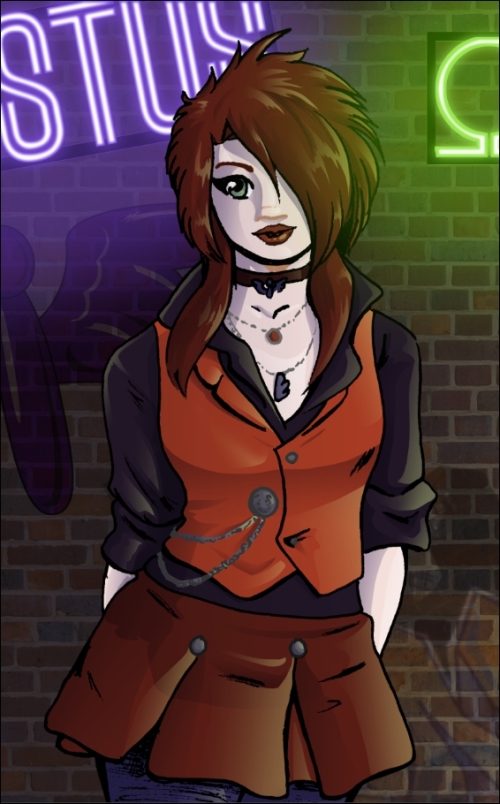
- Now, our work on the background starts. In the following screenshot, a brick texture has been imported and added behind the character. A new layer set to Multiply and filled with a dark blue gradient has been added over the texture to make it match the shading of the character.
- The visible light sources are now added to the background. The neon signs are made in a similar way to the laser blasts in the Creating laser blasts recipe, but an additional layer has been added behind the text. This layer has been set to the Screen combine mode, and the Soft airbrush tool has been used to add more light to the scene. Here is a screenshot of the layers used to create the OPEN neon sign:
Note in the following screenshot how far out the glow extends from the signs:
- Now it's time to add more colored light to the edges of the character. This is called a rim light, and it further accentuates the character's details. Create a new layer above the inked lines layer. Select the Screen combine mode for this layer. Using the Soft airbrush tool, add thin lines of color around some of the edges of the character, as shown in the following screenshot:
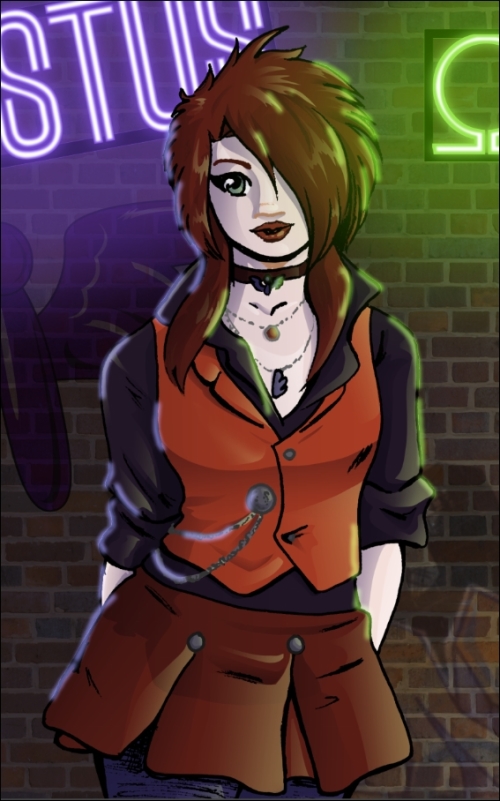
- Adjust the opacity of the rim light layer and use the Soft subtool of the Eraser(E) or the Blend(J) tool to soften any areas that are too hard. This final step is shown here:
Planning ahead goes a long way for an effect like this. Think ahead of time about what light sources you'll have in your image and where they will be coming from. Is it night time? The scene will be of blues and purples—most likely—and the light will be white and silver (provided there is starlight or moonlight). Is there a campfire nearby? Then you'll want to work with warmer colors.
For more information about light colors and working with colored light in painting, I recommend reading Color and Light: A Guide for the Realist Painter by James Gurney.
Also, the rim light effect goes a very long way, so don't use too much of it! I feel that this sort of intense rim light should be used sparingly to accent and bring attention to some parts of the character and punch up the look of the overall image. If we were to put a rim light on every surface of the character, it would draw the reader's eye all over the canvas and make a confusing composition.