
Now that we have a fabric pattern, we can apply it to a character's clothing. But just pasting it in flat will look… well, flat! So, let's use the Mesh Transformation tool to lay the pattern a little more realistically on the drawing.
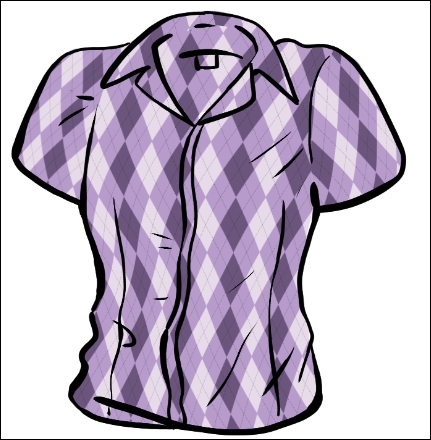
You will need a drawing of clothes. The example drawing for this recipe will be the blouse shown here:
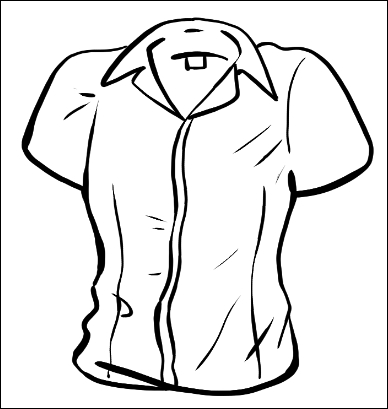
Your drawing can be a skirt, shirt, hat, or whatever you want to add a fabric pattern to!
This recipe will walk you through the use of the Mesh Transformation tool on a pattern material:
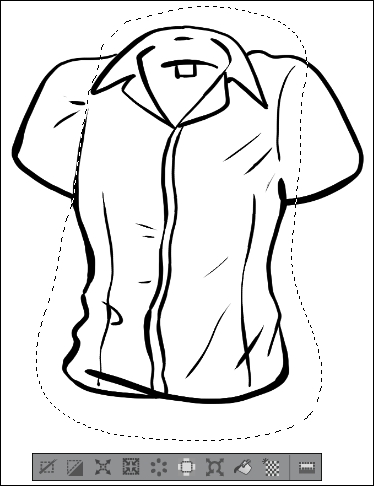
- Make a selection around a portion of the item using the Lasso Marquee(M) tool. In the following screenshot, the area around the main body of the shirt has been selected:
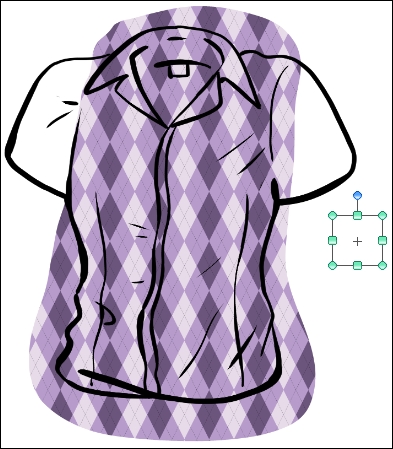
- Paste the desired material; in this case, we're using the argyle pattern that we created in the previous recipe. As you can see in the following screenshot, the pasted image is quite large because of the resolution we created it at:

- Use the bounding box that surrounds the material to resize the pattern, as shown here:
- Once the desired scale is reached, right-click on the layer in the Layer palette and click on Rasterize.
- Go to Edit | Transform | Mesh Transformation. A grid of control points will show up over the material.
- Use the sliders in the Tool property palette to increase the number of control points from
4to8or10, both vertically and horizontally. The updated lattice of control points is shown in this screenshot: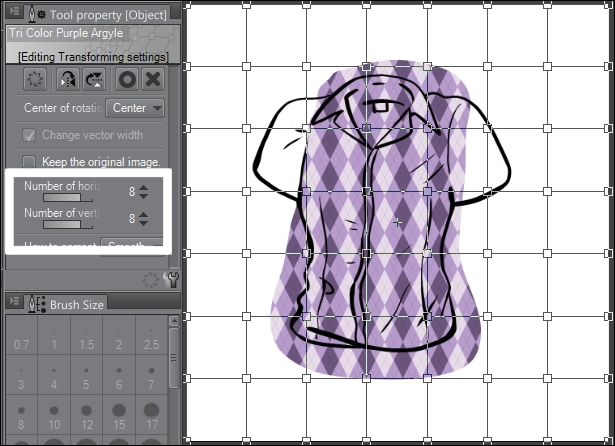
- Use the control points to alter the pattern so that it curves with the lines of the drawing. Be sure to think about how the fabric folds and curves around! Note the way in which the control points have been altered in the following screenshot to change the bend of the pattern:
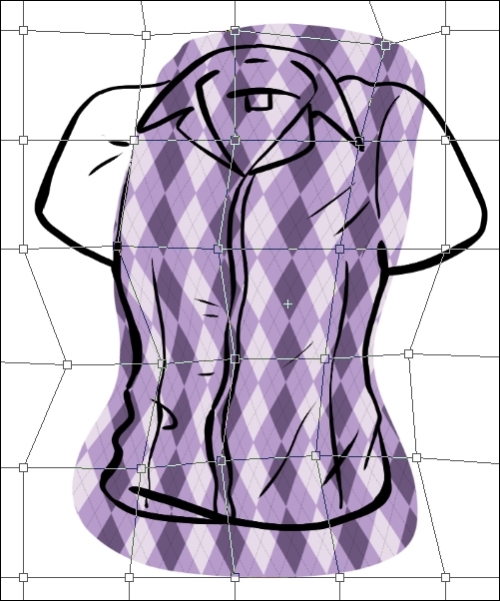
- When you're done, press the Enter key to finalize the transformation.
- Use the layer mask that is already attached to the materials layer to erase the extra pattern and clean up the edges of the material.
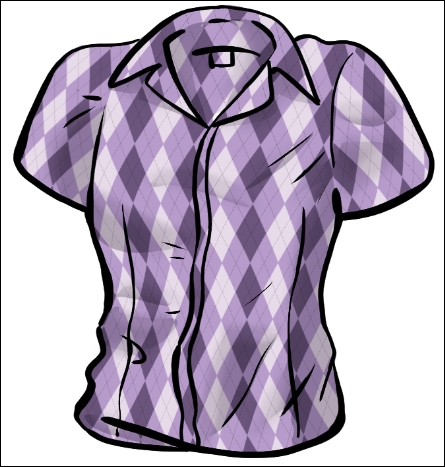
- Continue designing each piece of the garment in the same way. The shirt shown next was patterned in four pieces—the main torso, the collar, and the two sleeves:
- Add a raster layer above the material layers, set it to the Multiply layer mode, and add shading to the shirt to finish the drawing. The finished shirt is shown here:
..................Content has been hidden....................
You can't read the all page of ebook, please click here login for view all page.