In this recipe, we're going to create a brush that we can use to obtain the look of a brick wall.
To start with, we'll need to create a blank canvas. For this recipe, I've used the postcard horizontal (350 dpi) default template. Set Basic expression color to Color.
You may find that this brush requires some additional experimentation before you get the look that you want. I hope this recipe will give you at least a starting point to take off from:
- With the blank canvas open, go to Figure | Direct draw | Rectangle from the toolbox.
- In the Tool property palette, check the box next to Roundness of corner and set the value to
2.0using the slider. The location of the Roundness of corner option is shown in this screenshot: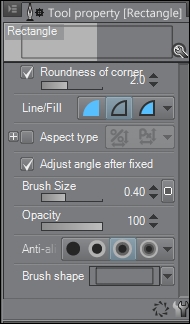
- Set a value of
4.0for Brush Size. - Draw a rectangle by clicking inside of the canvas area and dragging while holding down the mouse button. Release the mouse button when the desired rectangle size is reached.
- Select the Rectangle Marquee tool. Drag a selection around the rectangle you just created.
- In the Selection toolbar, directly beneath the "marching ants" of the marquee selection, click on the Scale Up/Scale Down/Rotate icon (seventh from the left).
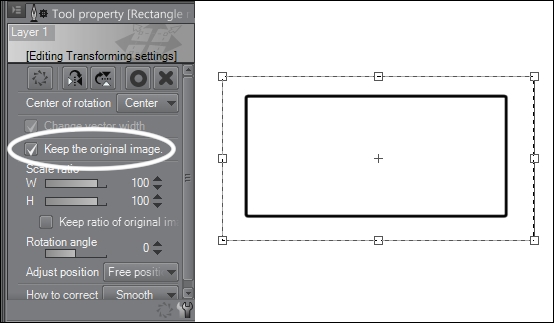
- A set of handles and a bounding box will appear around the rectangle marquee selection. With this active, check the box next to Keep the original image in the Tool property palette. The following screenshot shows the handles and the bounding box on the right, and the location of the Keep the original image checkbox on the left:
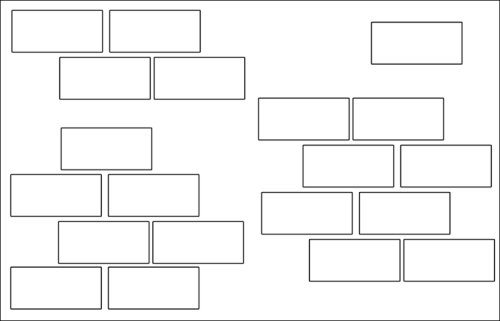
- Click inside the bounding box and drag to the right while still holding down the mouse button. A second rectangle will appear next to the first.
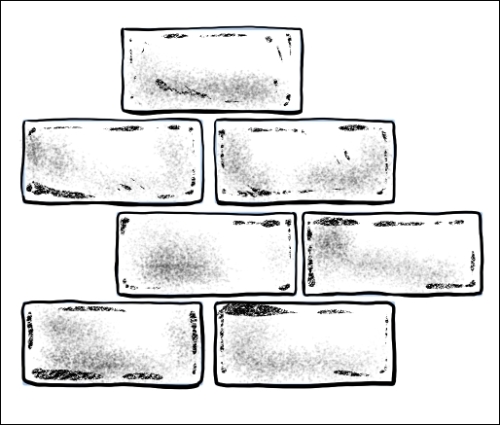
- Continue selecting and duplicating rectangles to make brick patterns. These will become our brush tip materials. Check out the screenshot given here to see the brick patterns made for this recipe:
- Now we will start making our rectangles look more like bricks. Create a new layer above the layer with the brick patterns. Select one of the brick patterns to focus on. Use the rectangles as a "sketch" and ink over the brick shape, making the outline uneven. Add a texture with the Charcoal subtool (this is found by going to Pencil | Pastel), if desired. The following screenshot shows one of the completed brick patterns created for this recipe:
- Continue step 6 for each brick pattern, drawing each on its own separate layer.
- Turn off any Paper layers by clicking on the eye icon to the left of the layer name in the Layer palette.
- Follow step 8 for all but one layer of the brick patterns.
- Go to Edit | Register Image as Material.
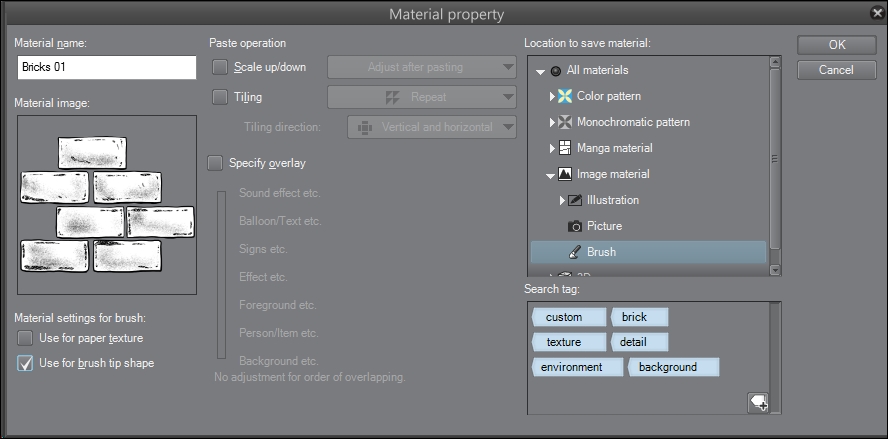
- In the Material property window, name your new material. Select the Brush folder under Image material to store it in.
- Check the box under the Material image preview that says Use for brush tip shape.
- Add tags by clicking on the tag and the + sign icon in the bottom-right corner of the Search tag box. Check out this screenshot to understand what your Material property screen should look like:
- Turn off the currently active layer. Make the next layer visible and active in the Layers palette.
- Repeat steps 10-14 for every remaining layer of the brick pattern.
- Select the Decoration tool from the Manga Studio 5 toolbox.
- Choose the Artificial category of decoration tools. Then select the Rubble tool.
- Click on the Create copy of currently selected sub tool icon in the bottom-right portion of the Sub Tool [Decoration] palette.
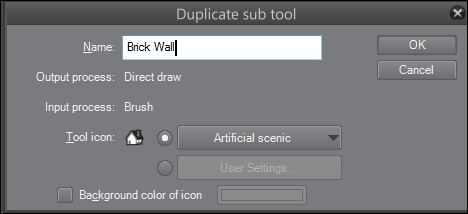
- Name the new brush tool using a descriptive title. Refer to the following screenshot for a suggestion:
- In the Tool property palette, click on the wrench icon in the bottom-right corner to open the Sub Tool Detail palette.
- Click on the Brush tip option.
- Delete the existing brush tip materials by selecting them one at a time and then clicking on the Delete selected brush tip shape icon under the Material box.
- Click on the Add brush tip shape icon directly to the left of the delete icon.
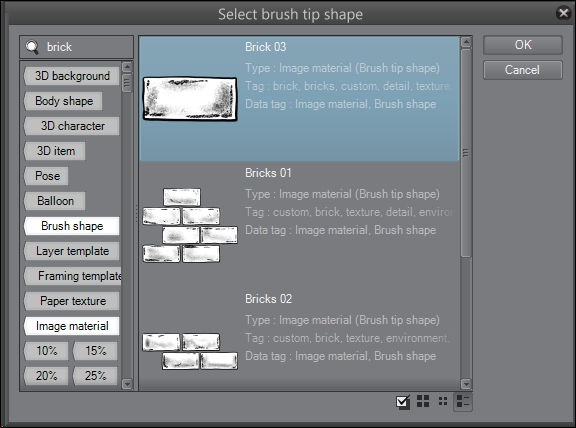
- Search for and select a material created in steps 1-19 of this recipe. When selected, the material will be highlighted, as shown in the following screenshot:
- Click on OK.
- Repeat steps 23-25 as needed to add all the brick patterns to the brush tip materials.
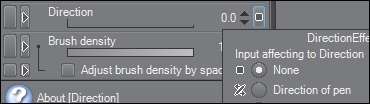
- Click on the dark gray box to the far right of the Direction option under Brush tip. Click on the radio button next to None to select it. If the checkbox next to the Random option is selected, click on it to deselect it. Here is a screenshot that shows the location of this menu:
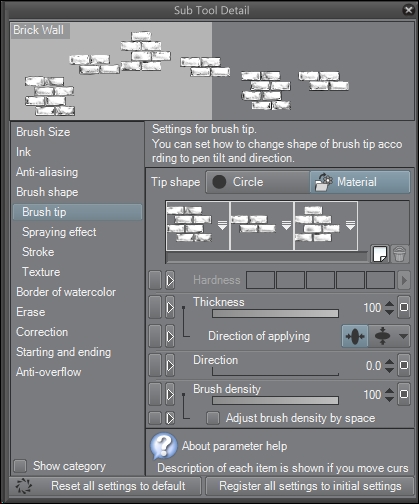
- The Brush tip options should now be the same as what is shown in the following screenshot:
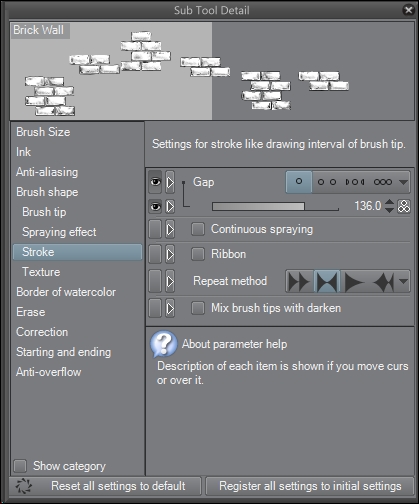
- Click on the Stroke option in the left-hand side menu of the Sub Tool Detail screen.
- Set the Gap slider to a value that leaves some space between each occurrence of Brush tip. This will vary depending on the size that the brush tip materials were drawn in at the beginning of this recipe. The Gap value used in this recipe is
136. - Click on the dark gray box to the far right of the Gap option. Then click on the checkbox next to Pen pressure. Set the minimum value to
100. On the same screen, click on the checkbox next to the Random option. Set the minimum value to60. Refer to this screenshot: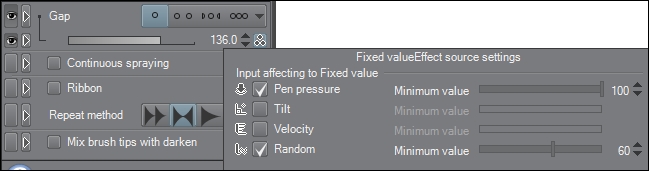
- Set Repeat method to Reverse by clicking on the second icon next to the option. It is highlighted in the following screenshot:
- Test your brush and make adjustments as needed to fit your personal tastes!
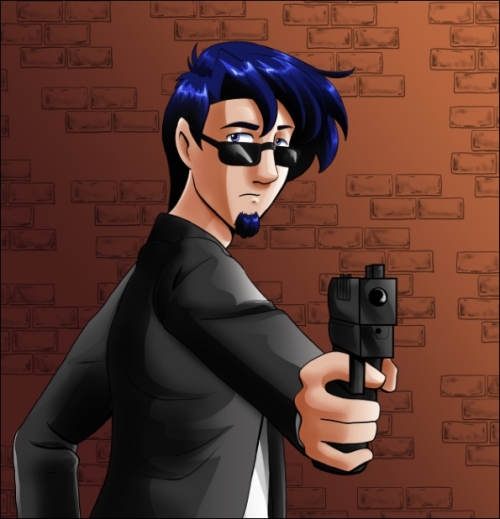
This brush works best in small doses, as a little detail on a background drawing perhaps. Distant buildings that need just a bit of brick detailing will benefit from this brush. Be patient while using it, and don't be afraid to experiment with the brush settings or add or take away some brush tip materials!
The following is an illustration made with this brush used in the background. I went for straight lines back and forth over the entire background. Then, an orange-to-rust-colored gradient was added. The brick outlines were lowered to about 60 percent opacity to fade them more into the background and make them less obtrusive.