
Let's face it. Most of us don't fancy spending our drawing time rendering patterns on cloth by hand, especially for panel after panel of a comic story! That's where Manga Studio's brushes and materials come in handy.
The brush settings from this recipe can be used for many other applications. Simply change the material and the brush will be changed! Try drawing a long, thin strip of wood grain instead of a fabric pattern, for example. The possibilities are endless.
The most important part of making one of these brushes is planning. Search for reference photos and decide what look you want to achieve. Look at decorative fashion trims and fabrics, and study how the pattern is put together before sitting down to make the brush. This will make it much easier to put together!
For this recipe, we'll be making a trim with a southwestern motif.
This recipe will walk us through the creation of a pattern brush for use for a decorative trim on a character's outfit:
Note
A brush like this is best for use in small areas, such as a trim on the edge of a character's coat or sleeve. For larger areas, such as plaid skirts or houndstooth coats, check out the recipes in Chapter 7, Adding and Creating Tones and Materials.
- Open a new canvas with Basic expression color set to Color and at least 300 dpi resolution.
- With your new canvas open, navigate to View | Grid to turn on the grid lines.
- Use the grid lines as guides to assist you in drawing your chosen pattern. Almost all of the following patterns were drawn using the Polygon tool, which can be found by going to Figure | Direct draw. (The pattern looks complex, but in reality, it's mainly triangles! This is where the planning portion of the process helps. Without planning, the patterns look very complex to reproduce.)
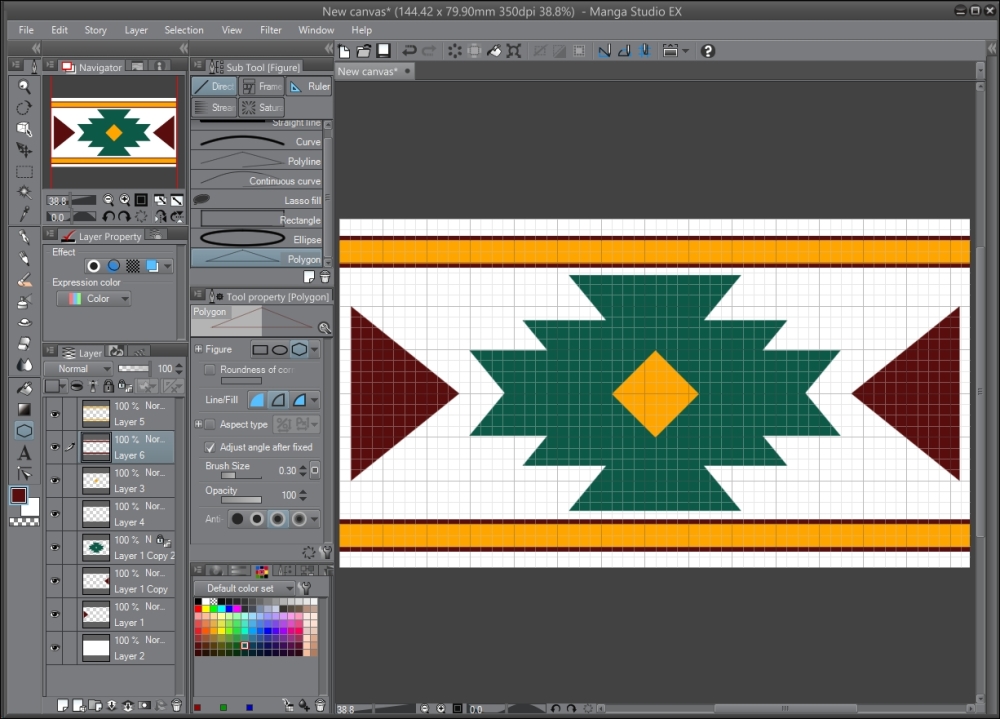
- Combine all the layers when the pattern is completed.
- Go to Edit | Register Image as Material.
- Give the material a descriptive title.
- Double-check the Material image preview to make sure that the space around the leaves is transparent (it will have the same gray color as the rest of the Material property window).
- Beneath Material image, check the box marked Use for brush tip shape.
- Choose the Brush folder, which is under Image material, to save the new material in.
- Add some tags to the Search tag box. Refer to the following screenshot for suggestions:
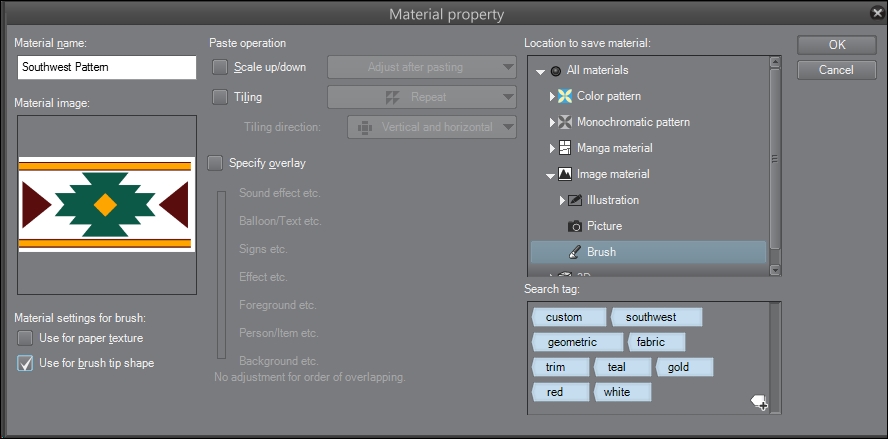
- Click on OK in the Material Property window.
- Select the Decoration tool from the Manga Studio 5 toolbox.
- Choose the Clothing category of decoration tools. Then select the Tirolean Tape tool.
- Click on the Create copy of currently selected sub tool icon in the bottom-right part of the Sub Tool [Decoration] Palette.
- Name the new brush tool using a descriptive title.
- In the Tool property palette, click on the wrench icon in the bottom-right corner to open the Sub Tool Detail palette.
- Click on the Brush tip option.
- Delete the existing brush tip materials by selecting them one at a time and then clicking on the Delete selected brush tip shape icon under the Material box. The delete icon is circled here:
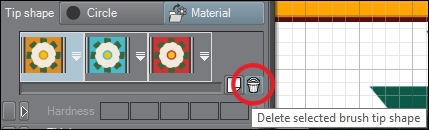
- Click on the Add brush tip shape icon directly to the left of the delete icon.
- Search for and select the material created in steps 1-11 of this recipe. Click on OK.
- If your brush tip material is not oriented correctly, change the Direction settings under Brush tip. In the example shown here, the Direction value was set to
90to make the material appear horizontal: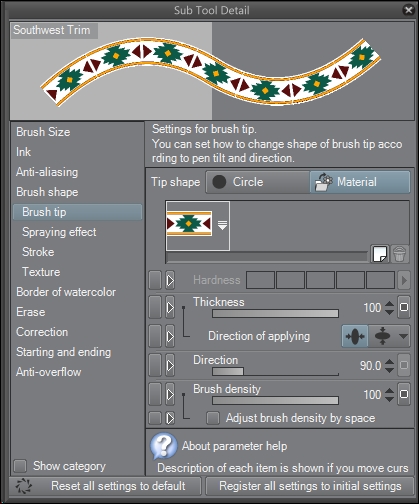
- Click on the Stroke option on the left-hand side of the window. Make sure that the Ribbon checkbox is ticked. The following screenshot shows this setting:

- Test your new brush!
By making this brush from a brush that is already set up as Ribbon, we save time setting it up. Less time messing around with the brush options means more time to work on art!
This screenshot shows the brush made in this recipe at work, as the band of this explorer's hat:
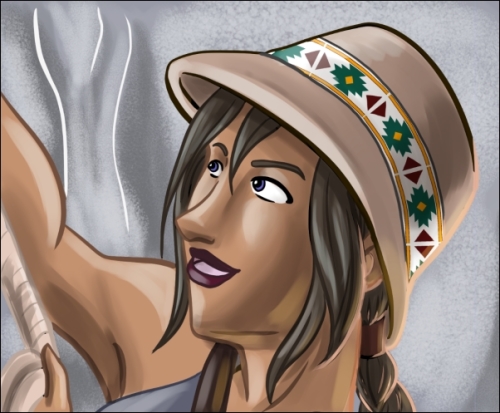
The shading on the brush details was achieved by making a layer above the trim, setting it to the Multiply layer mode, and shading with a desaturated brown. The highlights for the preceding drawing were done on a Screen layer mode with a bluish-white color. Both the shading and the highlight layers were set to about 50 percent opacity.
- The Creating and saving custom materials recipe in Chapter 7, Adding and Creating Tones and Materials
- The Drawing a custom fabric pattern recipe in Chapter 7, Adding and Creating Tones and Materials
- The Using Mesh Transformation to apply more realistic fabric patterns recipe in Chapter 7, Adding and Creating Tones and Materials