
In this recipe, we'll create a pattern inspired by fabric and save it as a material. Then, in the next recipe, we'll use the Mesh Transformation tool to make this pattern more realistic when applied to drawn clothing.
We'll need a pattern to look at, for inspiration, and a blank canvas. In this recipe, we'll be using the grid on a 350 dpi square canvas, and we will be making an argyle pattern.
The following steps will walk you through creating an argyle pattern and saving it as a material:
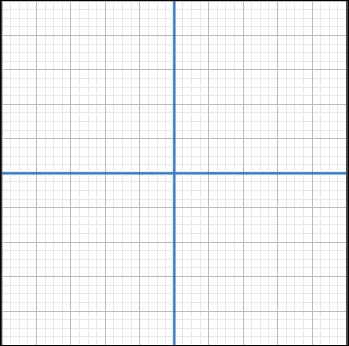
- Go to View | Grid to turn the grid on. This will make it easier to draw a precise repeating pattern.
- Draw one straight line horizontally and another vertically to mark the center of the canvas, as follows:
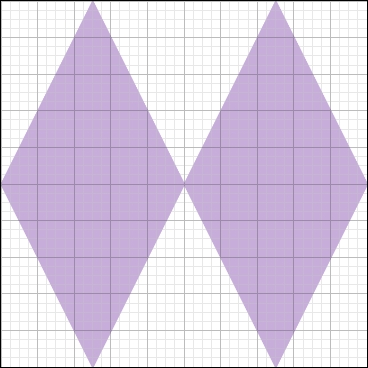
- Create a new raster layer.
- Select the foreground color to be used, and then select the Straight Line tool by going to Figure(U) | Direct draw. Draw two diamonds, one on each side of the central vertical line, touching the center of the canvas, as shown in the following screenshot. Fill them with color:
- Make a new raster layer below the layer with the two diamonds on it.
- On the new empty layer, fill the middle of the design with a different color, if desired.
- Fill the outside with a third color, if desired.
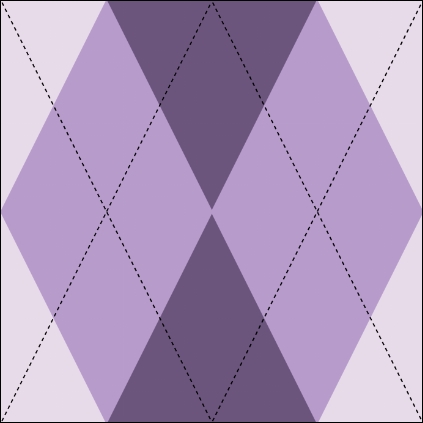
- Make another raster layer above the double diamond layer. Select the Straight line tool and locate the Brush shape option in the Tool property palette. Set Brush shape to Dashed line.
- Draw diagonal lines across the design, as shown here:
- Flatten the design layers of the design by navigating to Layer | Merge Layers(F).
- Use the previous recipe (Creating and saving custom materials) to save the pattern as a material, with Repeat as the Tiling option and Adjust after pasting as the Scale up/down option.
..................Content has been hidden....................
You can't read the all page of ebook, please click here login for view all page.