
Now that we have a Layer Mask, it's time to learn how to hide and restore content with it!
Again, you will need a file open with at least one layer with content (a sketch, an ink drawing, a photo, and so on) inside of it. Follow the instructions given in the Adding a Layer Mask recipe to make a mask before following this recipe.
Here is how to edit the content on the layer with the layer mask:
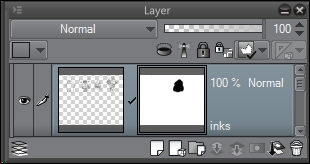
- To hide the content on the layer, select an Eraser(E) tool. Erase the section of the layer to be hidden. The area will show up in the layer thumbnail as black space. The following screenshot illustrates this; note the black area where artwork has been erased. This black area is the masked area.
- To make hidden content visible again, select any pen or brush tool. Draw again over the area with the Pen(P) or Brush(B) tool to bring back the hidden content. Here is a screenshot that shows a white area inside the previous black area, where the content has now been restored:
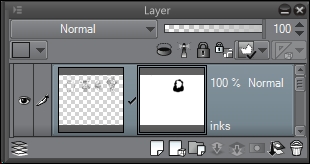
In the case of a Layer Mask, using the eraser doesn't permanently erase any part of the drawing. Instead, it hides the content. We can see where we have the Layer Mask placed by looking at the thumbnail in the Layer palette and noting where the black areas are. To bring the content back, simply switch to a drawing tool and paint "white" back in the Layer Mask (though the actual color we have selected doesn't matter while working on a Layer Mask). This tells the program to show this information again.