Sometimes, in comics and illustrations, you may just find that something you're drawing needs to be blown up. This brush can also be used for a billowing smoke effect!
Create a new canvas of at least 300 dpi resolution. Make sure that Basic expression color is set to Gray.
The following steps will walk us through the use of the spraying effect options to create a brush that looks like an explosion:
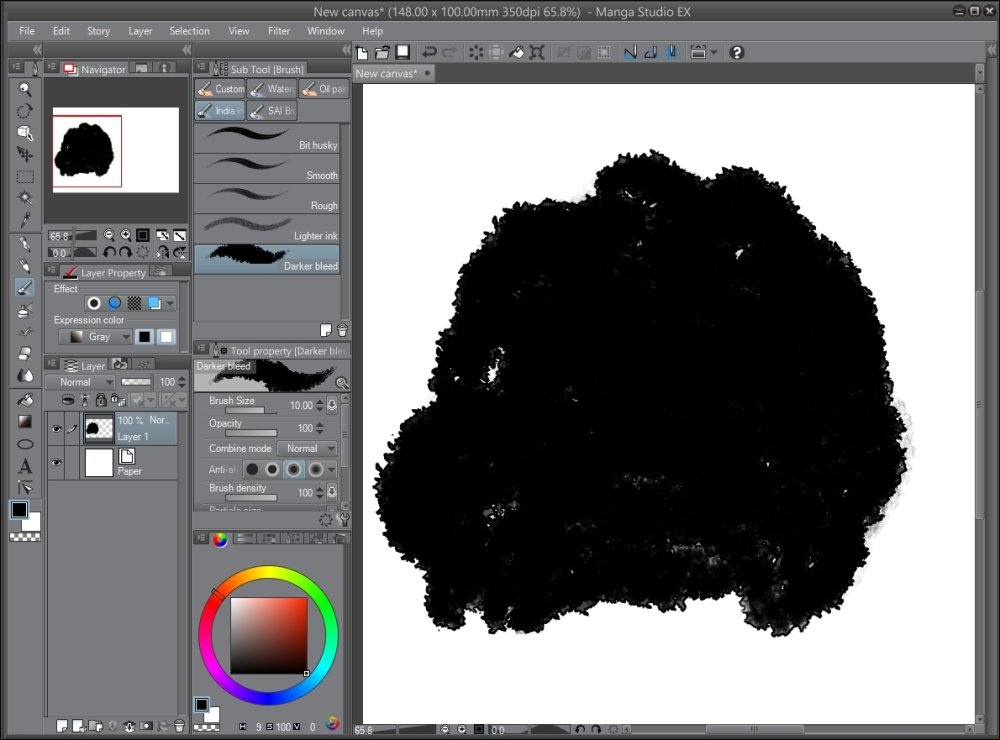
- On the blank canvas, mark the general shape of the smoke cloud for the explosion. The following screenshot shows this, done by going to Brush | India ink | Darker bleed and using a pure black color:
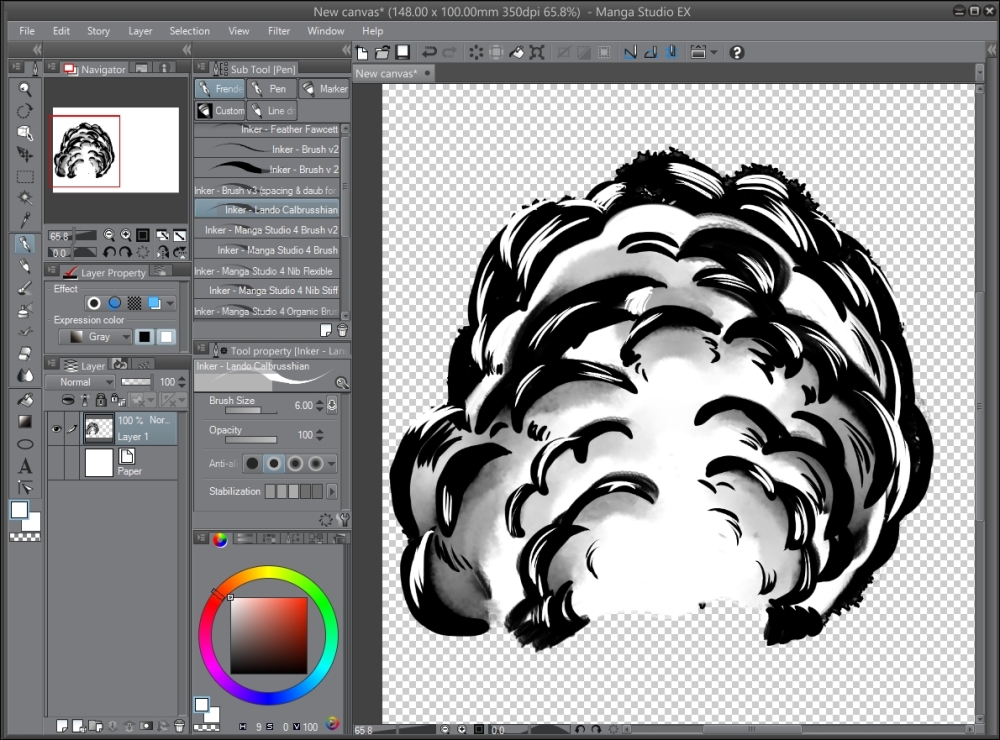
- Using the India ink or pen tools, continue adding details until you are satisfied with the look of the explosion cloud. As shown in the following screenshot, the Lighter ink tool (which can be found under India ink) with black was used to obtain the gray shading. Then, G-pen was used in both black and white to add more details:
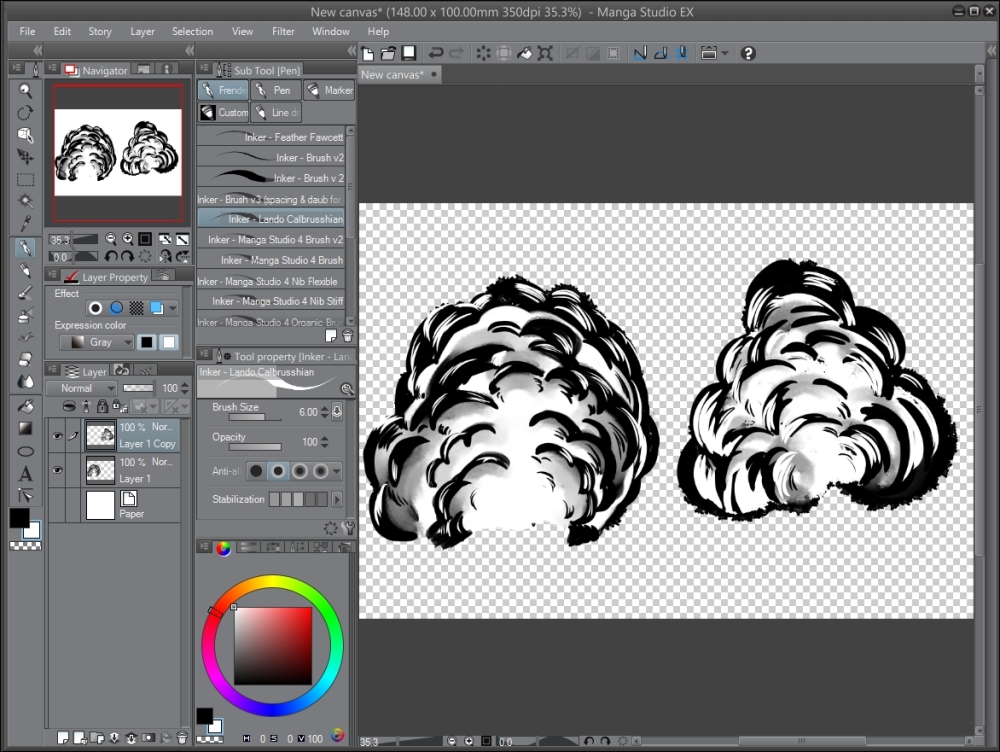
- On a new layer, create a second explosion shape, using the same techniques and tools as before. Here is a screenshot that shows both the shapes created for this recipe:
- Turn off one layer so that only one of the explosion shapes is shown. Remember that they should both be on separate layers! Click on the visible layer to select it (highlight it in blue), if it is not already the active layer.
- Go to Edit | Register Image as Material.
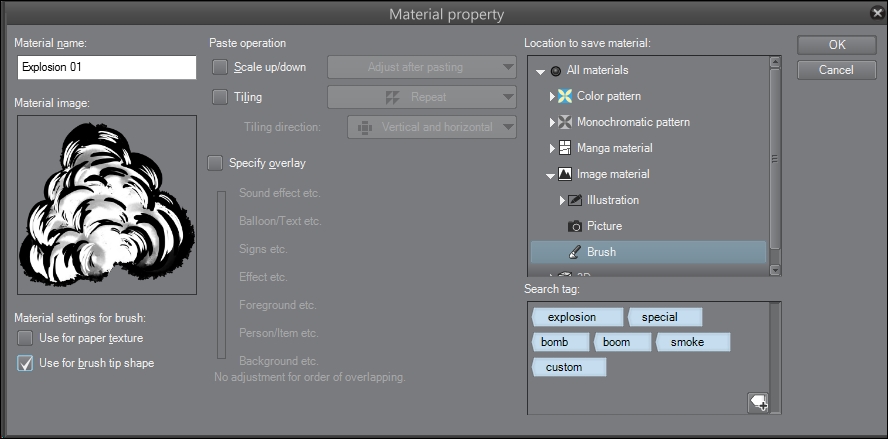
- In the Material property window, name your new material. Select the Brush folder under Image material to store it in.
- Check the box under the Material image preview that says Use for brush tip shape.
- Add tags by clicking on the tag and the + sign icon in the bottom-right corner of the Search tag box. Check out the following screenshot to see what your Material property screen should look like:
- Turn off the currently active layer. Make the next layer visible and active in the Layers palette.
- Repeat steps 5-7 for every remaining layer.
- Select the Decoration tool from the Manga Studio 5 toolbox.
- Choose the Effect category of decoration tools. Then select the Heart color tool.
- Click on the Create copy of currently selected sub tool icon in the bottom-right portion of the Sub Tool [Decoration] palette.
- Name the new brush tool using a descriptive title.
- In the Tool property palette, click on the wrench icon in the bottom-right corner to open the Sub Tool Detail palette.
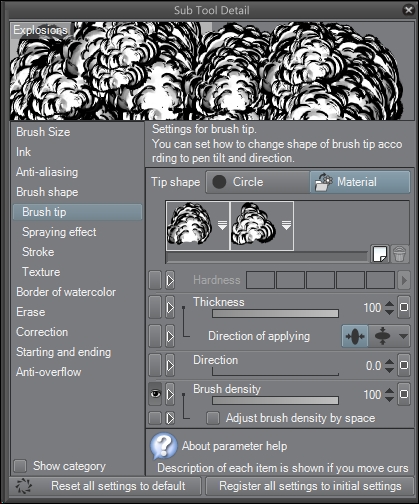
- Click on the Brush tip option.
- Delete the existing brush tip materials by selecting them one at a time and then clicking on the Delete selected brush tip shape icon under the Material box.
- Click on the Add brush tip shape icon directly to the left of the delete icon.
- Search for and select the materials created in steps 1-10 of this recipe. Click on OK.
- Click on the gray box to the far right of the Brush density settings and uncheck the box marked Random.
- Ensure that the Brush tip settings are the same as what is shown in this screenshot:
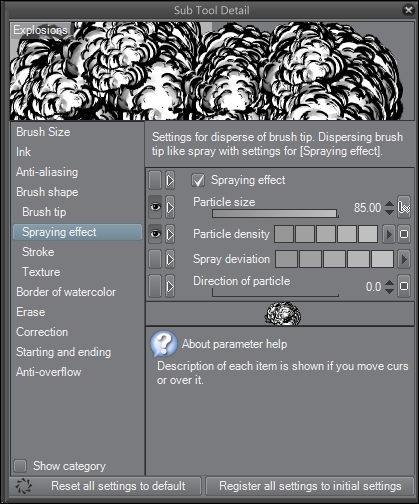
- Click on the Spraying effect settings on the left-hand side of the Sub Tool Detail screen.
- Set Particle size to
85(this number may vary, depending on the size of your brush tip material). - Click on the right-facing arrow next to Particle density to open the text entry box, shown in the following screenshot. Enter a value of
16, like this:
- Then click on the right-facing arrow next to Spray deviation to open the text entry box. Enter a value of
100, as shown here:
- The Spraying effect window should now look like what is shown in the following screenshot:
- Click on the Stroke option in the left-hand side menu in the Sub Tool Detail window.
- Set the Gap option to Fixed by clicking on the first circle icon. Then set the slider below it to
95.0, as shown in this screenshot:
- Test your new brush!
By using the Spraying effect options, we get a more random look for the brush. The "particles" (the brush tip materials) get sprayed over the canvas instead of following the line of the brush tightly and making a stroke. This allows us to get a chaotic, random look.
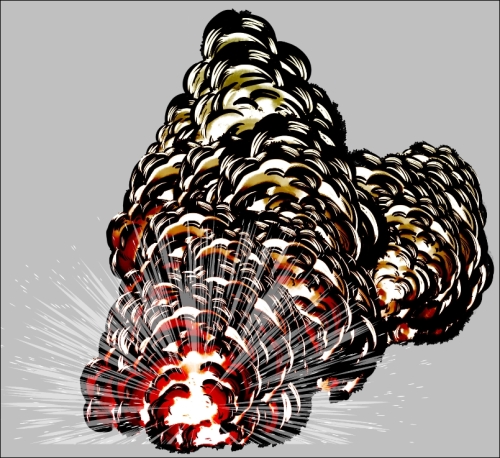
With a little creativity, the possibilities for this brush are pretty much limitless. The following drawing was made by layering a red-yellow gradient in a layer over the brush. The gradient layer was set to Color burn. Then, focus lines were added in white on the top and set to 50 percent opacity to complete the exploding fireball look!