
So far, we've played with 3D model characters and kept them as the defaults that they come in. But what if we could customize these characters and make them unique? Manga Studio 5 has options for changing not only some of the expressions and hair of the default characters that come loaded in the materials library, but also the proportions of the character. This means that we can do much more with 3D characters and make drawing dolls for our own characters as well—complete with the correct proportions!
Follow the instructions given in the Adding existing 3D objects to a page recipe before following the steps in this recipe.
Let's make a custom character look with the following recipe:
- Make sure that the Object tool under Operation is selected.
- Click on the 3D character model you wish to change.
- Following the character, a long menu will appear. The right-hand side of this menu will look like what is shown in this screenshot:
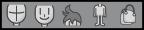
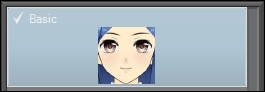
- Click on the Select face of character icon to bring up any facial options for the character. The School girl B 02 model has only a Basic face option, as shown here:
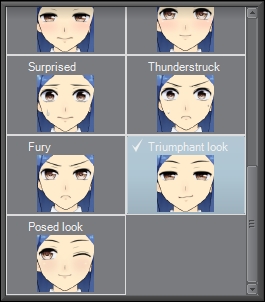
- Click on the Select facial expression of character icon to show and select from a variety of facial expressions for the character. As shown in the following screenshot, each facial expression is named and has a preview image:
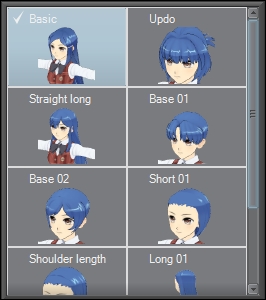
- Click on the Select hair style of character icon to show the different hairstyle options available for the character model. Most of the characters have a selection of long and short styles. Click on the desired hairstyle to select it. As shown in this screenshot, each hair style has a name and a preview image to make the selection easy:
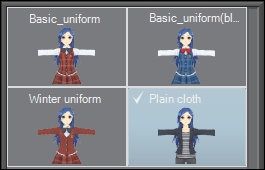
- Click on the Select body of character icon to show the clothing options for the selected character. In the following screenshot, you can see that the character has three school uniform options and one street clothes option:
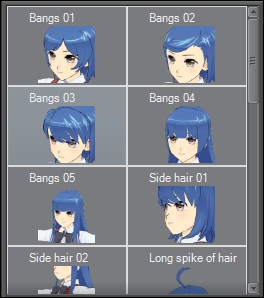
- Click on the Set display status of accessories of character icon to show additional hair options (for example, more bangs, ponytails, hair bows, and so on), as well as some other fun options, such as cat and rabbit ears. Several accessories can be displayed at once, so clicking on both Bangs 01 and Bangs 02 will overlap the bangs one on top of the other, rather than display them one at a time. The following screenshot shows some of the extra hair options:
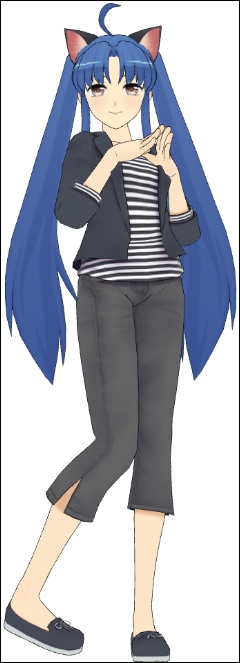
The character customization options allow us to start with a generic school girl with long, straight hair and transform her into a character with a little more personality. Perhaps, the character in the following screenshot is a cat girl from… outer space?
With a little work, some customization, and importing of a few other models, it's easy to see that even someone who doesn't want to draw 2D characters can make a 3D rendered comic with Manga Studio 5! But for those who are more interested in using the generic dolls as a reference to draw your own characters, read on!
The generic Male and Female drawing dolls don't have accessories and clothes to change. However, their body types have lots of options:
- Add a 3D drawing doll to the open page by opening the materials library and going to 3D | Body type. Click on a doll to select it and add it to the page as explained in the Adding existing 3D objects to a page recipe.
- With the 3D drawing doll selected, look at the lower menu bar that appears beneath the model's feet. On the right-hand side, you will see the following icons:

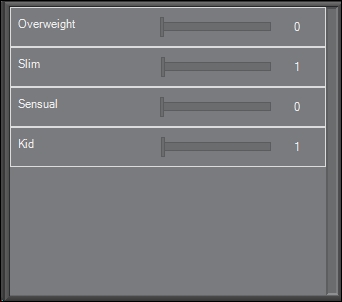
- Click on the first icon (Adjust body shape and size of 3d figure briefly) to bring up this menu:
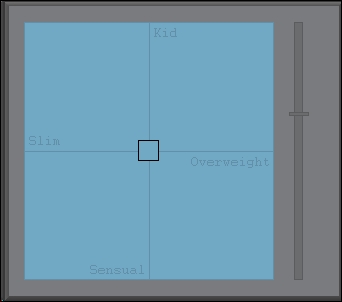
- Click on the square in the center of the quadrants and drag it around to adjust the proportions of the character. For example, to make a character with the proportions of a child, drag the square into the quadrant marked Kid.
- The slider to the right of the menu controls the height of the drawing doll. Adjust it as you like.
- This method may not give you the fine control that you want. If so, click on the Adjust body shape and size of 3d figure in detail icon. The following menu will appear:
- The sliders under this menu allow more fine-grained control over the proportions of the character. Move any slider to the right to apply more of the specific trait to the drawing doll model.
- For even more control over the model, click on the Adjust size of each part of 3D drawing figure in detail icon. Then this menu will appear:
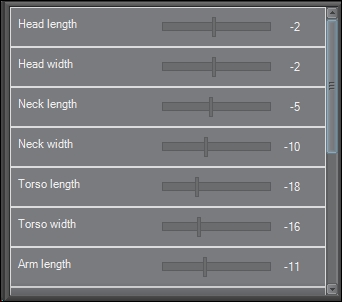
- Each slider controls one aspect of the drawing doll, as they are marked. With these detailed controls, it is possible to make even "chibi" characters, as shown in the following screenshot:
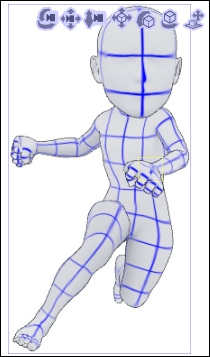
This "chibi" doll was made by increasing the width and length of the head and decreasing the torso, leg, and arm lengths. The arm width and torso width were also decreased.
After the doll had been posed, a new layer was created above the 3D doll. Then the doll was used as a basis for the drawing shown here:
