
A foliage brush is an adaptation of a free brush that is available from Smith Micro. At the time of writing this book, the brush is available at http://my.smithmicro.com/manga-studio-ex-5-free-content.html as Leaf in middle distance.
For this brush, we'll need to make a material and then use it to make a brush that "rolls out" like a ribbon:
- Open a new canvas with at least 300 dpi resolution.
- Draw a row of leaves, similar to the top of a tree or a bush.
- Fill the leaves with white color. Use the following screenshot as a guide to create the leaves' shapes:

- Turn off any visible Paper layers or other fills.
- If needed, combine the leaf outline layer and the fill layer. There should now be only the leaf outlines and the white fill visible on the canvas. The background should be transparent.
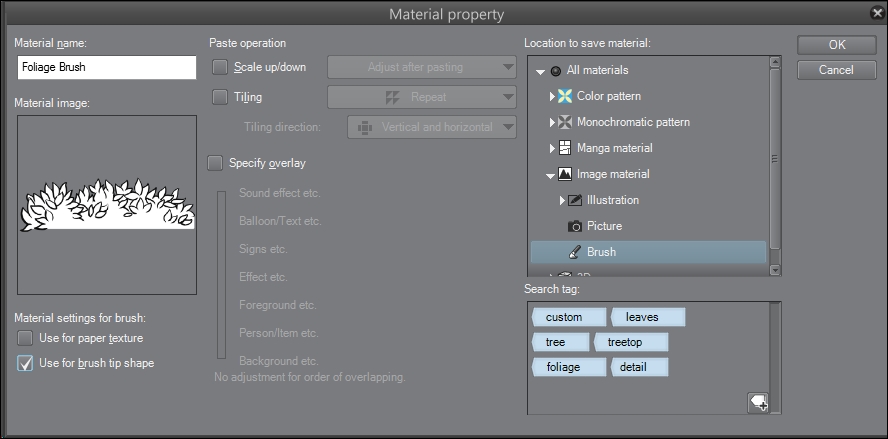
- Go to Edit | Register Image as Material.
- Name the material using a descriptive title.
- Double-check the Material image preview to make sure that the space around the leaves is transparent (it will have the same gray color as the rest of the Material property window).
- Beneath Material image, check the box marked Use for brush tip shape.
- Choose the Brush folder, which is under Image material, to save the new material in.
- Add some tags to the Search tag box. Refer to the following screenshot for suggestions:
- Click on OK.
- Select the Decoration tool from the Manga Studio toolbox.
- Under the Vegetation category, select the Grass A tool. Click on the Create copy of currently selected sub tool icon in the bottom-right portion of the Sub Tool [Decoration] palette.
- Name the new subtool with something descriptive.
- In the Tool property palette, click on the wrench icon in the bottom-right corner to open the Sub Tool Detail palette.
- Click on Ink on the left-hand side of the palette. Ensure that Opacity is set to
100and Combine mode is Normal. - Click on Anti-aliasing on the left-hand side of the palette. The anti-aliasing should be set to None.
- Select Brush tip from the left-hand side of the Sub Tool Detail palette. If the brush has a material currently loaded under Tip shape, select that material and click on the delete icon.
- Once any existing material has been deleted from the brush, click on the Add brush tip shape icon directly to the left of the delete icon.
- Search for and select the material created in steps 1-12 of this recipe. Then click on OK.
- Set Thickness to
100. - If the brush tip shape appears vertical instead of horizontal, set the Direction value to
100. Note that the following screenshot shows the direction set to0.0, and the brush tip shape is loading vertically in the preview at the top of the screen:
This screenshot, on the other hand, shows Direction set to
100:
- Click on the box to the right of the slider for the Direction settings to open Set to change parameter by pen pressure or velocity of tablet. Deselect the checkbox next to the Random option.
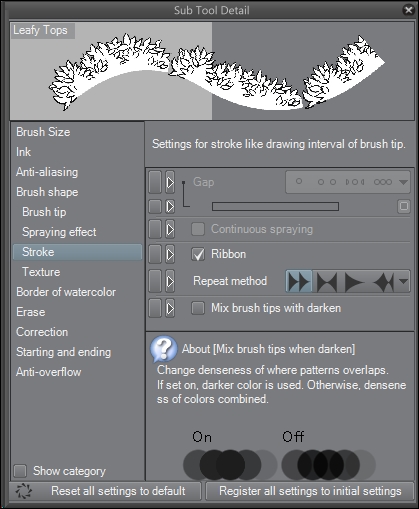
- Click on Stroke on the left-hand side of the Sub Tool Detail screen. Click on the checkbox next to Ribbon to activate this option. Refer to the following screenshot:
- Test out your new brush!
This brush works best when it's used in layers. To understand what I mean, look at the process of creating the top of a tree.
After sketching the trunk of the tree and the general shape of the leaves, use the brush to go around the outline of the top. Work in a clockwise direction to ensure that the bottom leaves are in the correct orientation. Look at the following figure and note the direction of the arrows. This is the direction to work in:
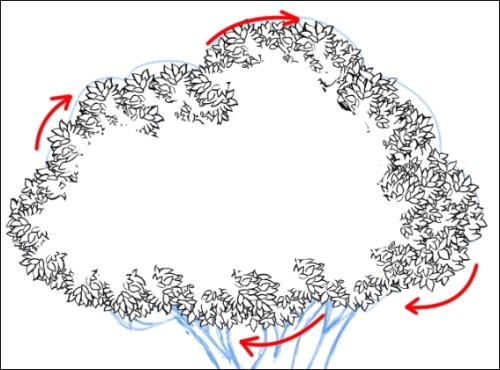
This doesn't look bad, but it could look better. Continue working in a clockwise direction, but now inside the first layer of leaves, as shown in this screenshot:
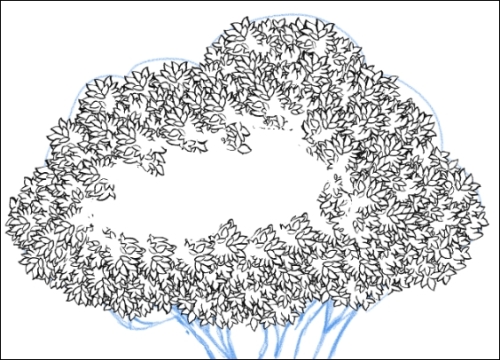
Finally, fill the empty space to smooth it all out. The following screenshot shows the tree all filled, using nothing but our foliage brush!
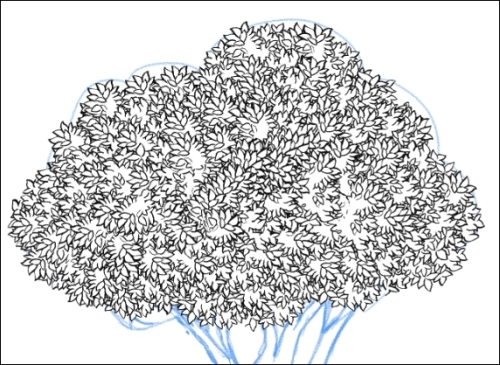
By using the Ribbon setting, we get a brush tip that repeats in a line, like the pattern printed on a spool of a ribbon. It will "unroll" as we use the brush. Layering the leaves then gives a lively finished product with lots of details!