
By building on the Simple frill tool (found under the Clothing subtool in the Decoration) as a guide, we'll create a ruffled brush suitable for a magical girl or a sweet Lolita outfit!
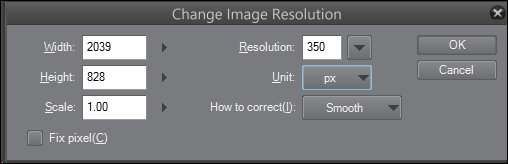
To start off, we'll need a blank canvas of at least 300 dpi. This screenshot shows the height, width, and dpi settings for the canvas used in this recipe:
Here are the steps to be performed to make a frilly, fluffy brush for use in your art:
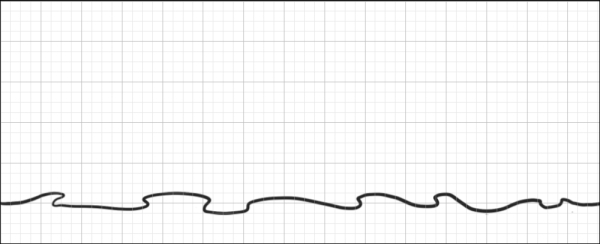
- First, we need to draw our ruffle for the brush tip. Start by going to View | Grid to make grid lines visible on the canvas.
- On a new raster layer, draw a wavy, uneven line near the bottom of the canvas. This line should touch the sides of the canvas on the same grid line on both the left and the right sides. Refer to the following screenshot for an example:
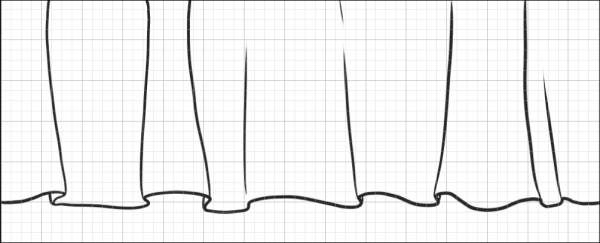
- Draw lines up from the curves on this line to make gathers in the fabric. Refer to this screenshot to understand how to do it:
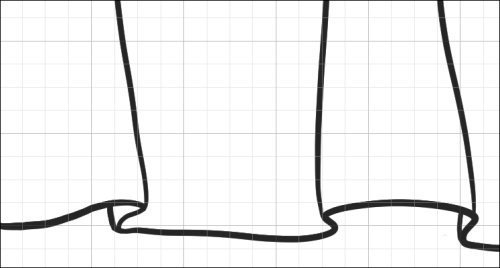
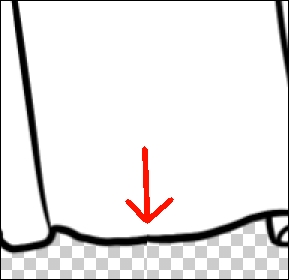
- Any parts of the main line where it curves under itself should have a short line drawn upward from the tip of the curve to the main line. This is where the fabric curls up under itself as it gathers in the ruffles. Check out the following screenshot to understand this better:
- Delete the Paper color layer, if applicable. The canvas should now have the outlines of the ruffles and a transparent background.
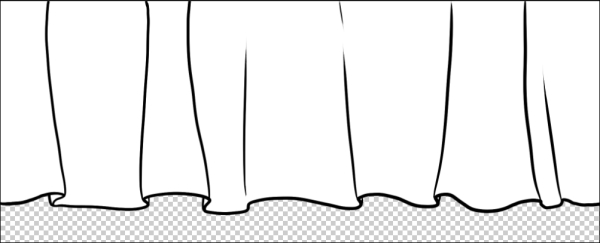
- Create a new layer beneath the ruffle outlines. Fill the ruffle outlines with white. Now the image should have a white ruffle with black outlines and a transparent background, as shown in this screenshot:
Tip
At this point, we may want to check whether our ruffle pattern is going to repeat seamlessly when we make it into a brush. One way of doing this is by exporting the current image as an image file. Open the exported image and then navigate to Edit | Change Canvas Size. Multiply the width by 2 and enter the new width. Select either the left or the right edge of the canvas to scale from by clicking on the appropriate box on the grid. Then, duplicate the image and drag it with the Move Layer tool so that the left edge of one copy is up against the right edge of another. By doing this, we can catch any spots where the pattern does not match up. While performing this recipe, I discovered that I needed to thicken the line on the left-hand side of my ruffles. This was because the lines did not match up perfectly, as shown here:
- Create a new raster layer above the white fill layer. Select a light gray color.
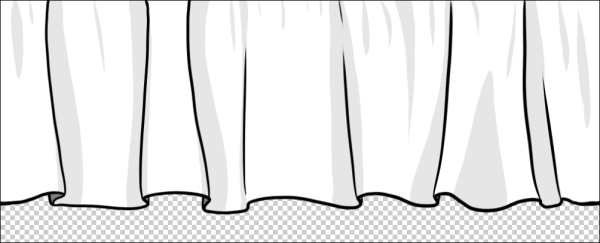
- Shade the ruffles using your preferred method, making sure that you pay attention to where the fabric bends back on itself, as these areas would be in shadows. The following screenshot shows how to make a selection with the Lasso Marquee tool and fill it with light gray:

- Continue adding details until you are satisfied. In the next screenshot, shading has been added to the top edge of the ruffles to complete the "gathered fabric" look:
- Once the ruffle artwork has been completed, navigate to Layer | Merge Layers to combine the art into a single layer. The background should still be transparent!
- Go to Edit | Register Image as Material.
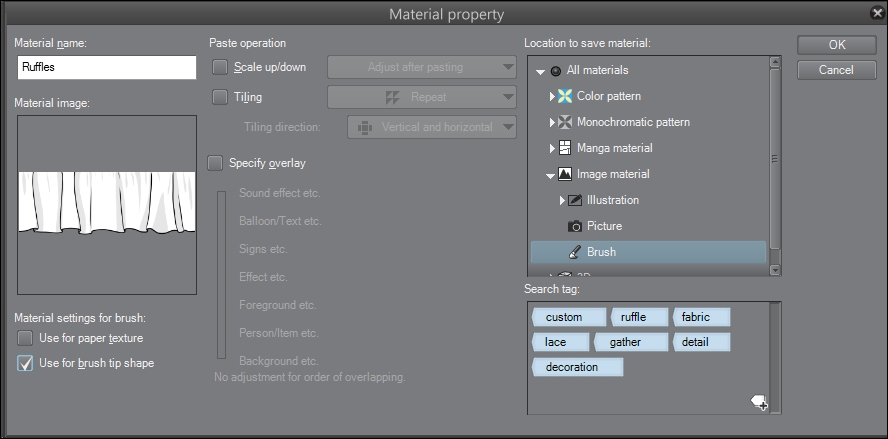
- Give the material a descriptive title.
- Double-check the Material image preview to make sure that the space around the leaves is transparent (it will have the same gray color as the rest of the Material property window).
- Beneath Material image, check the box marked Use for brush tip shape.
- Choose the Brush folder, which is under Image material, to save the new material in.
- Add a few tags to the Search tag box. Refer to the following screenshot for suggestions:
- Click on OK in the Material property window.
- Select the Decoration tool from the Manga Studio 5 toolbox.
- Choose the Clothing category of Decoration tools. Then select the Simple frill tool.
- Click on the Create copy of currently selected sub tool icon in the bottom-right part of the Sub Tool [Decoration] palette.
- Name the new brush tool using a descriptive title.
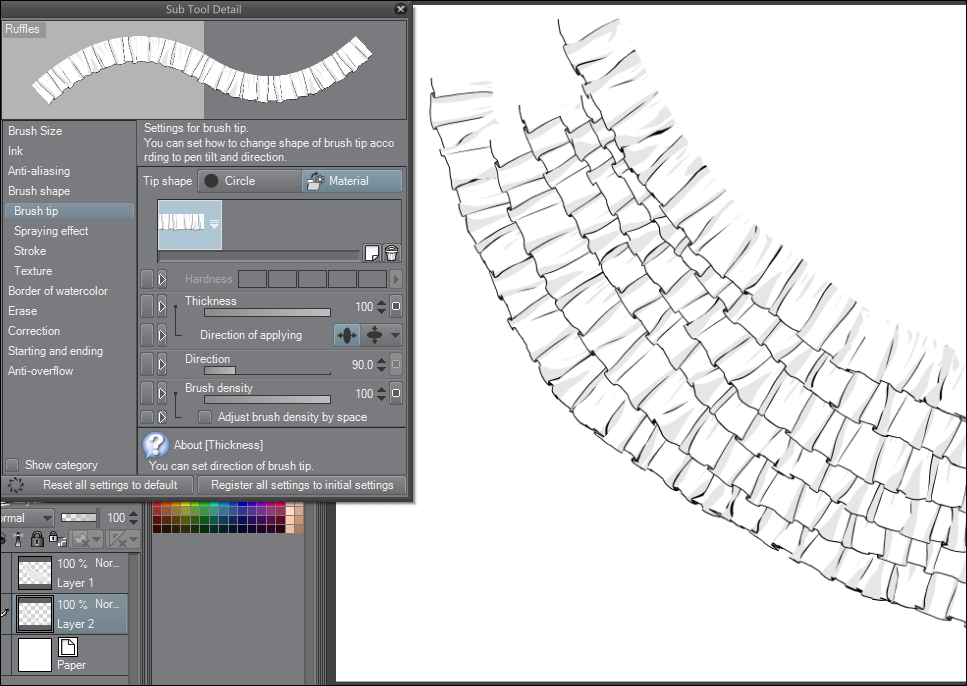
- In the Tool property palette, click on the wrench icon in the bottom-right corner to open the Sub Tool Detail palette.
- Click on the Brush tip option.
- Delete the existing brush tip materials by selecting them one at a time and then clicking on the Delete selected brush tip shape icon under the Material box.
- Click on the Add brush tip shape icon directly to the left of the delete icon.
- Search for and select the material created in steps 1-18 of this recipe. Click on OK.
- There should not be any other settings to change, because the Simple frill brush is already set to the Ribbon stroke option. Test out your new brush! Shown here is a screenshot from a test to see whether the brush settings are correct:
Using the grid lines, we ensure that the sides of the ruffle pattern will line up and repeat seamlessly. After all, we don't want a bumpy, lumpy seam in our cute ruffles! This is the same concept as the one when we used the grid to draw our custom material in the Creating a cracked detail brush and Making a fabric trim brush recipes.
As an illustration of a potential application of this brush, here is a screenshot of a three-tiered, Lolita-style skirt that uses our ruffle brush between each tier:
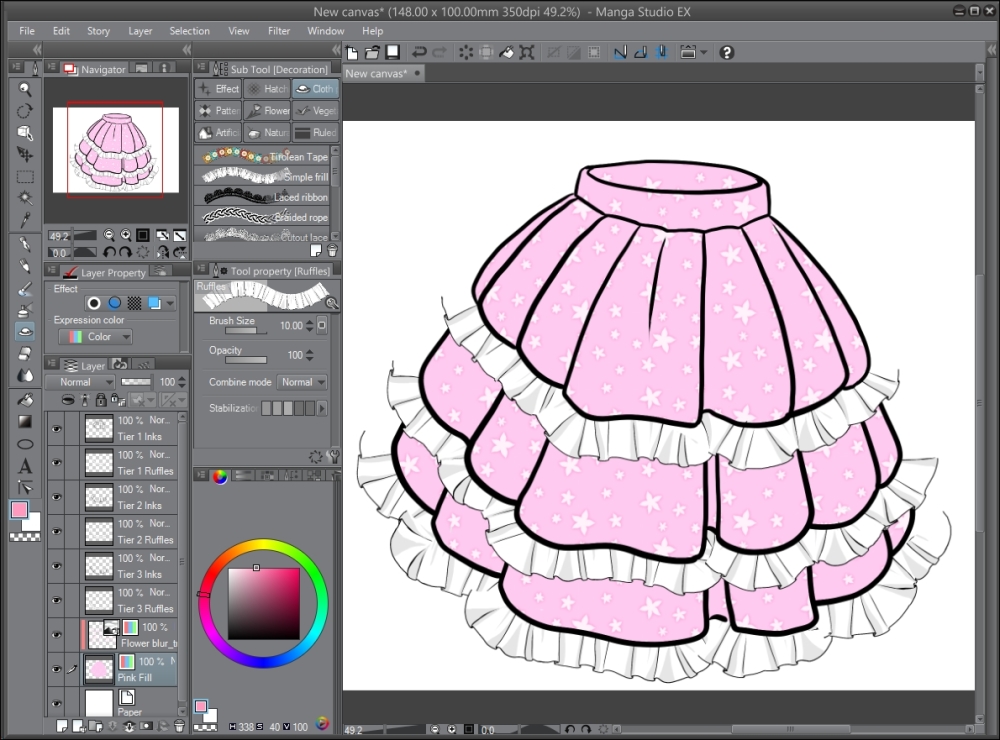
The individual tiers are each inked on their own layers. Then, between each layer of outlining, the ruffle brush has been used to add a single layer of detail. The pink fill color and the cherry blossom pattern are their own layers each, underneath the outlines of the tiers and the layers with the ruffle brush application on them.
Complete the image with finishing touches and the illustration is ready to go!