
Making a precise selection can be frustrating and time-consuming. The Shrink selection tool solves this problem by allowing us to draw a rough selection and then having the program refine it automatically. Let's learn how to use it now!
You will need a file open, and it should have at least one layer with content (a sketch, an ink drawing, a photo, and so on) inside of it.
Follow these steps to use the Shrink selection tool:
- Select the Marquee(M) tool from the toolbox. Then, select the Shrink selection subtool.
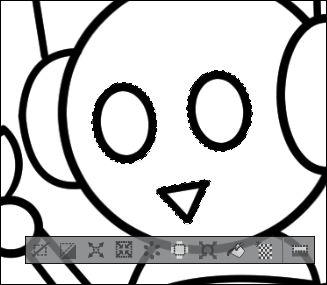
- Using the mouse or stylus, draw around the area to be selected. In the following screenshot, the robot's facial features are what I want to select, so I've drawn a rough area around them with the tool:

- When the selection is completed, the tool will automatically shrink down to select the outer edges of all areas inside the area we drew around in step 2. Refer to the next screenshot and note how the facial features are now cleanly selected:
Note
The areas to be selected by the Shrink selection tool must be surrounded by transparency. In the preceding example, if we tried to use the Shrink selection tool to select the robot's head and move it away from the body of the robot, the tool would not work, because the black ink lines of the body intersect with the lines of the head.