
Symmetry is the quality of being made up of exactly the same parts, either facing the other, around an axis. To make a symmetrical drawing, you can draw half the object and then mirror it, or you can use Symmetry ruler!
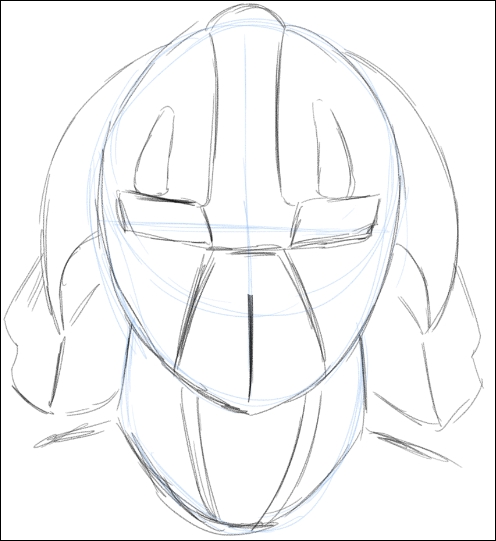
You will need a sketch of something to mirror, of course! In this recipe, the demonstration will be of this sketch of a robot's head:
The following steps will walk us through the use of Symmetry ruler:
- Select the Figure tool. Then, select the Symmetrical ruler subtool, which is under Ruler.
- Click and hold the mouse on the drawing; then, drag out a line. This is the line that your drawing will be mirrored about. The dark line shown down the center of the face in the following screenshot is our Symmetrical ruler:

- If adjustments need to be made to the ruler placement, select the Object tool under Operation and click on the ruler. The circular handles control the rotation of the ruler. Clicking and dragging on the ruler line will allow you to reposition the ruler on the drawing. The diamond handle turns the ruler on or off.
- Select the drawing tool of your choice and follow the lines. You may find that selecting one side of the drawing and only following the sketch on that side is best. The robot face shown here was completed by following the lines on the left-hand side of the ruler:

We can add lines of symmetry to the ruler to make a kaleidoscope-like effect by performing the following steps:
- Select the Figure(U) tool. Then select the Symmetrical ruler subtool, which is under Ruler.
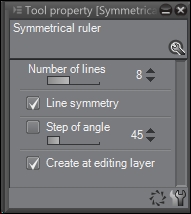
- In the Tool property palette, adjust the Number of lines option using either the slider or the up and down arrows to the right of the option. The following screenshot shows the settings used for this recipe:
- Click on the drawing canvas and hold the mouse button down while dragging out a line. This will determine a spoke of your ruler.
- If adjustments need to be made to the ruler placement, go to Operation | Object and click on the ruler. The circular handles control the rotation of the ruler. Clicking and dragging on the ruler line will allow you to reposition the ruler on the drawing. The diamond handle turns the ruler on or off.
- Select the drawing tool of your choice and finish your drawing! The next screenshot shows an image made with the G-pen tool. Note the lines that show where the drawing was mirrored to make the design.

..................Content has been hidden....................
You can't read the all page of ebook, please click here login for view all page.