The previous method is great for applying tones or background images to a large area. But when using traditional screentones, the tones are cut to fit a space in the drawing and then applied to that area. We can do something similar by making a selection and then filling it with a tone.
Again, you will need an open file. The size and resolution don't matter. In this recipe, we are using a blank canvas, but you can also do this with a drawing that you have previously completed.
The following steps will teach you how to add a screentone to a selected area:
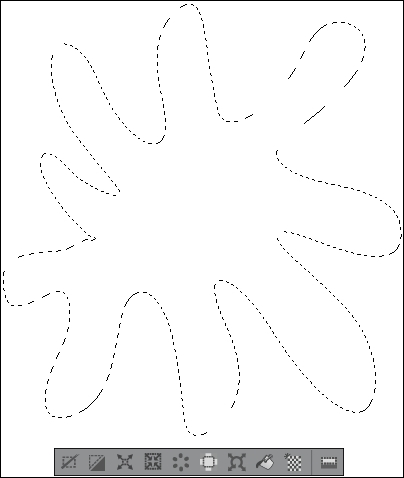
- Use a selection tool to select an area. This screenshot shows a selection made with the Lasso Marquee(M) tool:
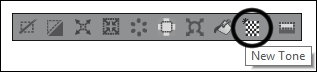
- In the selection bar beneath the selection, click on the New Tone icon. It is shown circled in the following screenshot:
- Choose the desired settings from the menu that appears. It is shown in this screenshot:
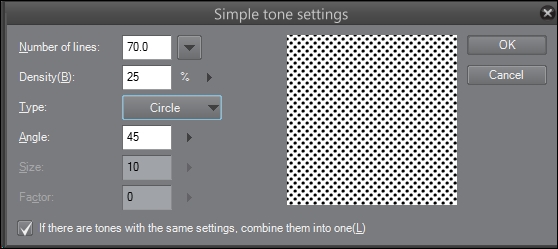
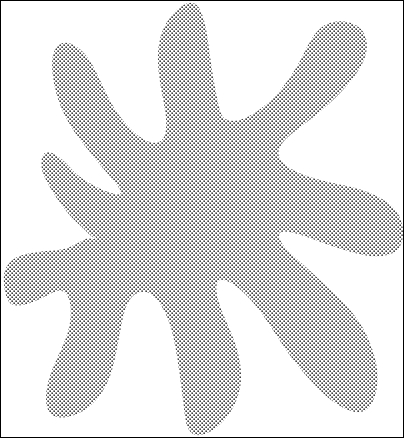
- Click on OK. The selected area will be filled with the tone options from the previous step. The following screenshot shows the selection filled with a screentone of 25 percent density:
Let's talk about the settings available in the Simple tone settings menu, which we looked at in step 3.
Number of lines is the number of lines in the screentone. Think of this as the dpi of the tone. A tone with 27.5 lines will be composed of much larger individual dots than a tone with 85 lines. In the recipe, we have used 70 lines, resulting in fairly small dots in the tone.
Density(B) is a measure of how dark the tone is. This can be anywhere from 1% to 100%; 1% means very tiny individual dots, which are barely noticeable, and 100% density means pure black.
Type is the shape of the dots in the tone. Our "dots" don't have to be circles! Manga Studio 5 gives us the option to use lines, flowers, diamonds, and hearts.
Angle is the angle of the lines in the tone. In this recipe, we have used 45 as our angle, so the lines of the dots run at a 45-degree angle to the page. Different angles produce different looks, so feel free to play around with the setting to see which one you like the most!
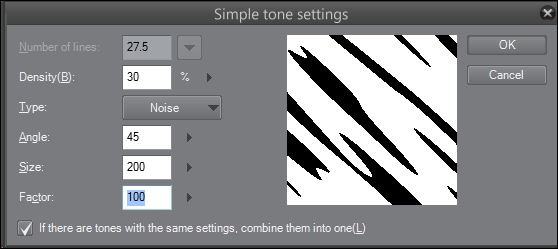
Both the Size and Factor options are available only if you are using the Noise type. Size controls the overall size of the Noise pattern. The higher the value of Factor, the more stretched the noise along the angle setting. Note that in the following screenshot, the angle is set to 45, Factor is set to 100, and the noise particles are elongated along the angle: