
Before you can install OpsMgr, you need to deploy a SQL environment to host the databases. A full installation of SQL is relatively straight-forward and you can refer to http://tinyurl.com/sqlinstall for a step-by-step walkthrough of SQL 2014 (the steps in this link are also applicable for SQL 2012 R2 and SQL 2016).
There are however, a few pointers that you need to take into account when deploying SQL with OpsMgr and this section will help you avoid some of the common pitfalls that people encounter.
During the installation of SQL, you will be asked to choose the features that you want installed into your new instance. A database requirement of OpsMgr is that the Full-Text and Semantic Extractions for Search feature shown in Figure 2.5 is selected and this is something that a lot of people miss when deploying OpsMgr for the first time.

Figure 2.5: Choosing the Full Text Search feature
Further on through the SQL installation wizard and at the Server Configuration dialog box, change the SQL Server Agent service startup type to Automatic (the default setting here is Manual). If you don't make this change now, the OpsMgr prerequisite checker will pick up on it later and you will need to revisit this step.
Staying at the Server Configuration dialog box and clicking on the Collation tab, you will be presented with an option for the database engine SQL Collation setting as shown in Figure 2.6.
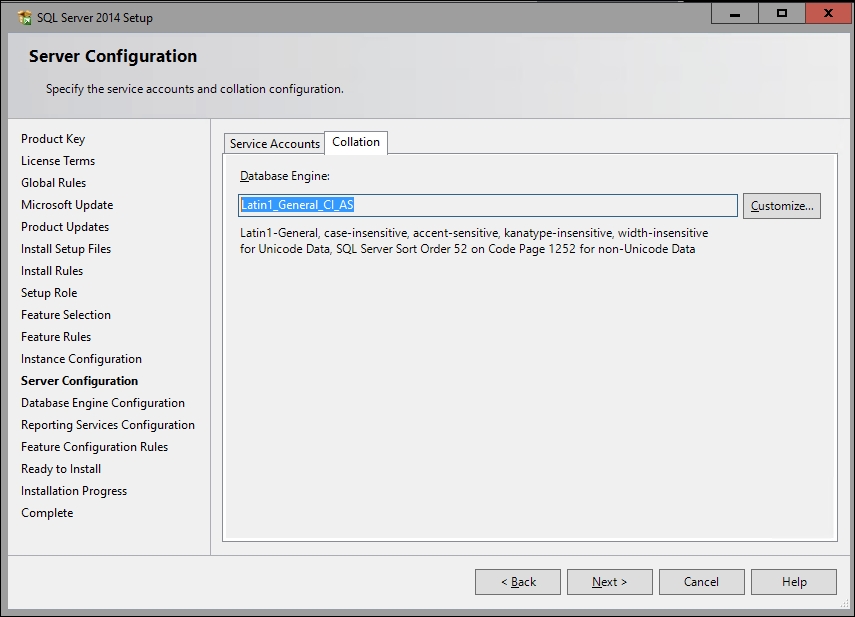
Figure 2.6: Configuring SQL collation
Now, depending on the version of OpsMgr that you are planning to install, this collation setting could become very important. For example, prior to OpsMgr 2012 R2, there were very specific SQL collation settings that needed to be applied depending on the language locale of the system and type of data that you store in the databases.
If you are working through the steps in this book to help you deploy an older version of OpsMgr, then we highly recommend you first read through this post from Microsoft - http://tinyurl.com/sysctrcollation and then configure your SQL collation accordingly.
For OpsMgr 2012 R2 and higher, the requirement for changing your SQL collation setting on English systems has been removed and there's no need to change it from the default setting.
During the SQL installation wizard and at the Database Engine Configuration dialog box, you will be prompted to specify an Authentication Mode setting. For OpsMgr, it is recommended to configure this setting using the Windows authentication mode option.
Also at the Database Engine Configuration dialog box, you will be prompted to specify your SQL Server administrators for the instance. If you've already created the OpsMgr service accounts and added them to the security group as suggested earlier in this chapter, then you can specify that the security group is a SQL Server administrator as shown in Figure 2.7.
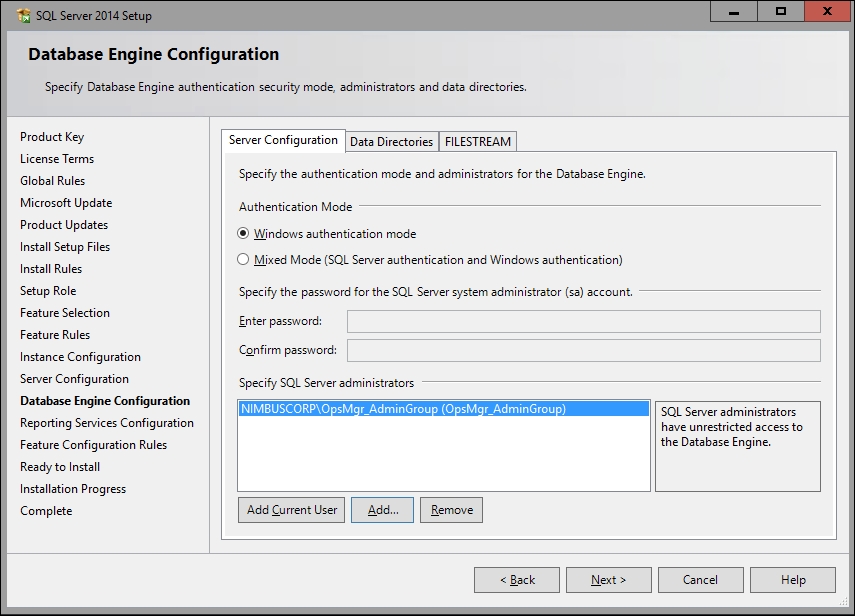
Figure 2.7: Adding SQL administrators
The benefit of adding the security group that contains your OpsMgr service accounts here is that all of the relevant permissions are now in place for the OpsMgr installation to do its job.
Any time you deploy an instance of SQL, it is best practice to assign a designated amount of memory to that particular instance. The reason for this is that by default, the SQL installation wizard configures the new SQL instance to use up all of the available memory on your server – leaving nothing for the operating system!
This clearly isn't an optimal configuration and over a short period of time, if left as it is, your SQL Server will slowly grind to a halt as the operating system doesn't have the memory resources it needs to support itself.
Changing this setting is easy when you use the SQL Server Management Studio and connect to the SQL instance that hosts your OpsMgr databases. When the instance opens, you can view its properties by right-clicking on the instance name and selecting the Properties option as shown in Figure 2.8.
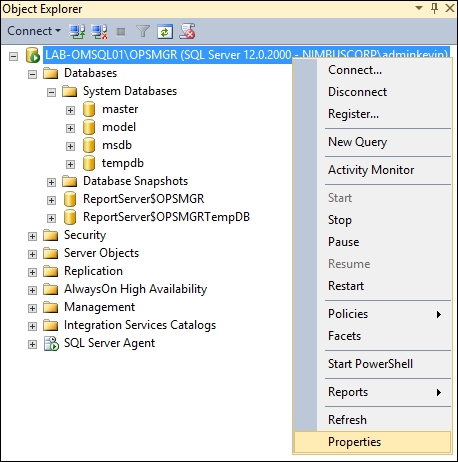
Figure 2.8: Access the SQL instance properties
Inside the Server Properties dialog box, click on the Memory page from the navigation menu on the left, then input the amount of memory that you wish to allocate to this SQL instance. You can see from Figure 2.9 that we've allocated a total of 8192 MB (or 8GB) of memory to this instance.
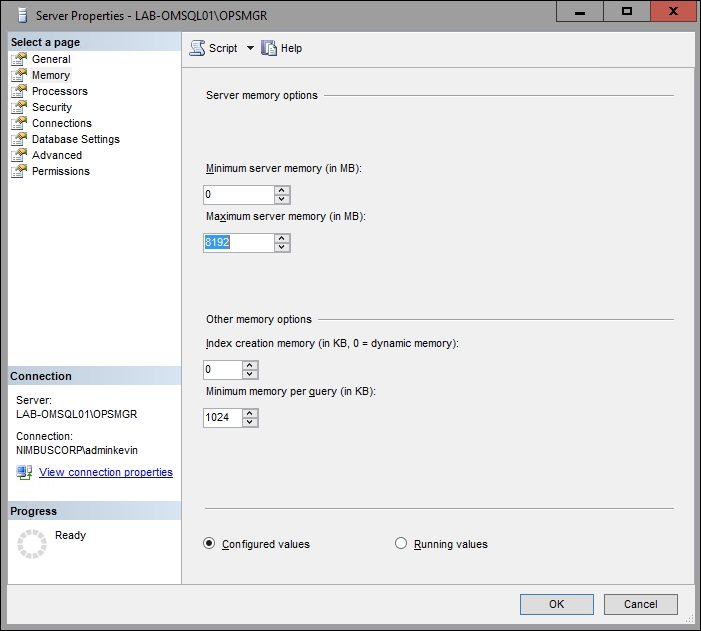
Figure 2.9: Configuring SQL Maximum Server Memory
As a general rule of thumb when trying to work out how much memory you should allocate, it's recommended that you leave anywhere between 2GB and 5GB for the operating system – depending on how much physical memory you have to work with in the first place. Check out this post from System Center MVP Stefan Roth for more information on performance tuning for your SQL Server - http://tinyurl.com/sqlperftuning
There are many other options – including High Availability - you can apply to the SQL infrastructure that will be responsible for running your OpsMgr environment and if you want to learn more, then you can download an excellent free whitepaper from System Center MVP Paul Keely at http://tinyurl.com/sysctrsql.