
Now that you have an understanding of the discovery process, it's time to monitor some network devices and this section will walk you through the process. Before you begin though, ensure that all the previously discussed requirements are in place and confirm that the IP addresses or DNS names of your network devices are correct.
Tip
If you're working through the steps in this book in your lab and you don't have any network devices to monitor, then take a read through Cameron Fuller's blog post on using the free and very useful Xian SNMP Device Simulator tool from Jalasoft. This tool gives you the ability to simulate network devices using SNMP v1, v2c and v3 authentication. http://tinyurl.com/snmpsimulator.
Here's what you need to do to begin monitoring your network devices:
- From the Administration workspace in the OpsMgr console, expand the Network Management view.
- Right-click on Network Management, then click Discovery Wizard as shown in Figure 6.1 (you can also choose to click on the Discovery Wizard… link located above the Wunderbar).
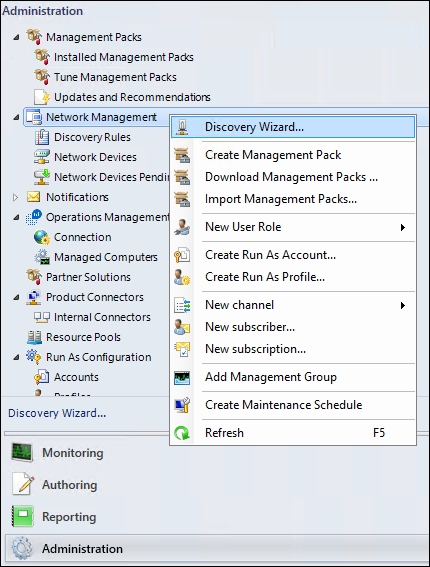
Figure 6.1: Opening the Discovery Wizard
- From the Computer and Device Management Wizard, select the Network Devices option as shown in Figure 6.2, then click Next to continue.

Figure 6.2: Choosing the Network Devices wizard
- At the General Properties dialog box, enter a name and a description for the discovery rule, select the management server or gateway server that will run the discovery and then choose a resource pool created specifically for network monitoring as shown in Figure 6.3. Click Next to move on.
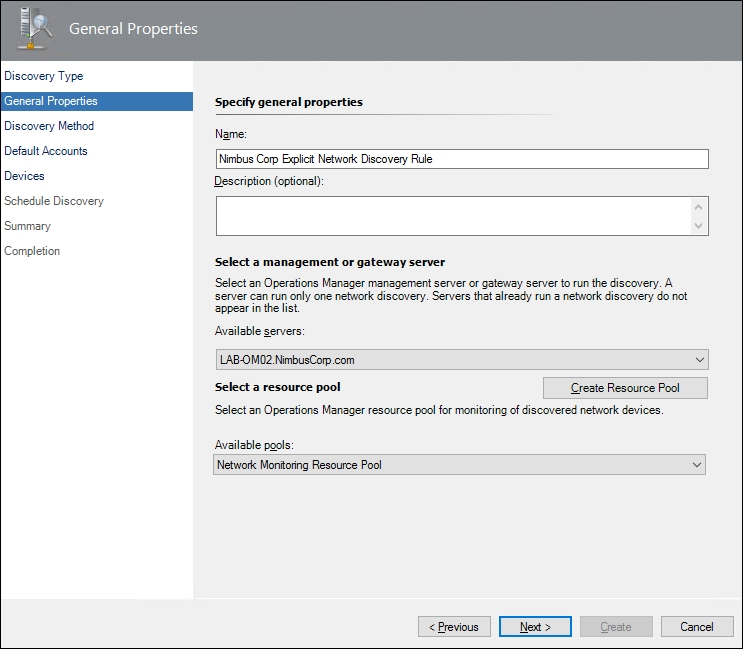
Figure 6.3: Configuring the discovery rule
- From the Discovery Method dialog box, select the discovery type you want to use, as shown in Figure 6.4, we'll choose the Explicit discovery option, then click Next to continue.
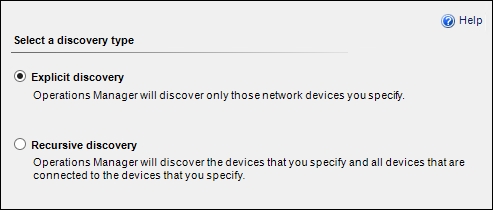
Figure 6.4: Choosing a discovery type
- In the Discovery Settings dialog box, you can create a new SNMP v1/v2c Run As account or use an existing one. If you use different SNMP community strings on different network devices, then you'll need to create separate Run As accounts for each device. Figure 6.5 shows an example of multiple Run As accounts being selected for a network discovery. Click Next to continue.
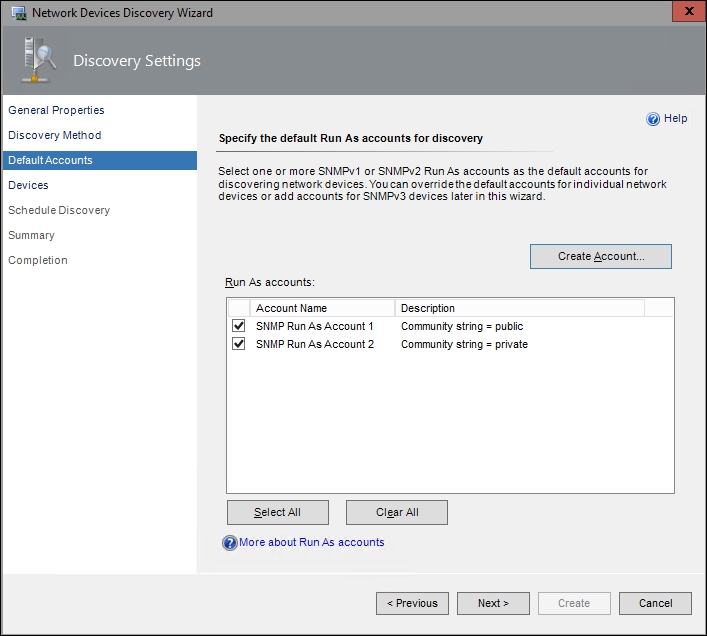
Figure 6.5: Specifying Run As accounts
- From the Devices dialog box you can choose to either hit the Import button to import a text file containing the IP addresses of your network devices (very useful when you have more than a few devices to monitor), or you can click the Add button to specify an individual network device. For this example, we'll click the Add button.
- In the Add a Device dialog box, input an IP address or DNS name for your network device, choose which access mode you wish to use (SNMP, ICMP or both), select the SNMP version you wish to use (you can configure an SNMP v3 account at this point if you wish), then leave the Use selected default accounts option enabled, as shown in Figure 6.6 and hit OK.

Figure 6.6: Configuring discovery settings
Tip
When configuring the Access Mode setting for a device, be aware that if you leave it as the default ICMP and SNMP option, then both access types must succeed before proceeding. This means that if ICMP can't Ping the device or SNMP can't connect, then the discovery fails. This is useful to know in case you have an internal firewall policy that blocks ICMP (Ping) traffic. In most cases, it's best to choose either one or the other and not both here.
- In Figure 6.7 you can see some network devices specified and if you want to modify the number of retries and timeout thresholds, you can click the Advanced Discovery Settings button now. When you're happy enough to move on, click Next.
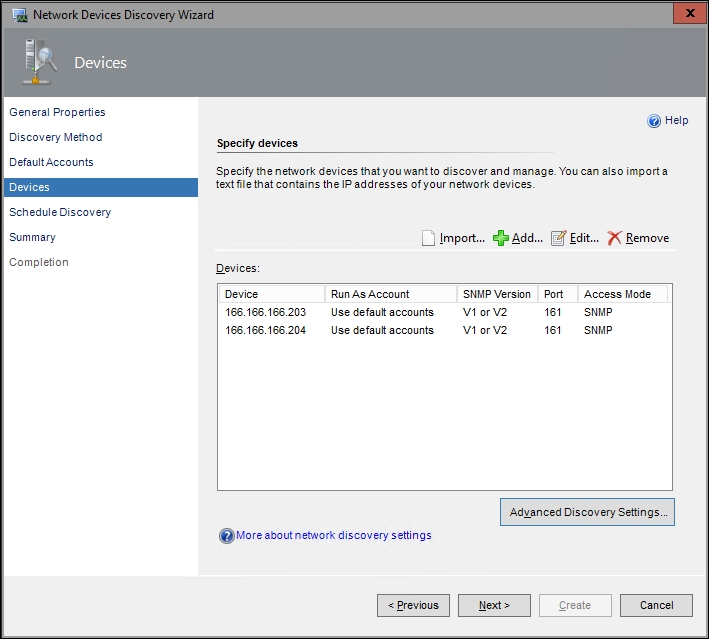
Figure 6.7: Configuring discovery settings
- In the Schedule Discovery dialog box, choose to run the discovery rule on a schedule, or to just run it manually. Running the discovery rule on a schedule can be useful if you work in an environment where network devices are added and removed on a regular basis or it can also be helpful if you want to minimize discovery traffic during office hours. As shown in Figure 6.8, we'll choose to run our discovery rule manually.
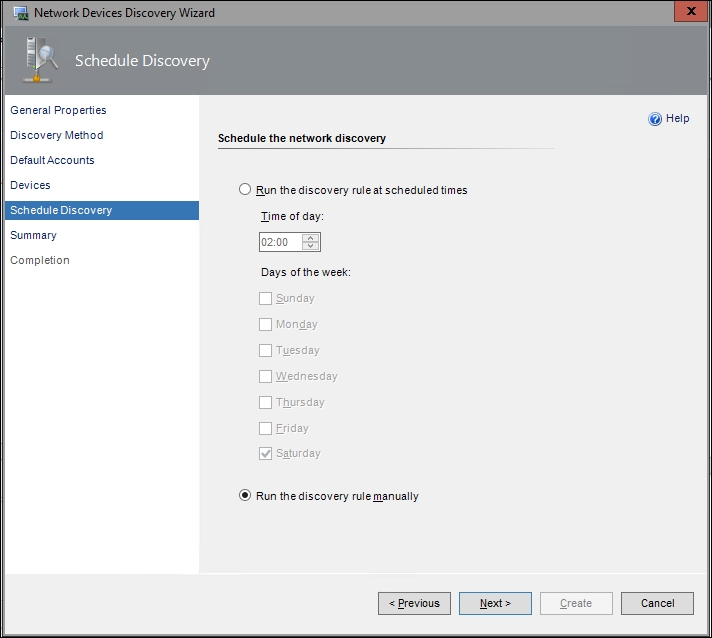
Figure 6.8: Choosing when to run the discovery rule
- Click Next to move on; at the Summary dialog box, hit the Create button to create your new discovery rule.
- If you see a warning pop up indicating that you need to distribute the new Run As accounts to the management server, click Yes to do so before clicking on the Close button to close the wizard and run the discovery rule automatically.
- When the discovery rule is finished processing, you should be able to see the number of network devices you specified show up in the Last Discovered column as shown in Figure 6.9.

Figure 6.9: Successful processing of a discovery rule
From time to time, it's not uncommon to have a device (or a number of devices) fail to be discovered. This can be a problem if you don't know where to find a list of these failed devices. In this instance, the failed device or devices will be listed in the Network Devices Pending Management view from within the Network Devices section of the Administration workspace.
Once you've located the failed devices, you can use one of these options to try to rediscover them again:
- Right-click on the failed device from within the Network Devices Pending Management view and then click Submit Rediscovery.
- Rerun the discovery rule by right-clicking on the rule and selecting the Run option.