
With your Management servers installed, we need to now concentrate on installing the OpsMgr Reporting server role. For this, you will need to have a server running SQL Server Reporting Services (SSRS) in Native Mode. This SSRS instance will be used exclusively by OpsMgr and cannot be shared with any other products due to the security model it operates within.
Tip
Prior to installing the OpsMgr Reporting Server role, the SSRS instance should be pre-configured in Native Mode. This is the default option selected for you when you deploy SSRS on the same server as the Database Engine Services feature and the SQL installation wizard will automatically configure SSRS in Native Mode for you. If you chose to not install SSRS on the same server as the Database Engine Services instance, then you will need to use the SQL Reporting Services Configuration Manager to manually configure the server for Native Mode.
Here's what you need to do to get the OpsMgr Reporting server role deployed:
- From the OpsMgr installation media, right-click on
setup.exeand choose 'Run as administrator' to begin. - From the splash screen that opens up, choose whether or not you wish to download the latest updates to the setup program and then click on Install.
- In the Select Features to Install dialog box, choose the Reporting server option then click on Next to continue.
- Let the prerequisites check complete and click on Next to continue.
- Accept the license terms at the next dialog box and then click on Next.
- Specify the name of the first management server that you installed into your Management Group as shown in Figure 2.19 and click on Next to move on.
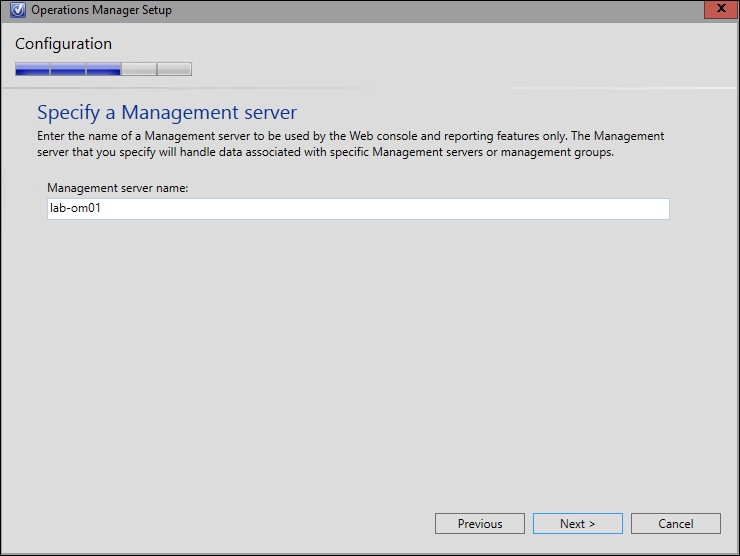
Figure 2.19: Specifying a Management server for the Reporting role
- In the next dialog box, choose the name of the SQL Server instance that you wish to host SSRS on, then click on Next.
- Configure the Data Reader account credentials as shown in Figure 2.20, then hit Next.

Figure 2.20: Configuring the Data Reader account
- Click through to the Microsoft Update dialog box and choose whether or not you'd like to use Microsoft Update to deliver automatic OpsMgr updates, then click on Next to continue.
- Finally, review everything that you have entered at the Installation Summary dialog box and hit Install to begin the Reporting server installation.
- When the process has completed, you can confirm your Reporting Server is working by launching the Operations console and confirming the Reporting tab is present in the navigation bar. After a few minutes, similar to Figure 2.21, you should see reports populating in the relevant folders. Be aware that it can sometimes take up to 30 minutes for this process to occur after the Reporting role has been deployed.
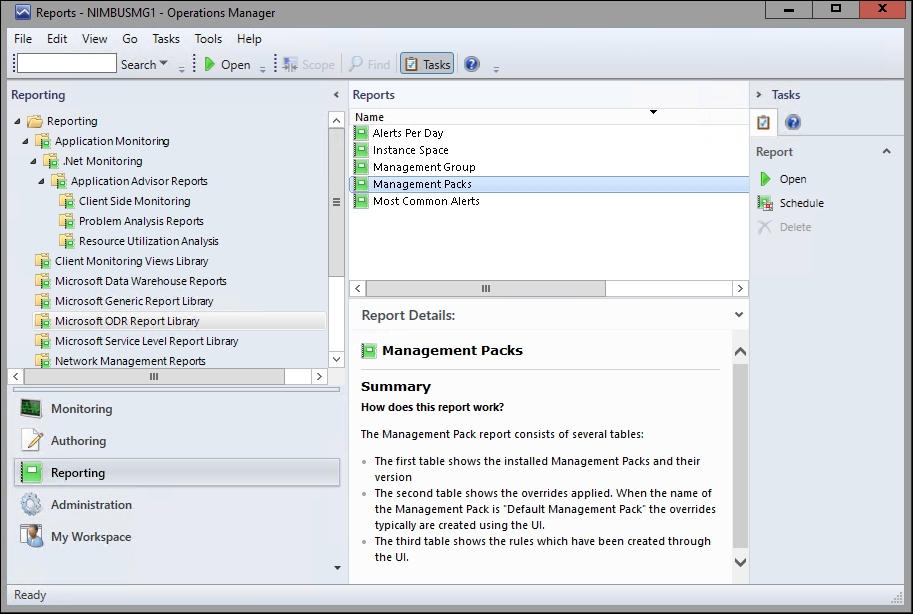
Figure 2.21: Confirming the Reporting Role
- Double-click on one of the reports from the Microsoft ODR Report Library and a new report should generate automatically. This confirms the Reporting server role is functioning properly.