
If you want your subscribers to receive alert notifications for specific alerts over a given notification channel, then you'll need to configure a subscription to tie all of the notification components together.
The process of creating custom subscriptions is very similar to the wizard-driven process of creating rules in Microsoft Outlook to determine how e-mails are handled when they're received. Criteria conditions are specified within the subscription to determine if and when alerts will be sent to specific subscribers. Using the console, you can create a new custom subscription from scratch through the Administration workspace or you can create a targeted subscription direct from an alert within the Monitoring workspace.
When configuring new alert subscriptions, it's a good idea to plan the types of alerts that you wish to send to subscribers. For example, you might decide to only send alerts with a resolution state of New and a severity of Critical to operators working outside normal business hours. This type of subscription will ensure that the on-call team don't get woken up during the night for alerts that may not be too important and it will help to increase confidence in the monitoring solution for everyone involved in managing the IT estate.
To create a new subscription from the Administration workspace, follow these steps:
- Expand Notifications, right-click on Subscriptions and select New subscription from the context menu to open the Notification Subscription Wizard.
- As shown in Figure 10.17, type a name for the subscription and enter some detailed information into the description field about what exactly the subscription does – this description comes in handy when you're managing a large number of subscriptions and need to quickly identify what each one does. Click on Next to continue.

Figure 10.17: Creating a new notification subscription
- At the Criteria dialog box, select the conditions that you want to apply to alerts that will be forwarded with this subscription. You can apply multiple conditions to the same subscription and the majority of them are self-explanatory. For this example, we'll select the of a specific severity and with a specific resolution state conditions. We populate these conditions by clicking on the blue links in the Criteria Description field and choosing the Critical and New criteria as shown in Figure 10.18. When you've made all your criteria selections click on Next to move on.

Figure 10.18: Specifying the subscription criteria
- From the Subscribers dialog box, hit the Add button to open the Subscriber Search dialog box shown in Figure 10.19. Click on the Search button and you'll be presented with a list of all available subscribers. If you've a large number of subscribers already created, you can use the filter field to refine your search. When you've added the required subscribers, click on OK to close.

Figure 10.19: Adding a subscriber to a subscription
- Back at the Subscribers dialog box, you have the option to create a new subscriber by clicking the New button, which is an alternative way of launching the Notification Subscriber Wizard we discussed earlier. Hit Next when you're ready to move on.
- The Channels dialog box shown in Figure 10.20 is where you specify the channel type(s) that will apply to the subscription. If you added subscribers with multiple delivery addresses (e-mail and SMS for example), then you can use the Add button to add multiple channels here to ensure alert notifications are forwarded over all transport mediums. You can also use the New button to launch the wizard for creating new channels and this button will also allow you to create a customized copy of an existing channel.

Figure 10.20: Selecting channels to use with your subscription
- Use the Alert aging section of the Channels dialog box to specify how long OpsMgr will wait before sending alert notifications. This is a very useful feature and by simply specifying a value of one or two minutes here, you'll stop noisy alerts that might be briefly flipping state (Memory and CPU usage are two examples) from healthy to critical and then back to healthy. Anything that helps avoid situations where your call operators consistently get woken from their beds to deal with a critical alert only to see that everything is healthy by the time they logon to check can only be a good thing!
- Click on Next to move on and at the Summary dialog box, leave the Enable this notification subscription box checked (unless you don't want to immediately enable the subscription) and hit Finish to close the wizard and create the subscription.
Tip
If you want to roll out your PowerShell Kung-Fu again, you can use the Add-SCOMNotificationSubscription cmdlet to create new subscriptions. You can find all the syntax information and some sample scripts here - http://tinyurl.com/opsmgraddsubscription
An easy way of creating notification subscriptions for specific alerts is to open an alert view in the Monitoring workspace, right-click on the alert and select the Notification subscription option from the menu as shown in Figure 10.21.
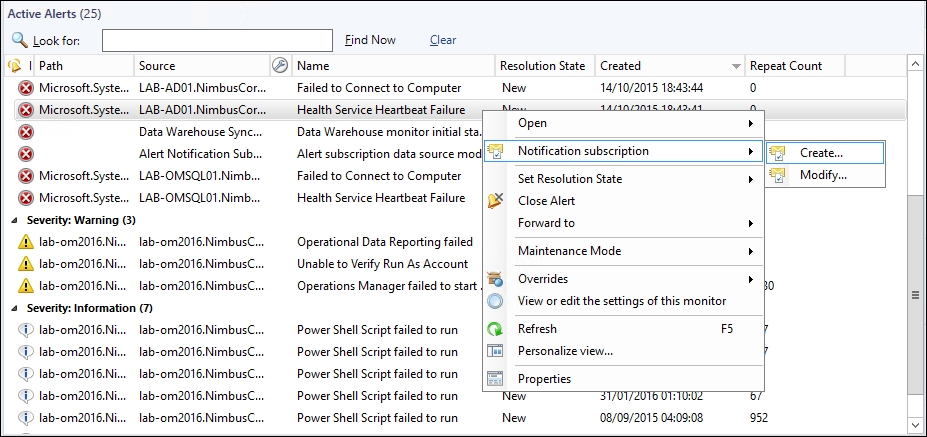
Figure 10.21: Creating a scoped subscription from an alert view
The Create option from the menu launches the Notification Subscription Wizard and will pre-populate a name, description and the created by specific rules or monitors subscription criteria similar to Figure 10.22.
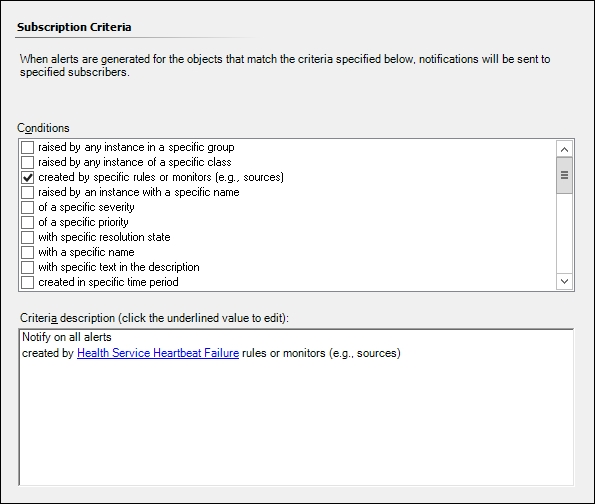
Figure 10.22: Pre-populated criteria from a scoped subscription
Note
When creating scoped subscriptions from the Monitoring workspace, be aware that the default pre-populated criteria doesn't add a resolution state criteria. This means that you will be notified on all alerts – including those with a resolution state of Closed. This can generate unnecessary notification noise for your operators and it's a good idea to specify the New resolution state criteria here.
Subscribers and channels are not pre-populated when you create a scoped subscription so you'll need to add these as you work through the remaining steps in the wizard.
If you've already created some scoped alert notification subscriptions that target specific alerts, you can use the Modify option from the Notification subscription menu after you right-click on an alert in the console. Selecting this option will present you with the Select Subscription dialog box shown in Figure 10.23. Here, you can choose the subscription you wish to add the scoped alert notification to and as you select a subscription from the list, the informational description at the bottom will change to explain if your modification will broaden or restrict the overall scope of the original subscription.
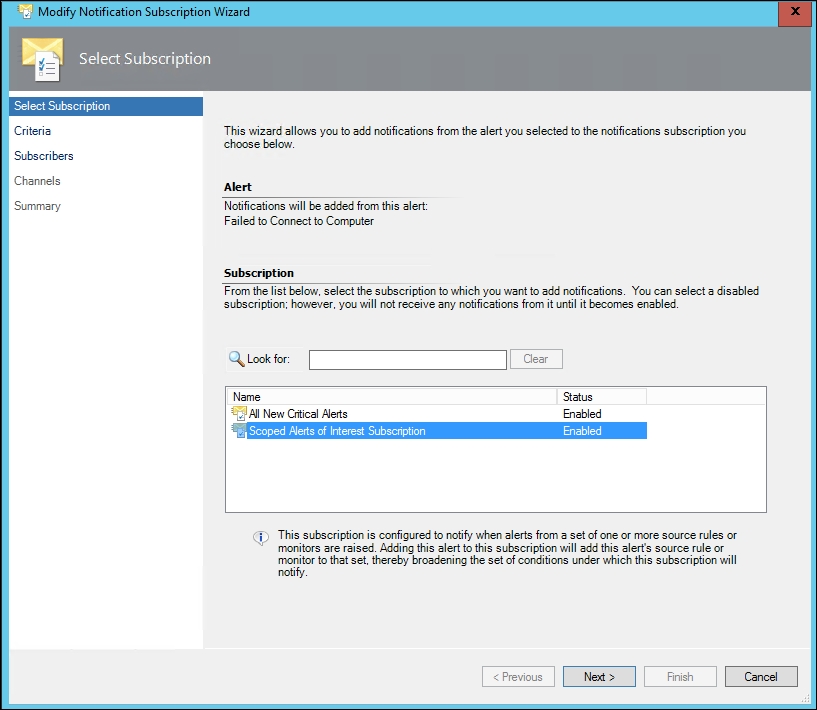
Figure 10.23: Using the Modify option to change a scoped subscription