
In Chapter 5, Working with Management Packs, we discussed the difference between monitors and rules and in the context of alert tuning, it's important to have the ability to easily identify when an alert is generated by one or the other.
A quick way to identify if an alert was generated by a monitor is to click on the alert from within the console and check either the Alert Details or Alert Actions pane to see if they refer to a monitor as shown in Figure 8.4.
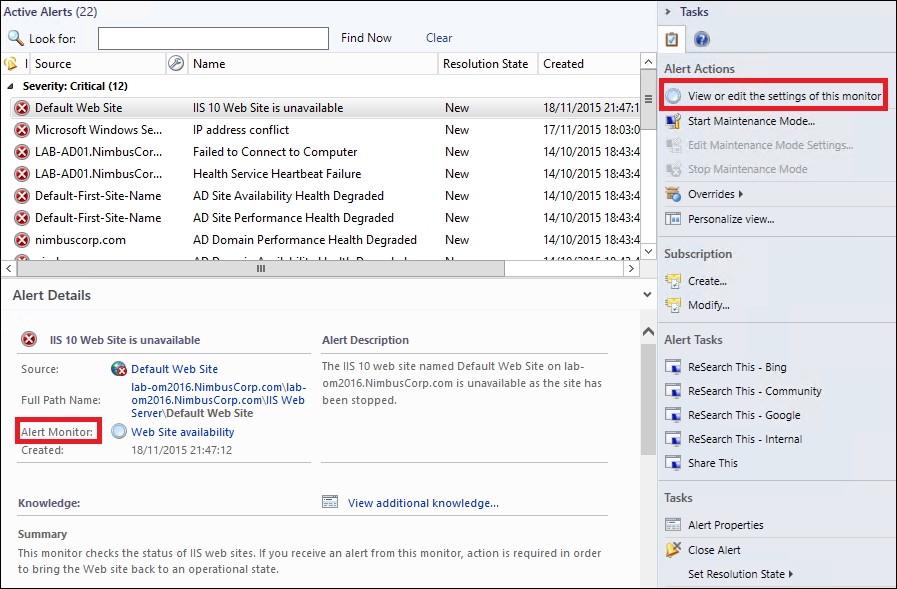
Figure 8.4: Identifying an alert generated by a monitor
Alerts generated by monitors tend to behave differently and have a lot more options that can be configured with overrides than alerts generated by rules.
If you need to change how an alert generated by a monitor behaves, then you'll need to configure an override for that alert. Overrides can be configured within the console using the Monitoring, My Workspace or Authoring workspaces.
The following steps will walk you through creating an override from the Monitoring workspace for an alert generated by a monitor:
- From an alert view in the console, right-click on the alert, choose Override the Monitor, and then select an option to target the override at from the list as shown in Figure 8.5.

Figure 8.5: Overriding a monitor
Note
When creating an override, you will be presented with five options for which you have to target the override. The first option at the top of the list (For the object:) will always target the override of the actual object which raised the alert, and the second option (For all objects of class:) will target the override of all objects of that same class.
If you wish to target an override at a group, then choose the third option (For a group:) and the fourth option (For a specific object of class:) targets a different object of the same class that generated the original alert. The fifth option in the list (For all objects of another class:) is the least used option when overriding alerts and it enables you to target objects from another class to the one that raised the alert in the first place.
- From the Override Properties dialog box, you can control how the alert fires by modifying the value of each of the parameters within the monitor. The Override column shows you the parameters that have been modified and as you can see from Figure 8.6, it's easy to distinguish between Default, Override and Effective values. It's good practice to always add a comment into the description field for each override you're making (just click on the Edit… link) as this can be helpful when trying to understand the reason someone made an override in the first place.
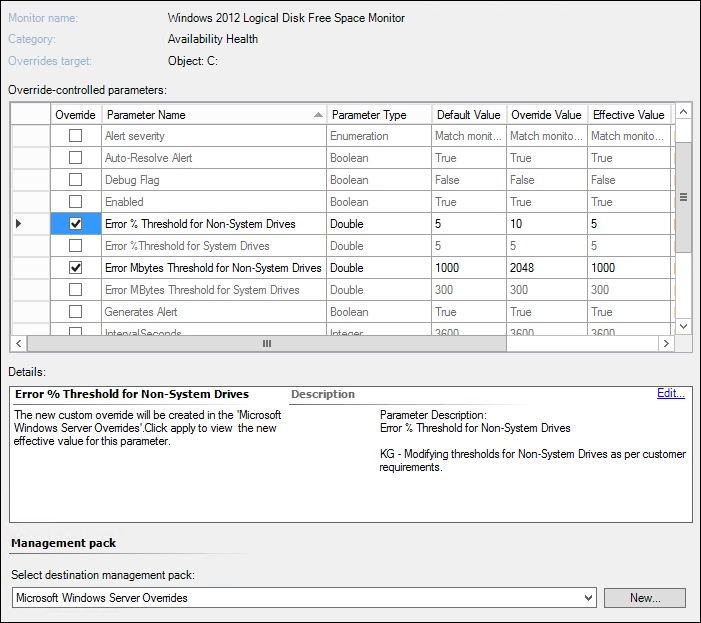
Figure 8.6: Changing the monitor parameters through overrides
- When you're finished configuring each override value, at the Select destination management pack section, choose an associated unsealed management pack to store the override into, and then click on OK to save the changes.
Tip
This is probably a good time to point out a golden rule in OpsMgr when creating overrides. You should always choose an unsealed management pack that references the sealed management pack from which you can make the override to and never save any overrides into the Default Management Pack.
The reason for this is that it can cause dependency issues at a later stage when you want to upgrade or remove other management packs and you'll need to break out your XML editing skills to fix those issues, which are never fun!
Should you come across a console full of alerts, the temptation to just select everything, right-click and hit the Close Alert option is something that might be appealing to you, but in the case of alerts generated by monitors, this isn't the wisest thing to do!
An alert generated by a monitor impacts the health state of a monitored object and when the issue that initially caused the alert is resolved then the monitor will self-heal and automatically close the alert. If you decide to manually close an alert generated by a monitor without the condition that originally caused the alert to fire being resolved, then you will end up with a closed alert but a still unhealthy object that can appear hidden unless you're looking at a state view or using the Health Explorer to view that object.
When you find that a particular monitor is generating unnecessary and noisy alerts on a regular basis, then instead of constantly just closing the alert, you should either create an override to modify the thresholds of how the alert fires or simply disable it.
Here's one way to properly disable an alert generated by a monitor:
- From an alert view in the Monitoring workspace, right-click on the alert, select Overrides and then click on Disable the Monitor as shown in Figure 8.7.
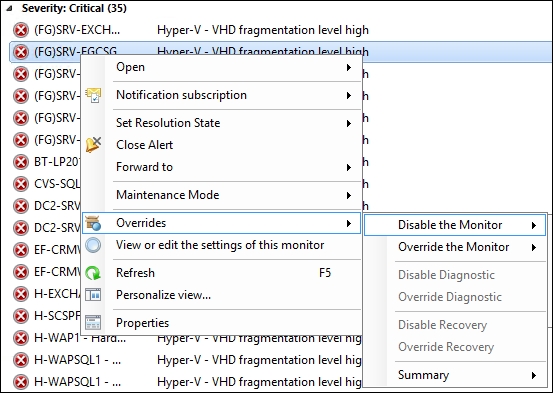
Figure 8.7: Disabling an alert generated by a monitor
- Choose a target for the override from one of the five options that the pop-out menu suggests; we'll choose the For all objects of class option, as we want to disable this alert completely for all objects of the same class.
- Now, because you selected the Disable the Monitor option in the first step, you should see the Enabled parameter has a check in the Override box and the Override Value parameter has been changed to False for you – as shown in Figure 8.8.

Figure 8.8: A monitor with its Enabled value automatically set to False
- Select an unsealed management pack to save the override to, add a comment to the Description section, and then click on OK to save your changes.
- This will now disable the original monitor and in turn, the alert that was generated by that monitor will automatically close itself from within the console.
Disabling an alert in the Monitoring workspace like this is an easy way to disable the monitor for a specific object, class or group without having to go through additional steps from within the Authoring workspace.