
Next, you’ll animate the sky: as the robed figure raises his sword, rays of light will burst through the clouds. Double-click the Sky precomp. The sky is already broken into five layers. You’ll animate the clouds in the precomp, and that animation will be reflected in ViewOfHades3D.
The five sky layers are shown in Figure 15-54, Figure 15-55, Figure 15-56, Figure 15-57, and Figure 15-58.
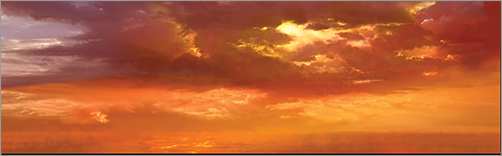
In the Sky comp, you’ll move the individual layers so that the clouds part, revealing the rays of light. The clouds closest to the horizon are the farthest away and will move the least. The layer at the top of the comp, closest to the viewer, will move the most (Figure 15-59).
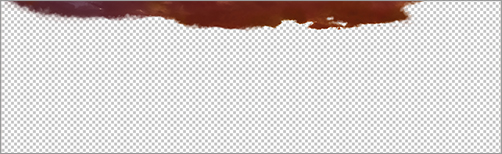
Figure 15-54: Sky 1: Farthest clouds near the horizon. This will be the entire original sky.

Figure 15-55: Sky 2: Background clouds just above the mountains. Notice that the bottom of the clouds should be soft, to blend with the underlying layer.
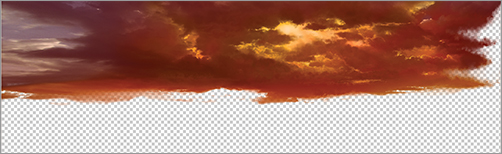
Figure 15-56: Sky 3: Right-side clouds
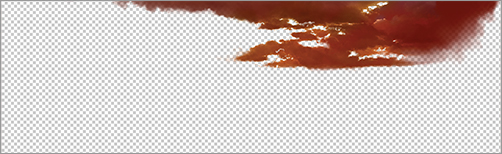
Figure 15-57: Sky 4: Left-side clouds
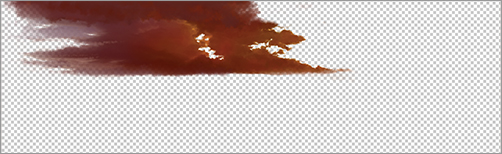
Figure 15-58: Sky 5: Top layer of clouds nearest the viewer
Sky 4 and 1 move in the opposite direction of Sky 5, 3, and 2 so the sky can part (Figure 15-59 and Figure 15-60).
Figure 15-59: Sky layers closest to the horizon move the least; layers higher up move the most.
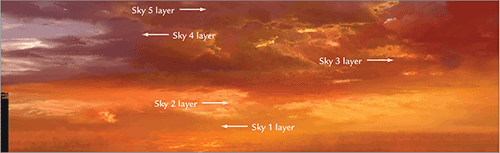
Figure 15-60: The clouds part to reveal the light.
Using the Solo Switch
In order to concentrate on an effect you’ll add to the Sky precomp, you need to turn off visibility of all of the other layers. You could manually turn off each layer, but there is an easier way. You can use the Solo switch to turn off all the layers except Sky. In the ViewOfHades3D comp, click the switch to the right of the Visibility eye for Sky; a round shape fills the box, indicating that the Solo switch is set for that layer (Figure 15-61). All the other layers disappear. You can click the Solo switch for other layers to add it to the visible layers, but the other layers without the Solo switch set won’t be visible until the Solo switch is turned off for all layers.
Figure 15-61: Solo switch clicked for the Sky comp to make it the only visible layer

Creating Light Rays
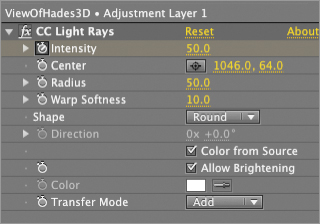
Create a new adjustment layer above the Sky precomp by choosing Layer New Adjustment Layer. The adjustment layer comes in at the top of the layer stack; move it down so it’s just above Sky. Choose Effect Generate CC Light Rays, and set the parameters as follows (Figure 15-62):
- Intensity: 50
- Radius: 50
- Warp Softness: 10
- Transfer Mode: Add
Figure 15-62: Setting for CC Light Rays
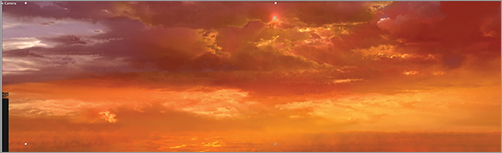
Position the Source of the Light Rays
At frame 0, click the crosshair icon to the right of the Center attribute in the CC Light Rays controls, and click the screen just above where the light will appear. Set a keyframe for the intensity of the effect. Doing so generates a flare and some tiny light rays streaming out of the clouds (Figure 15-63).
Figure 15-63: Position of the CC Light Rays effect at frame 0
Move to frame 300, and change the intensity to 200. Notice how the light rays change as you scrub through the animation. This creates a dramatic “godrays” effect that is driven by the underlying information in the painting (Figure 15-64).
Figure 15-64: Position of the CC Light Rays effect at frame 300

Click the Solo switch on both the adjustment layer and Sky to turn it off, and make all the other layers visible. Remember, if the Solo switch is on for any layer, the non-Solo layers won’t be visible.