Before you begin to turn your plate into a night scene, you need to do some prep work to get it ready for relighting.
Adding a New Sky
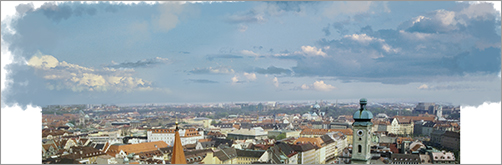
Create a new layer above Plate but below BlackMask, and call it Sky. The sky is a flat blue in the plate. Add cloud formations to make the scene more picturesque. Turn off the BlackMask layer while you’re painting the sky so you can paint beyond the edges. Use DaytimeSky.jpg from the DVD materials as a starting point, and revise and extend it using the cloud brush you created in Chapter 2, “Photoshop Workspace, Tools, and Custom Brushes.” Paint beyond the edge of the plate so you have the latitude to move the clouds when the scene is composited (Figure 11-2).
Figure 11-2: Add clouds to the plate.
Adding a Mountain Range
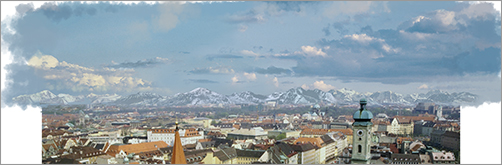
With the sky completed, create a new layer above Sky where you’ll add a mountain range to define the horizon better. Name the new layer Mountains. This mountain range was created by patching together reference photos in the www.environmental-textures.com folder from the Chapter 7 (“Texturing and Color Correction”) section of the DVD. The range is hard lit from the side, so you’ll need to paint over the mountains to match the lighting in the plate (Figure 11-3). The work file for the mountains, MountainRange.psd, is included on the DVD.
Figure 11-3: Add a line of mountains on the horizon.
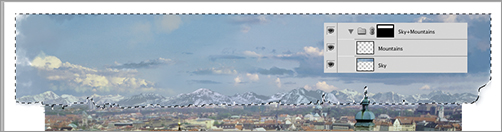
Select both the Sky and Mountains layers, and Shift+click the Create New Group icon at the bottom of the panel. Select this new group, and rename it Sky+Mountains. Trace around the buildings that intersect with the horizon to create a selection, and apply the selection as a layer mask to Sky+Mountains to integrate the group with the plate (Figure 11-4).
Figure 11-4: Use a layer mask to integrate the mountains into the edge of the city.
Removing Cast Shadows
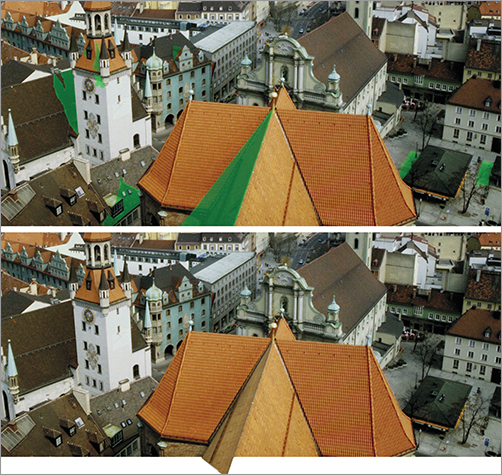
The sun is casting hard shadows on the orange foreground roof and the middle left steeple. These shadows need to be removed for the night version. At night, most of the illumination will come from the street, and the roofs will receive only soft reflected light. Create a new layer called DaytimePainting above the Sky+Mountains group. To patch the hard shadow on the foreground roof, copy a selection of the lit area of the roof to the left of the shadow.
Paste the copied section over the hard cast shadow. You’ll need to distort the pasted section to make the roof tiles line up. Eliminate all the cast shadows shown in green so you have a clean plate over which to work (Figure 11-5). Select the Plate and DaytimePainting layers and the Mountains+Sky group, and Shift+click the Create A New Group icon. Name the new group Daytime. Now your daytime plate is ready for conversion to night.
Figure 11-5: Eliminate cast shadows.