UDK's interface has changed from time to time; it is an outgrowth from the UT3 Editor of several years ago. There's no reason to think it will remain the same as the software improves. Still, its essential layout has remained intact since day one.
-
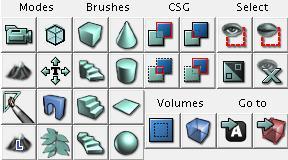
Look down the side of the editor and you'll see a range of square buttons that are grouped together. The top set is Editing modes. The second is Brushes (the base geometry creating tool in UDK). The third is Volumes, which opens a list of volume types you can generate from the active brush in the scene. Then there are some Show/Hide tools and Selection aid tools at the bottom. Click on the Go To Builder Brush icon [
 ]. You can also press the Home key to frame whatever is selected in the view. Notice it frames the red Builder Brush in all views, and also selects it. Click on the sky dome actor in the scene, then press Go to Actor [
  ] and it will likewise frame the entire scene as that actor is really big. Below, the icons, for the tool set have been set into a smaller area to fit the page.

- The four views can be sized by dragging their frames. At the end of the icon row each viewport has, shown below, there is a Tear Off command that creates a floating copy of the view. You can change the layout of the views using the options under the menu View | Viewport Configuration. The default
2 x 2split is probably easiest to get used to. As with most 3D software, you can shade the views in various modes, using the icons running along the top of each view. Just hold the mouse over the button to get its tooltip, and test each one out to see how it behaves. Each viewport's icon row starts with a letter (P for perspective, T for top, F for front, and S for Side) that you can click to cycle between views.
- To navigate the perspective view there are two systems. One way is to use the left mouse to move forward and back, right mouse to look around, and both together to move up and down. This way can be extended by right-clicking and using W A S D for movement, Q and E for up and down, and Z and C for camera zoom. There is an option to use W A S D without holding the right-click under the Preferences menu in the Flight Camera Controls. If you use this you'll have to switch from using W to hide StaticMesh models to using Alt + W.
- In the orthographic views you can pan the view using left or right click, zoom using both together or by mouse scrolling. Middle mouse dragging creates a handy ruler that measures units as you draw a red line.
- Many of the icons down the side of the editor and along the top of each viewport are just graphics for the same tools or commands in the menu at the top of the editor.
- The File menu lets you save and open maps, as well as packages, and import and export terrain content. There is also a list of Recent files which becomes very handy.
-
The Edit menu allows you to Select, Copy, and Paste actors and also Find Actors through search filters. The icon for that is a pair of binoculars [
 ].
].
- The View menu has a lot of functionality including access to the Browsers (Content, Actor Classes, Levels, and so on), actor properties, surface properties and world properties windows, and also the Kismet and Matinee editors. You can enable and adjust the grid scale for viewports and the editor autosave period here, or at the lower right-hand side of the screen through the roll-outs shown here:

-
In the View menu there are some toggles, including Allow Translucent Selection (which is also on the top row of icons) [
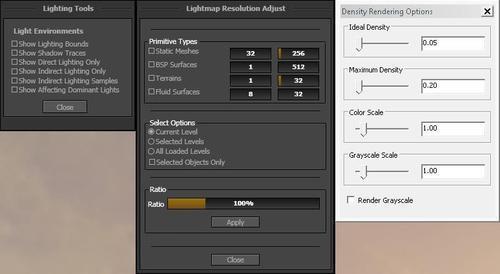
 ], which makes actors that have a translucent material (like water) selectable. At the bottom of the View menu you'll find some handy Lighting Info tools too. These help you monitor your scene and adjust lighting variables.

- The Brush menu, Build menu, and Play menu each provides access to the tools we already mentioned as well as lists their hot keys. The Tools menu offers a few extra utilities, in particular the New Terrain generation window.

- With actors in the scene, you can transform them using the Move, Rotate, Scale, and Local Non-Uniform Scaling tools, which can be accessed through icons in the top row or through the Edit menu or by repeatedly pressing Space to cycle them. Non-uniform scale is always in Local space. The hotkey to switch between the World and Local transform modes is the grave key ` or tilde key ~

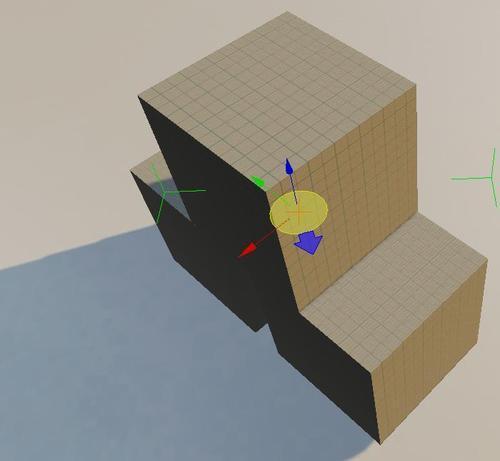
- In one of the UDK updates, a combined transform tool was introduced which can be enabled through the Preferences | Enable Combined Translate/RotateWidget and then cycling the Space bar till it appears. Shown above, this features regular
RGB=XYZaxis arrows for movement, a yellow XY movement circle, and a blue arrow to orient an object through a world Z rotation. -
Once you have fleshed out a scene, press G to view it in Game mode [
 ], where all symbolic object icons, boundaries like collision or volumes, and labels will be hidden. Press Ctrl + R to toggle Real Time mode to see all the effects playing out. Finally, Camera Movement Speed can be adjusted using the icon in each view as shown next. If you right-click on it, you can access it through a roll-out or just tap it until you get the camera speed you like.

..................Content has been hidden....................
You can't read the all page of ebook, please click here login for view all page.
