
It's important to understand the difference between a "save game" and a "level checkpoint" right from the start. A save game writes information out to disk, external to UDK. This can be done with an understanding of DLLBind for example, or by using the SAPITU classes provided in UDK. For more information about this, take a look at the official documentation: http://udn.epicgames.com/Three/ConfigSavegameSystem.html.
In this case, the topic is on checkpoints, which enable a player to respawn on death in an updated location, according to navigation progress or other achievements. Our example is useful even though it doesn't save external data or permit closing the game and reloading its last status; it elaborates slightly on the toggling of Triggers by toggling PlayerStart actors, along with setting the appropriate properties so this will work.
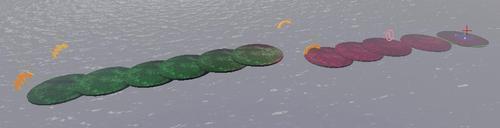
Load up Pactk_05_CheckPoints_START.UDK, a very simple scene with a string of platforms and some navigation guides. The platforms are colored. Run from green to red, then from blue to yellow. Even though it is not difficult to get to the end, an obstacle has been marked on the red platform that will kill us, since we want to test respawning. To test respawning it is also possible just to fall off the platforms into the water. The level has been set to the GameType UTGame.
The Kismet has some provided parts, to make things go a little faster. All the Object Variables are there for the Triggers and PlayerStarts in the scene. So we'll select them in the steps using the variables by right-clicking and choosing Select in Level.
Toggling the PlayerStarts

- In Kismet find the row of Object Variables for the Triggers and highlight T1.
- Right-click on it and choose Select Trigger_1 in Level. Then right-click and choose New Event using Trigger_1 | Touch. Repeat this with T2, T3, and T4 so you have an event for each trigger.
- Hold T and click to add a new Toggle, then copy it and paste till you have five of them. Comment them as T0, T1, T2, and T3 respectively.
- Extend a wire from the Touched nub of every Trigger Touch event to the Turn Off nub of the Toggle T0. Set the Target of the toggle as the Named Variable Locations. Locations references an Object List Variable we'll set to hold all our PlayerStarts. This means that whenever a trigger is touched all the PlayerStart actors are turned off.
- Now we will turn on the PlayerStart actors one by one. Add a new Switch action. Set its Link Count property to 3. Hook up the Out nub of the Toggle T0 to the In nub of the just added Switch.
- Hook up each of the three links from the Switch to the Turn On nub of Toggle T1, T2, and T3:
- For the Target of the Toggle T1 hooked to Link 1, assign the Named Variable PS1
- For the Target of the Toggle T2 hooked to Link 2, assign the Named Variable PS2
- For the Target of the Toggle T3 hooked to Link 3, assign the Named Variable PS3
The variables represent PlayerStart actors in the scene.
- Using a Switch in this case works because the order is linear and the Triggers are only fired once each. Alternatively, the toggling could be done instead with Objectlists, since integer math can be used to increment the Index it has.

-
All these Trigger Touch events also feed into an action which gives us an audio cue: New Action | Voice/Announcements | Play Announcement. To fill the property Announcement Sound, open the Content Browser (Ctrl + Shift +F) and search for Waypoint. Highlight PacktWavs.Cue.WaypointSaved then assign it in Kismet using the assign icon [
 ].
].
- Open the Sub-sequence Ending. The event Trigger_4 Touch needs to fire the Ending sequence. In the scene select the actor Trigger_4 Touch and in Ending right-click and choose New Event Using Trigger_04 | Touch. Hook this up as follows:

Provisioning the Object List
- So far we have provisioned the Toggle actions, but the Object List Locations remains empty. Let's fill it up with the Named Variables that call on the PlayerStart actors. The reason to do this is so we can turn them all off at once.
- A particularly important step is to set the default properties of the PlayerStart actors so that only PS0 (PlayerStart_0) is set as Primary Start. Select PlayerStart 1, 2, and 3, and press F4. In their properties turn off Primary Start and Enabled, as shown here. They'll be enabled one by one when they are reached by the player and the triggered switch we set previously will wake them up.

- In the main Kismet sequence, where the Object Variables are for the PlayerStarts, hold Ctrl + S and click to add a Level Loaded event.
- Hold T and click to add a Toggle, and hook its Turn On nub to the Level Loaded event's Loaded and Visible nubs. Set the Named Variable PS0 as its Target.

- From the Out nub of the Toggle extend a chain of five New Action | Object List | Modify ObjectList actions. The Out nub of each hooks up to the next action's Add to List nub. They all share the same Object ListVar, which is the Named Variable LOCATIONS. In order, the Object Ref nubs to assign are the Named Variables PS0, then PS1, then PS2, then PS3, as shown here:

Setting the trap
- Open the Sub-sequence Start. In the level there is a bouncy red trap for testing. The trap itself is a hovering warning object (InterpActor_2) which bounces up and down, and a DynamicTriggerVolume is attached to it that hurts the player if touched. This is marked with a single arrow in the next screenshot. The trap animation already exists in a Matinee called Hovering Sign, which is set to Looping. Also, the Play Rate is controlled by a Random Float Variable with a period of 0.66s to 2.33s for some variety, to prevent it being too predictable when dashing under it.
- Extend out from the Level Loaded event in the Sub-sequence Start to a new Attach to Actor action. For this the Target will be the same as the Object Variable assigned to the Hovering track of the Matinee, which is InterpActor_2.
- Right-click on the Object Variable Interpactor_2 assigned to Hovering and choose Select in Level. In the scene, click on the Go To Actor button in the tools panel or press Home. Select the InterpActor overlapping this, which is a copy of the already animated one. The copy faces backwards, because the source mesh is one sided. The InterpActor_1 location is shown in the next screenshot using a double arrow, as there are two there:

- Back in Kismet, right-click on the Attachment nub of the Attach to Actor action and choose Create New Object Variable using InterpActor_1, then PIE to check that both objects are bouncing up and down.
- Presently you'd not be able to get underneath the bouncing object because it isn't the object that kills us, it is the DynamicTriggerVolume sitting there. We need this to follow the Matinee too. In the scene, select DynamicTriggerVolume_0 which is indicated in the previous screenshot with a single arrow, and add it as the Attachment to a new Attach to Actor action. As before, connect the Player Spawned event's Out nub to the In nub of the Attach to Actor, and set the Target as the Object Variable InterpActor_2.
- With the DynamicTriggerVolume_0 still selected, right-click in Kismet and choose New Event using DynamicTriggerVolume | Touch. Set the Max Trigger Count for this to 0 and from its Touched nub extend a wire to a new Modify Health action.
- In the Modify Health action's properties, set the Damage Type as DmgType_Crushed from the list. Set the Amount as 500, enough to kill anybody outright. Hold P and click and set the added Player Variable to Player 0, then hook it up to the Target of the Modify Health action.
- Extending out of this action, add a New Action | Voice/Announcements | Play Announcement. From the Content Browser, set PacktWavs.Cue.TryAgain in the property Announcement Sound for this audio asset. Since the player dies while this sound plays it will be overlapping other sound effects, so right-click on the Play Announcement action's In nub, choose Set Activate Delay, and enter 1.

- Hold T and click to add a new Toggle. Hook its Turn Off nub to the Touched nub of the DynamicTriggerVolume_0 Touch event. Add the Named Variable Locations as its Target. Finally, wire its Out nub to the Turn On nub of another Toggle action, and for this set the Target as the Named Variable PS1, as in the previous screenshot.
- That should wrap up the required sequences to trigger checkpoints. Of course, you can just walk into the water each time you pass a checkpoint to see if the check point re-spawns you correctly. The provided scene Packt_05_CheckPoints_DEMO.UDK shows the final result.
For further information about Kismet, bookmark and read closely the UDN Kismet Reference : http://udn.epicgames.com/Three/KismetReference.html.