
This chapter further deals with Kismet, with a focus on constructing processes that allow you to do more with gameplay, such as creating cinematic effects, creating puzzles, spell-casting behavior, creating a regenerative health shield, or allowing the player to guide a Bot that follows you, and creating a per-session checkpoint.
In this chapter, we'll cover the following topics:
- Prefabs including Kismet references
- Swapping control of a Bot using Possess Pawn
- Ways to stop a recurring loop
- Setting up cinematic cameras
- Animating cinematic cameras
- Obtaining a trigger event off a RigidBody
- Creating a firing pattern based puzzle
- Allowing the player to pick up, carry, and place an object
- Exploring 'following' and 'attracting' behaviors
- Creating a regenerative health shield
- Creating a per-session checkpoint series
In this short recipe we'll furnish the scene with two Shrines using a pre-built asset that has been saved as a Prefab. A Prefab combines any number of actors into a single unit. The point of this recipe is to note that if the Prefab actors include references to Kismet, then the Kismet is saved with the Prefab asset as a Sub-Sequence.
Open the map Packt_04_Prefabs_Start.UDK. The scene consists of a cave mouth, looking out onto a landscape that the player cannot reach during gameplay.
-
First, let's look at how to create a Prefab which includes objects that participate in Kismet. Open Kismet [
 ] and look for the section commented NightDayCycle. This is an example that is set up in the bonus online recipe Creating an animated day to night transition (available at http://www.packtpub.com/sites/default/files/downloads/1802EXPUnrealDevelopmentKitGameDesignCookbook_BonusRecipes.PDF) introducing topics such as sky dome creation, a Night to Day transition, and using MaterialInstanceActors. What you want to look for in the networks is a Log called Dusk, coming from the bottom MatineeChangesMaterials.
- Next to the Log Dusk, add a Toggle (hold T and click). Select in the scene all the particle Emitters. These are flames for torches in the scene's cave. Press F4 and turn off their Auto-Activate property so they don't simply play when the level loads.
- In Kismet, right-click on the Target nub of the Toggle and choose New Object Vars Using Emitters... and hook up the Out node of the Log Dusk to the Turn On node of the Toggle.
- Now hook up the Out node of the Log Dawn to the Turn Off node of the Toggle. This makes the particles only play at night.

- PIE, and you'll see that when Dusk arrives, the torches in the cave turn on at that time. However, if we were to make a Prefab out of the Emitters and Torches now, the problem is that the Emitter's use in Kismet comes out of the Matinee ChangesMaterials. That'd have to be included in the Prefab too. So we need to break it off, while still keeping it connected. Passing the Toggle through a Remote Event is the way to do this.
- Hold R and click; you'll be prompted for an Event Name. Type in TorchesON. Hold R and click again, and this time when prompted for an Event Name, type TorchesOFF.
- Alt-click on the Turn On and Turn Off links feeding the Toggle.
- Hook up the Activate Remote Event action TorchesON to the Log Dusk. Hook up the Activate Remote Event TorchesOFF to the Log Dawn.
- Hook up the Remote Event TorchesOn to the Turn On nub of the Toggle. Hook up the Remote Event TorchesOff to the Turn Off nub of the Toggle, as shown:

- Select the nodes highlighted in the given screenshot, right-click, and choose Create New Sequence. Call the Sub-Sequence TorchesToggle.
- In the Kismet there is a commented section Torches, which includes Object Variables for the torch mesh actors and PointLightToggleable actors. Select these, press Ctrl + X to cut them, and then open the Sub-Sequence TorchesToggle you just made and press Ctrl + V to paste them there.
- Right-click and choose New Action | Actor | Set Material. Copy and paste this. Hook the added nodes up as shown in the following screenshot, including adding each PointLightToggleable Object Variable to the Toggle action's Target:

- Now we can create the Prefab so that it will include the Kismet that goes with these actors. Select all the Object Variables including the Emitters, the four lights, and the four meshes and choose Select Actors in Level. In the scene, right-click and choose Create Prefab. You will get the following prompt:
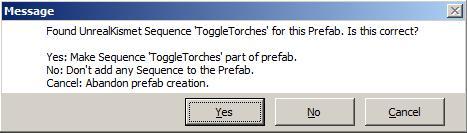
- Press Yes, and then you'll be asked to name your new Prefab. Choose Yourfolder.Prefab.WallTorches. You'll then be asked Would you like to replace these Actors with an instance of the new Prefab? and here you can also press Yes. Don't forget to save your package.
- To set up for the next recipe's level we can add a couple more Prefabs, for practice. Open the Content Browser and locate PacktKismet.Prefabs.Shrine. This is an asset including a plinth, a glowball, and a Kismet Sub-Sequence. If an actor in a Prefab is referenced within a Sub-Sequence in Kismet the script network involved also gets saved as part of the Prefab. In the case of our Shrine, this is just a Matinee for the GlowBall to bob up and down.
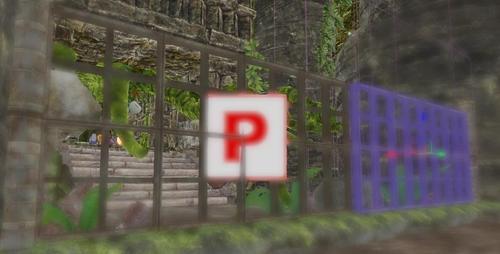
- Place the Shrine prefab at Trigger_0, where the PlayerStart is. Place another right at the back of the cave, as shown in the next screenshot, at Trigger_2. These Shrines (or the Triggers they go with) will give us events to fire off the swapping of characters.

-
Open Kismet [ ] and you'll see Kismet has automatically added a Sub-Sequence Prefabs, and you can't delete this since the Prefab actor in the scene depends on it; but if you delete the Prefab actor in the scene, it clears the Sub-Sequence Prefabs.
- Optionally, in the Content Browser, locate the Prefab PacktKismet.Prefab.SlidingGate on top of the StaticMeshActor_158 and StaticMeshActor_164. This is used in the next recipe. An example map is provided: Packt_04_Prefabs_DEMO.UDK.
A prefab pulls together selected assets so you can easily place many copies of them, or place them in various levels without having to arrange the parts again. You can actually update, reset, and collapse a Prefab.
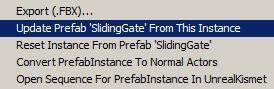
To collapse it back to individual actors, right-click in the scene with the Prefab selected and choose Convert PrefabInstance To Normal Actors. You can also open the Kismet nodes used by the Prefab from the scene by choosing Open Sequence for PrefabInstance In UnrealKismet.
One of the Prefabs we've added to the scene has an incorrect lighting setting. The SlidingGate has two halves, and one is an InterpActor that is animated by a Matinee. The other side is just a StaticMesh. An InterpActor and a StaticMesh have different shadows because one is static and one is dynamic. To fix this, we can open the Prefab and edit it by converting the StaticMesh half of the gate to an InterpActor too.
- First, select the Prefab PacktKismet.Prefabs.SlidingGates that you added in the scene.
- Now go to the View menu and turn off Lock Prefab from Selection. This is on by default, to stop us accidentally adjusting the Prefab contents.
- Once that is off we can select the gate mesh pieces individually. Select the piece shown in the screenshot, that is a Static Mesh actor, right-click on it and choose Convert | Convert StaticMeshActor to Mover. This turns it into an InterpActor that has a dynamic lighting channel. When you are done, Ctrl + Left-click on all the Prefab's elements (or click the icon for the Prefab actor then press Ctrl + LMB on the actor you adjusted too) then right-click and choose Update Prefab from Selection. You'll be prompted Are you sure you want to update Prefab 'SlidingGate' ? Click on Yes. Later, where this asset is used in other maps, the first time the map is loaded you'll get an updating Prefab notice.
- Now you should get shadows that match for both sides of the gate in every scene where it occurs.
Prefabs are also covered in Chapter 2, Notes From an Unreal World, under the recipe Handling StaticMesh actors in the scene.