
Often our inboxes get inundated with messages and it can be quite overwhelming. A way to prevent this is to manage our mail with rules. We can use mail rules to act automatically on new messages we receive that meet certain conditions. We can create a rule that checks for messages from a certain sender or that contains a certain subject and automatically move the messages to a certain folder, send copies of the messages to someone, or delete unwanted messages before we ever see them in our inbox. For example, I subscribe to several websites and I have set up rules to move the incoming newsletters from these websites directly to a folder so that they bypass my inbox.
The mail rules we create are stored in the Rules folder in our mail file. We can go there to add new rules as well as edit the ones we've created. We can edit rules, change their order so that one rule has priority over another, turn them off when we don't want to use them, or delete them entirely.
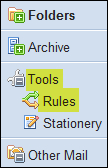
We can access Rules in the side navigator under Tools.
There is a Quick Rule option, which is an abbreviated set of the most commonly used rule configurations that can quickly be applied—hence the name Quick Rule.
The following table explains some of the Quick Rules and Rules settings for our reference:
|
Condition |
Definition |
|---|---|
|
Contains |
Contains looks for a partial match. For example, if we have selected the rule to act on messages that contain sales in the subject, it will act on a message that has sales conference as well as sales enquiry in the subject field. |
|
Does not contain |
We will need to be careful with this as the setting is the complete opposite to the contains condition and is usually used in conjunction with contains or is. |
|
Is |
Is looks for an exact match. In our sales example, it will only act on messages with sales and sales only in the subject. |
|
Is not |
Is similar to does not contain but it looks for an exact match. |
Follow the steps next to create a quick rule:
- Open mail and select a message that we would like to apply a quick rule to.
- Select More | Create QuickRule.
- As the Quick Rule is based on information in the selected message, we will see values in the Sender, Subject, and Domain fields. We can edit these values if necessary. The fields could be empty if, for example, we select a message that doesn't have text in the subject field.
- There are three steps to complete the rule. With each condition we can specify any of the following states for each field value —contains, does not contain, is, and is not.
- We first need to select the condition to match. There are three conditions to configure—Sender, Domain, and Subject. We can select one of these conditions or all three.

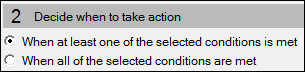
- We need to decide when to take action—on one or all selected conditions.
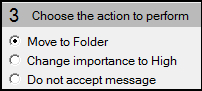
- Choose an action to perform:
- Move to Folder: We will need to select the folder we want the messages to be moved to.
- Change importance to High: This option adds the red exclamation mark icon to messages to indicate the message is of high importance.
- Do not accept message: This deletes the message. Note the message is not stored in Trash and cannot be restored.
- We first need to select the condition to match. There are three conditions to configure—Sender, Domain, and Subject. We can select one of these conditions or all three.
- Click OK to save the configurations. The new quick rule is created and stored in the Tools | Rules folder. The new quick rule acts on incoming messages, but existing messages in the inbox that meet the conditions of the rule are not affected.
If the Quick Rules do not give enough options, we can create a rule.
Rules have many more options to configure and are quite powerful as there are further actions we can select from and more configurations including exceptions.
- In the side navigation pane of mail, go to Tools | Rules or alternatively click the More button and then select Mail Rule. This will open up the Rules folder.
- In the Rules folder, click New Rule.
- In the New Rule dialog box, there are two areas that we need to configure. In the first area, we need to specify conditions. Rules have several conditions that we can configure.
Condition to check
Options
Additional options
Sender
Contains, does not contain, Is & Is not
Subject
Contains, does not contain, Is & Is not
Body
Contains, does not contain, Is & Is not
Importance
Contains, does not contain, Is & Is not
High, normal, low
Delivery priority
Contains, does not contain, Is & Is not
High, normal, low
To, cc, bcc & To and cc
Contains, does not contain, Is & Is not
Body or Subject
Contains, does not contain, Is & Is not
Internet domain
Contains, does not contain, Is & Is not
Size
Is less than, is greater than, is, is not
Form
Contains, does not contain, Is & Is not
Note: an example of a form is the memo form
Condition to check
Options
Additional options
Blacklist, whitelist
Contains, does not contain, Is & Is not
All documents
None available
- Once we have added one condition, we can add further conditions and/or exceptions.

- We can, at any time, Remove or Remove All conditions using the buttons on the right-hand side of the screen.
- Once we have entered the conditions, the next step is to Specify Action. Rules have several actions available and we can add more than one. The actions available are listed here:
Action
Options
Additional options
Move to folder
Select the folder to move to
Copy to folder
Select the folder to copy to
Send copy to
Full or header only
Enter names to send to
Set expiry date
Number
Day(s), week(s), month(s), year(s)
Action
Options
Additional options
Change importance to
High, normal, low
Stop processing
None available
Delete (don't accept message)
None available
- Click Add Action.
- Click OK to close the dialog box; the rule is now enabled.
As we can see from the options, rules are quite extensive. Once created, rules act in the order they appear (top to bottom) in the Rules folder. We can change the order of the rules by using the buttons at the top of the Rules folder by moving them up or down.

We can edit or disable a rule at any time as well as delete the rule if it is no longer required.