
Throughout this chapter and the chapter before, we have set many mail preferences to configure our mail in a particular way. For example, we may have enabled the spell check to automatically check spelling when we send a memo. We also may have set up Sender Colors so that messages from certain people will be highlighted in a different color. Mail preferences can be accessed from the File | Preferences | Mail menu or by clicking the More button from within Mail and selecting Preferences.
Accessing mail preferences from the File | Preferences | Mail option gives us more areas to configure as we can set Internet options as well as Sending and Receiving preferences.
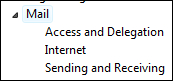
Accessing preferences from within mail using the More button and then selecting Preferences gives us the following tabs to select from:

Throughout the chapter, as I have mentioned, we have learned how to configure most of the preferences listed on each tab in the previous screenshot. On the Basics tab, we had options on to we enable the spell check along with view and folder management. On the Signature tab, we could set up our signature to append to each memo that we send. The Follow Up and Sender Colors tabs allowed us to configure our Quick Flag options and color code our messages from particular senders.
The preference we have not looked at is the Letterhead. We may have noticed that when we create a message, the header of the memo will typically contain a graphic as in the following example that has the maple leaf:

We can change this graphic by going to mail preferences and clicking on the Letterhead tab and browsing the different letterhead options. For each graphic that we select, to the right there is a preview screen. One of my favorites is the surfboards. We have an option to select No Letterhead if we prefer.
