
A project template is a standardized starting point for a new project. A template can contain task information, resource information, or both. It might be very broad in scope, showing just major phases and generic resource names, for example. Or, the template can be highly detailed, with multiple outline levels of tasks, their durations, task dependencies, and specific resource information.
Note
Because the terms project template and project global template are so similar, often you’ll hear people refer to the latter simply as the project global, the global, or the global MPT file.
Microsoft Project comes with a set of built-in templates for a variety of industries and applications. Microsoft Project templates are available from third-party sources as well, such as professional societies and standards organizations. You can create your own templates based on previous projects you have completed. It’s good practice to adapt and save the plan of a completed project as a template for future use in your organization, either for yourself or for others.
Note
For more information about using a project plan as template, see the section titled Creating Your Own Project Template later in this chapter.
A project template serves as a knowledge base for a certain type of project. It is meant to save you time when planning your new project and to let you build on past project experiences. The project template can also help set and enforce organizational standards. It can disseminate custom features and elements, such as specially designed reports, company-specific base calendars, and modified views.
Whenever you start a new project, you’re given the opportunity to choose a template. If you start a project with a template, your new project file is populated with information from that template. You then adapt that information to meet your project’s specific requirements. When you save the file, you’re saving a new project file, rather than overwriting the existing template file. This way, the template remains available for use in its more generic format.
To create a new project from a template, follow these steps:
Click File, New.
In the New Project pane, under Templates, click the On Computer link.
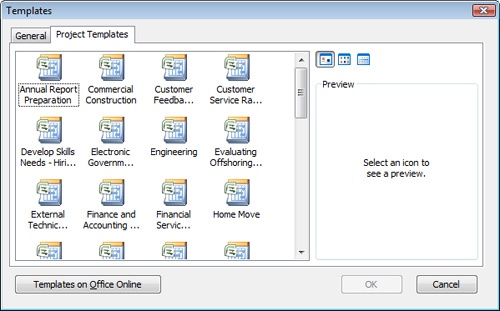
In the Templates dialog box, click the Project Templates tab (see Figure 28-4).
Click the project template you want to use and then click OK.
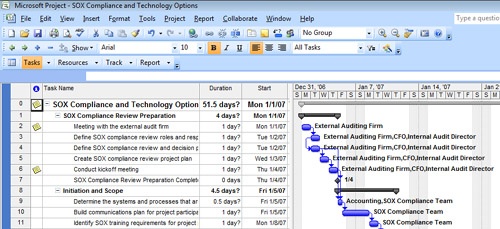
A new project plan appears, based on the template you chose (see Figure 28-5).
The original template file has an extension of .mpt, indicating that it is a Microsoft Project template file type. When you save a new project file based on a template, by default, your new project file is saved as a normal MPP (Microsoft Project plan) file. To save a project based on a template, do the following:
Review your new project file for the types of information included and the level of detail. Review as follows:
In the Gantt Chart or other task sheet, review the list of tasks. Determine whether you need to add more tasks or remove extraneous ones.
Check to see whether durations are filled in for the tasks. If they are, see if they seem close to the durations you will expect in your new project. Most templates include durations as estimated durations, as indicated by the question mark (?).
Examine the chart portion of the Gantt Chart or the Network Diagram and see whether task dependencies have been set up. Review their appropriateness and their complexity.
Display the Resource Sheet. If generic resources are listed, start considering real resources who can replace the generics. If you’re using a template generated within your organization, you might see names of actual individuals.
Based on this review, you can see how much adaptation you’ll need to do to tailor this template to your project.
Inside Out: Create a new project from an existing one
You can use an existing project as the basis for a new project. To do this, click File, New. In the New Project pane, under New, click the From Existing Project link. Browse to find the project you want to use as the basis for your new project and then open it. When you save this file, Microsoft Project makes sure that you give it a different name, so the original file remains intact.
When you use an existing project file as the basis for a new project plan, you typically need to do a little more adaptation than with a regular template, because there is extraneous information, such as actuals, that you won’t need in your new project.
A quick way to remove the bulk of this historical information while keeping the good stuff is to first save the file as a template, as follows:
Click File, Save As. Browse to the location where you want to save the new project and then give the new project a name. Then in the Save As Type list, click Template (*.mpt). Click Save.
In the Save As Template dialog box, select all the check boxes to remove baselines, actuals, and cost information. Then click Save.
The file is saved as a template, minus the data that pertained only to the progress of that other project.
Click File, Save As again. This time save the file as a regular project file.
You’re now set to go. There might be additional information yet to remove, such as date constraints or certain resource information, but you’ve already taken care of the majority.
If you’re building a new project plan based on a template or on an existing plan, use the Adjust Dates tool to bring the scheduled project start date in the template to your own project’s start date.
Click View, Toolbars, Analysis to show the Analysis toolbar. Click the Adjust Dates button on the Analysis toolbar. In the Adjust Dates dialog box, enter your project start date and then click OK.
You can download additional templates for different industries and endeavors from the Office Online Web site. To do this, follow these steps:
Click File, New.
In the New Project pane, click the Templates On Office Online link.
Your Web browser launches and goes to the Templates page of the Office Online Web site.
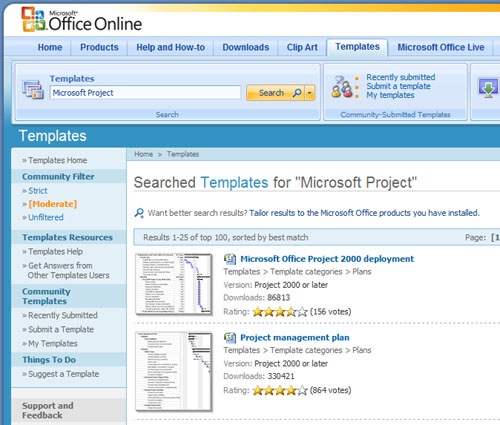
In the Search Templates box, type Microsoft Project and then click Search.
A list of Microsoft Project templates appears (see Figure 28-6). Some are created by Microsoft, others were suggested and added by project management experts in the field.
Another way to find templates is to navigate through the lists of templates in the Browse Templates area. You can click a category, for example, Plans, to see the list of templates. To narrow that list to Microsoft Project templates, in the side pane, under Filter By Product, click Project.
To select or just preview a template you might want to download, click its name in the list.
A preview of the selected template appears (see Figure 28-7).
If you like the template, click Download Now.
In the Save As dialog box that appears, change the name if you want and then click Save.
The template is downloaded, saved, and appears in Microsoft Project. You can now adapt that template to the specifics of your project.

After you plan and track a few projects to completion using Microsoft Project, you’ll see that you’re recording valuable information in your project plans. Of course, you’ll archive your project plan for historical purposes. However, you can also use an existing or completed project plan as the basis for a template that will save you and others a great deal of time when planning future projects.
By creating your own template, you can save task and resource information, format settings, project-specific options, calendars, macros, and other elements that you’ve used successfully in other projects. Any Microsoft Project file can be saved as a template.
To save an existing project file as a template for future use by you or other project managers, follow these steps:
Open the project file you want to save as a template.
Click File, Save As.
In the Save As Type list, click Template (*.mpt).
The file name changes from the .mpp extension to .mpt, indicating that a copy of the regular project plan file will be saved as a template file. Also, the file is moved to the Templates folder. As long as your template is stored in this folder, it will appear in the Templates dialog box.
Click the Save button.
The Save As Template dialog box appears (see Figure 28-8).
Select the check box for any item you do not want to be saved as part of the template and then click the Save button.
The file is saved as a template in your Microsoft Templates folder on your computer’s hard disk.

To check that your new template appears in the Templates dialog box, do the following:
Click File, New.
In the New Project pane, under Templates, click the On Computer link.
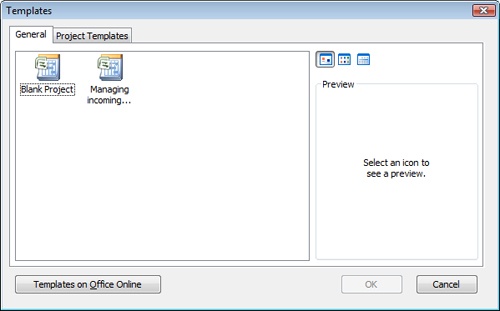
Your new template should be listed on the General tab (see Figure 28-9).
Note
By default, templates stored in the Microsoft Templates folder appear in your Templates dialog box. You can store templates in a different folder, however, and direct the Templates dialog box to find them in the new location. Changing the location of the templates can be useful if a set of templates has been developed for your organization, and they’ve been placed on a file server for multiple project managers to use and perhaps update.
To change the location of the Microsoft Templates folder, click Tools, Options and then click the Save tab. Under File Locations, click User Templates and then click the Modify button. Browse to the new location and then click OK.
Review the new template file to see whether any other information should be removed. Here are some suggestions:
Display the task sheet and apply the Constraints table. See if any date constraints should be changed to As Soon As Possible or As Late As Possible.
Review the task dependencies shown in the template. Determine whether they’re useful or should be removed.
Review the Resource Sheet. Decide whether you want to keep specific resource information or replace it with generic resource names. Also decide whether you should change maximum units and other availability information, and whether the cost information should be retained or deleted.
Review tasks, resources, and assignments to see whether any notes should be removed.
After you finish adapting the template, click Save on the Standard toolbar. Your changes are made to the template.
If you need to update the information in an existing template, you cannot simply open the template and save it. If you do, Microsoft Project will try to save a copy of the template as a regular project (MPP) file. To update and save information in the template itself, follow these steps:
Open the template you want to update.
Make the changes you want.
On the Standard toolbar, click Save to open the Save As dialog box.
In the Save As Type list, click Template.
The current folder switches to the Templates folder. The template you just edited should appear in the list of files.
Click the template and then click the Save button.
A prompt appears, indicating that you’re about to replace the existing file. And that’s exactly what you want to do.
Click OK. The Save As Template dialog box appears.
Click the Save button. Your changes are saved to the template file.