
The Matching questions in Moodle are probably what you'd expect. They offer a list of names, items, questions, and other items on the left-hand side of the screen and the answers in the form of a drop-down menu on the right-hand side.
Matching is a very simple item to create and can be a useful addition to tests. Instead of wasting any more time talking about Matching items, let's show you how to make one.
First, we're going to create a new quiz. We'll call it Matching in both Name and Introduction. We're going to leave all the options set to default except for the Adaptive mode, which we will turn to turn off.
In the Question bank, we'll make sure the category is set to Default for Matching. Once these steps are done, it is time to create a new Matching question from the new question drop-down.
For this question, we're going to be asking our students to match a list of US Presidents to their time in office. Match the US Presidents and their terms is what we will use for both the name of the question and the question text.
We're going to leave all the options set as they are and go to the questions and answers section.
This section is where we will enter the questions and answers. In our case US Presidents will fill the Question textbox and their time in office will fill the Answer textbox. An example of how the question looks is shown in the next screenshot:
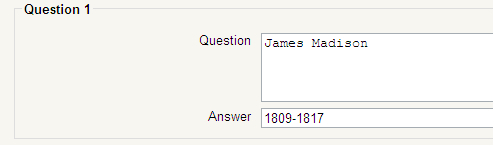
There is a note at the top of the section telling us we are required to, at minimum, enter two questions and three answers. The note also informs us that we are able to add more incorrect answers if we like, which can be very helpful if we are working with a small number of items.
As you can see, we have entered James Madison in Question 1 Question textbox and his term of office, 1809-1817, in the Answer textbox. We will now go ahead and add two additional Presidents and their terms to the item. For Question 2 we are adding James Monroe, 1817-1825, and for Question 3, John Quincy Adams, 1825-1829.
We will also be using Question 4 to create an additional distractor by filling in its Answer with a term of office but no President. In the Question 4 Answer textbox, we will add 1829-1833.
Now that we have entered all the information, we need to go back and make sure all our settings, spellings, and information is correct. Once we have confirmed that everything looks as it should, we'll click on Save changes and the question will be created.
You will notice that there is no place for feedback. This is one of the few places that we can't give direct feedback in Quiz. If we want to give feedback, we need to go to the General feedback and include whatever we'd like all the students to see. We could, for example, simply include the additional information about the answers or make a comment on the importance of knowing these dates for the course final exam.
We will simply enter the correct answers, just so we can see how it looks.
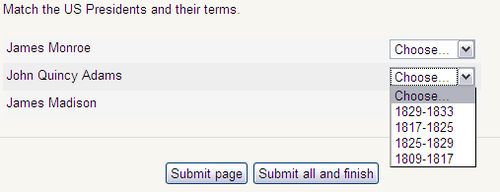
Now we need to preview the question. We click on the Preview icon next to the question and see what it looks like. Here is the Matching question. Each of the drop-down menus contain the dates we entered in a random order, as you can see here.
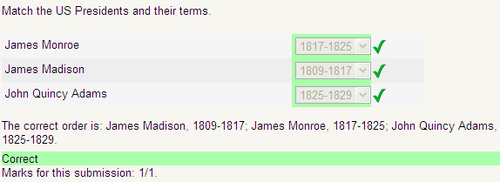
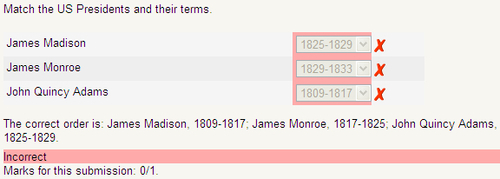
Now, I'll go ahead and answer the questions by putting everything in the proper place, then click on the Submit all and finish button. We can see an example of a correct response, a partially correct response, and an incorrect response.
The screenshot of a correct response is as follows:
The screenshot of a partially correct response is as follows:
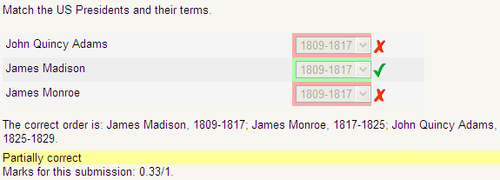
Finally, the screenshot of an incorrect response is as follows:
Tip
Identical Responses
Unfortunately, there is no way right now to keep your students from accidentally guessing the same option more than once or simply guessing the same option multiple times in, hopes of at least getting some credit. To deal with the former point, remember to tell your students to check their work before submitting. To deal with the latter, adding more options will lessen the chances that this kind of student will guess correctly.
Now that we have checked everything and confirmed the question is correct, the final thing to do is move the question to the test. Close the Preview window. In the Question Bank, click on the Move icon next to the question and it will be placed in the Quiz.
We are now going to make a matching question together. It will be a standard matching question. For this question, we will be asking about four currencies and the countries where they are used.
- First, we need to create a new Quiz and in the Name and Information textboxes, call it Matching.
- Leave all the settings as default, except for Adaptive mode. We want to turn that off. Once it is off, go to the bottom of the page and click on the Save and Display button.
- In the new Quiz, click on the Edit tab. Change the Category to Default for Matching. Then go to Create new question and select Matching.
- In Name and Question text, once again, we will be using the same thing. Enter the following text into both textboxes: Match the currency to the country.
- Once finished, we will enter the correct responses into the General feedback textbox: The correct answers are: Belize - Dollar; Brazil - Real; Colombia - Peso; Costa Rica - Colón.
- Now we will need to enter the countries into the Question textbox and the currencies into the Answer textboxes. There are currently only three Questions available, so we need to click on the Blanks for 3 More Choices button.
- Once we have added the four countries and currencies, we will want to add a couple of more distracters. In the Answer 5 textboxes, please enter Quetzal (Guatemala's currency). In the Answer 6 textbox, please enter Bolívar (Venezuela's currency).
- When we finish, we need to click on the Save changes button.
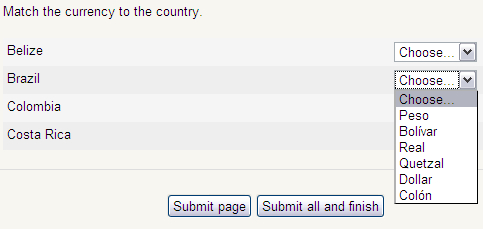
- Preview the question and you should see something very similar to the following image. You can see all four countries and all six currencies.
- Check all the answers to make sure everything is where it should be, then move the question to the Quiz.
Tip
Special Textbox Characters
You can't enter special characters or symbols into textboxes. If you want to add a special character, such as an accent mark, you need to use its HTML entity code, for example, $#8364 for the Euro sign, copy and paste it from somewhere else, or you can find many listings online for the HTML entity code.
As you can see, matching items are fairly easy to create and easy to use. However, there are two things that you should think about when adding these items to tests: shuffle and score.
The shuffle function can be a great feature for all kinds of questions, but sometimes it can cause more confusion in students. In Quiz, we have the option to shuffle the questions and the responses. In Matching, the responses are automatically shuffled. However, there is also a shuffle in Matching. If the Shuffle with Questions is selected at the quiz level, and if the box is checked, the questions or statements are shuffled, as well as the responses. There are times when this option can be useful and times when it will cause unnecessary distraction.
Also, in Matching, you might have noticed we didn't add a grade to anything. This is because each option is worth an equal percentage of the item score. So, if there were four possible options, each would be worth 25 percent of the total. A student getting two correct responses out of the four options would receive a 50 percent score for the item. This is normally considered a fair way of marking these types of items, but there may be times when you do not want to accept partially correct responses. There is no way to do this inside of the item. The only option you would have would be to go back and manually alter the student's score.
In addition, the only nature of this question type is seen as a serious disadvantage by many users.