
Before we begin to create our Workshop, we will look at the options Workshop has available and talk about their functions. Workshop is different from Quiz and Lesson, in that there are no sections used to divide fields into categories. We will be looking at all the options in the order they are presented, so we know exactly what we can do in Workshop.

This is where we name our Workshop and enter what the link in the course will be labelled. There is no difference between Submission Title and the Title we have seen in Lesson and Quiz.
Enter the description of the Workshop's aim and what the students are expected to do here. All students entering the Workshop will see this, so it is important to include here a detailed outline of what they are to do, including assignment requirements or anything else that is expected of the students.
Since this is just like the Description in Quiz and Lesson, you can do the same things including: adding images, tables, text files, and so on. In fact, you can do the same things anywhere you encounter the rich text editor.
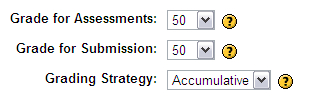
This is a score between 0 and 100, which reflects the total points the student or peer can assign the work submitted to the Workshop. In the previous image, we have ours set to 50. Instructors are only involved in assessing this section if the Workshop uses a strategy we will talk about shortly called Accumulative.
However, this is only part of the total score. This score is added to the Grade for Submission to calculate the total score for the Workshop assignment.
This is a score between 0 and 100, which reflects the maximum points the teacher can assign the work submitted to the Workshop. Once the teacher has assessed the work and added their score, the score from Grade for Assessments is added to it for the final grade.
For example, our Grade for Submission is set to 50 and let's say we assign Student One 45. If the score given in Grade for Assessments was 42, Workshop would add the two scores together to get the final grade, which would work out to be 42 + 45 = 87.
The Grading Strategy offers five 'strategies' for using the grades. They are as follows: Not Graded, Accumulative, Error Banded, Criterion, Rubric.
This means that there will be no grades given for the Workshop. Instead of grades, the students and their peers are able to give comments on the submitted work. The instructor can then grade the comments. If there is no grade given by the teacher, this is only a self-assessment or peer assessment and will not be used in the calculation of their course grade.
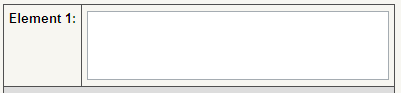
When creating Not Graded assignments you will see an Element textbox with no grading options; you will see this page when the Save changes button—at the bottom of the Editing page—is clicked. You should enter a statement or instructions about what you want the reviewers to comment on in the Element textbox. Here is what it looks like. When you finish, click on the Save changes button at the bottom of the page and the comments will be displayed to the student.
This is the default setting for Workshop's grading strategy. If this is used, the assignment is graded based upon a series of what Moodle terms assessment elements. These assessment elements will look at the submitted work using either one of these 'elements' for a very simple evaluation, or from two to twenty for more complex and detailed submissions.
When creating elements, there are three things that need to be decided on and entered into the Element editing page; they are: Description, Scale, and Weight. The Editing Assessment Elements page is shown in the next screenshot:
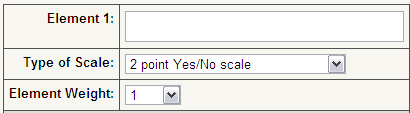
In the Element 1 textbox, we enter the description of what we want the student assessing the Workshop to do with this element. For example, if we have given a writing assignment, we may want the student to review their classmate's work and determine if they used effective support for their topic or if they had a strong conclusion. So, in the description we would want to enter a message telling the student exactly what to look for, and how to grade based on what they read.
In the Type of Scale section, we determine how points are awarded. There are ten scales in the drop-down ranging from a 2 Point Yes/No scale to a 5 Point Excellent/Poor Scale to a Score out of 100.
Depending on the assignment type, some of the scales might be easier to justify than others. For example, using a 2 Point Yes/No Scale to determine whether or not the writing assignment submitted has the required minimum of four paragraphs might make more sense than a 5 Point Excellent/Poor Scale, or a score out of 100. Selecting an appropriate and useful scale for the students to use while assessing peers, and for the assessed student to understand, is an important aspect of creating effective Workshops.
The final thing to note about Type of Scale is that whichever scale you decide to use, they are all equivalent in grading as long as the Element Weight is set the same.
You can also create custom scales. To do this, look in the Gradebook chapter for more information on how to do this.
This setting sets the weight of the Element. By default all of the Elements in the Workshop are set equally to one. If you wish to give more importance to a particular Element, go to the drop-down menu and adjust it. The scale for weights goes from +4 down to -4.
It is important to note that the weight given to the Elements, regardless of changes made, does not affect the total possible points a student can receive from the assignment.
Using this setting the teacher will create a series of Yes/No questions, which the student reviewing the Workshop will respond to. This is a good way to create criteria-based assessments. For example, if you created a writing assignment you might want to ensure that there were the requisite number of paragraphs, ten new vocabulary items used, a title, and so on. This is an easy way to do it, and it is also an easy method for students to begin working with self-reviews and peer reviews.
The Element editing page looks slightly different from the previous Grading Strategies. Here is what you will see if this option is selected:
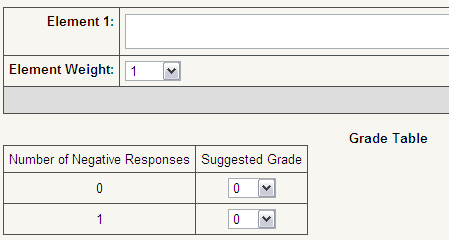
As you can see from the previous screenshot, there is the usual Element and Element Weight. These are completed as normal. Underneath you see Grade Table. In the Grade Table there are two columns: Number of Negative Responses and Suggested Grade.
The Number of Negative Responses show how many 'No' responses the student receives. The Suggested Grade drop-down menus allow you to set the number of points the student should receive depending on the number of 'No' responses they get. For example, if you had an assignment with 5 criteria and a Grade for Submission of 25, you would probably choose to set zero negative response to 25 points and five negative responses (meaning they were all incorrect) to 0 points. You can adjust the scores as you see fit.
In Criterion rating, the instructor creates a series of statements about the assignment as well as a score associated with each statement. The reviewers go through the work and then choose the statement that best fits the assignment they worked with. The setup for Criterion is fairly simple, and a single Criterion is shown in the next screenshot:

The statements entered should include a clear description of the level of work required and/or specific information or material that needs to be included to achieve the rank being assigned to the statement.
Using the Criterion rating, while a useful way for assigning scores, isn't something that students new to peer or self-reviews should probably start with. Using statements often leaves open too many possibilities for those new at assessing and can lead to inaccurate scoring and interpretations, unless the statements are very precise and detailed.
The scoring goes from 0 to 100, so there are many possible criterion statements that can be created, although, creating too many can be counterproductive since it requires the students to look through many options and they can get bored or begin skimming just to find something that looks about right.
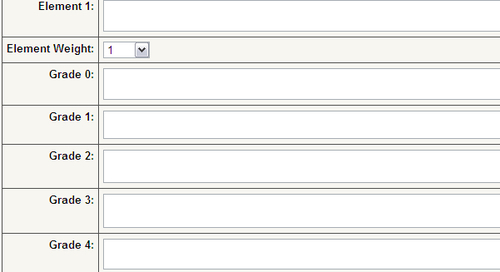
The Rubric Grading option is how Moodle integrates a rubric into the Workshop. Each 'element' or aspect of the assignment that needs to be evaluated by the reviewer is entered into an Element textbox. Variations in the quality of the 'element' are assigned to the respective Grade. Workshop uses a 5-point scale with a Grade 0 giving no points and a Grade 4 the maximum points. The Rubric Grading scale is shown in the next screenshot:
Using the Rubric Grading system is another useful way to introduce students to self-reviews and peer reviews. By creating clearly outlined ranks, students will be able to make more effective and useful evaluations of assignments. In addition, creating a series of rubrics for students to use for assessment is useful to the students themselves, since it enables them to know exactly what they need to do to achieve a specific level or score on the assignment.
The five grading strategies we have just looked at all have their uses. When creating Workshops, you need to make sure that the method selected for grading is appropriate to the assignment and the students and that the reviewer's task is clearly described.
Now let's move on and look at the next three items in the Workshop creation page as shown in the next screenshot:
