
Splitting Views
Another option you have when working with cameras is to use a split screen. When you have more than one camera, you can split the screen in two so that you can see the view from both cameras at once. To split the screen, you use the
CameraViewport command. Start by entering the following code or by opening demo07-04.bb to create a program with two cameras:
; Lighting and Cameras
; ––––––––––––––––——
Graphics3D 640,480
SetBuffer BackBuffer()
; Create camera
camera1=CreateCamera()
PositionEntity camera1,0,5,5
RotateEntity camera1,90,0,0
camera2=CreateCamera()
PositionEntity camera2,0,0,0
; Creating a light
light=CreateLight()
; This is the code for creating the cylinder
cylinder=CreateCylinder()
PositionEntity cylinder,0,0,5
; This following code makes our program run
While Not KeyDown( 1 )
RenderWorld
Flip
Wend
End
Now we’ll create the split screens using the CameraViewport command by entering the following code in bold:
; This is the code for creating the cylinder
cylinder=CreateCylinder()
PositionEntity cylinder,0,0,5
; Using CameraViewport
CameraViewport camera1,0,0,GraphicsWidth(),GraphicsHeight()/2
CameraViewport camera2,0,GraphicsHeight()/2,
GraphicsWidth(),GraphicsHeight()/2
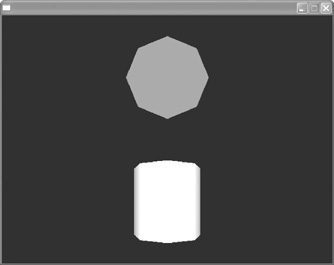
Now when you run the program, you’ll see the screen split in two. The top section is a view of the cylinder from the top, and the bottom section is a face-on view, as seen in Figure 7.11.
Figure 7.11. The view is now split.
Okay, this code is made up of a bunch of different numbers and text, so let’s break it down step by step.
CameraViewport camera1—This creates the split screen portion for camera1.
,0,0—This tells you the x and y coordinates (starting from the top-left corner of the screen) for this section of the split screen.
GraphicsWidth()—This tells you how wide this section of the split screen should be in relation to the entire screen. Let’s say you wanted the width of this split to be half the size of the screen. You would enter GraphicsWidth()/2 in this section of code. The “divided by 2” code (/2) tells Blitz3D to divide the width of the screen in two.
GraphicsHeight()/2—This indicates what the height of the split screen should be. In this case the /2 divides the screen in two horizontally so we have one split screen at the top of the screen and one at the bottom.
Note: Now You Try
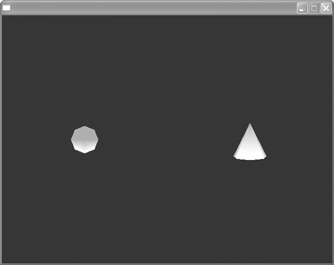
In the last example, the screen was split horizontally through the middle. Try on your own to create a split vertically down the middle of the screen with a cone. Once you are done, compare your code with the actual code used to create Figure 7.12, demo07-05.bb.
Figure 7.12. The demo07-05.bb program.
;demo07-05.bb - Split views with cones
; ––––––––––––––––
Graphics3D 640,480
SetBuffer BackBuffer()

Const ESC_KEY = 1

; Create camera
camera1=CreateCamera()
PositionEntity camera1,0,5,5
RotateEntity camera1,90,0,0
camera2=CreateCamera()
PositionEntity camera2,0,0,0


; Create a light
light=CreateLight()
; This is the code for creating the cone
cone=CreateCone()
PositionEntity cone,0,0,5
EntityColor cone, 0, 26, 125

; Using CameraViewport
CameraViewport camera1,0,0,GraphicsWidth()/2,GraphicsHeight()
CameraViewport camera2,GraphicsWidth()/2,0,GraphicsWidth()/2,
GraphicsHeight()

; This following code deals with cameras and cylinders
While Not KeyDown(ESC_KEY)

    RenderWorld
    Flip
Wend
End