Creating Heightmaps with a Brush
Another way that you can create a heightmap in PHOTO-PAINT, or just about any other graphics application, is to simply paint one. Just remember as you paint that the darker the shade of gray, the flatter the surface will be and vice versa. Start by launching PHOTO-PAINT.
Click the New icon. If the Welcome screen doesn’t appear, or if you are already in PHOTO-PAINT, just click File > New. A new document dialog box will now appear where you can set the parameters for your heightmap.
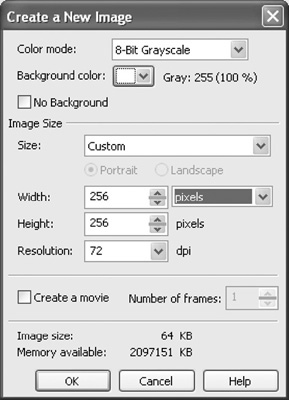
Take a look at Figure 8.7 and make sure that your settings are the same. You want the Color mode to be 8-bit Grayscale, the width and height to be 256 pixels, and the resolution to be 72 dpi. You’ll probably have to change the units of measurement to pixels to be able to enter these numbers. Click OK once you have all the settings entered.
Figure 8.7. Enter your image settings for the color, size, and resolution.
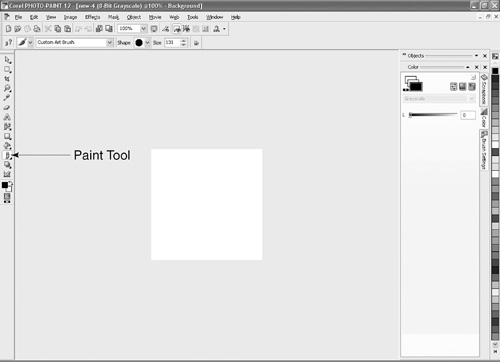
Click on the Paint tool button in the toolbox, as shown in Figure 8.8.
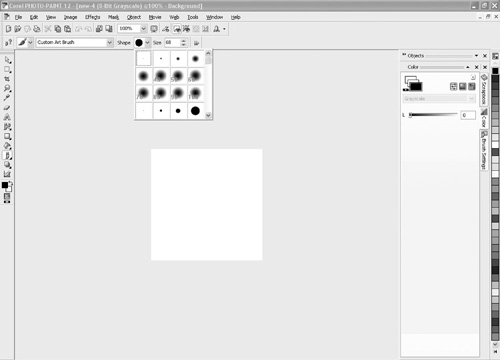
Click on the Shape drop-down menu from the Property bar. You’ll now see a list of different brush sizes and shapes, as shown in Figure 8.9. You can choose from any of these brushes.
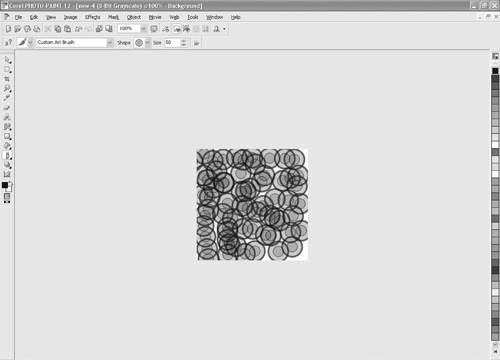
Click and drag across the page to draw, as shown in Figure 8.10. You can select different colors to change the amount of shading in order to create different heights.
Now that your heightmap is created, it is a good idea to save it. Generally speaking, you should save it as a .bmp file. In PHOTO-PAINT, click File > Save As to open a dialog box where you can save your file. Click the Save As Type drop-down arrow and scroll until you can select BMP—Windows Bitmap. Now give your file a name—call this heightmap2.bmp—and then click the Save button.