
Pausing
Imagine that you are in the middle of playing the game of your life. Everything is coming together, all cylinders are firing, and the high score is in sight. Just then the telephone rings, the dog starts barking, the doorbell goes off, your mother starts yelling, and nature calls. You don’t want to ruin your chances at getting that high score, but what do you do? Easy: You pause the game. Thankfully, programming a pause into your game is easy because Blitz3D has a command that will pause all the action in your game until you press a key. The command for pausing is WaitKey(), which will pause the game until any key is pressed. Let’s incorporate it into a game. Open the file called demo13-10.bb, which contains several spheres flying around a nucleus. Save this file to a new location on your computer and make sure the files sunskin.jpg and orbit.jpg are saved in the same location. We’ll add a command that initiates the pause whenever the letter P is pressed. Add the following code in bold to the program:
While Not KeyDown(ESC_KEY)
If KeyDown(P_KEY) Then WaitKey()
; Turn pivots, making atom orbit around the nucleus.
TurnEntity pivot,0,3,0
TurnEntity pivot2, 3,0,0
TurnEntity pivot3, 0,0,3
Now run the program and press the letter P. The action on the screen will stop. Press any other key on the keyboard and the action will resume.
Note: WaitJoy() and WaitMouse()
In addition to using the WaitKey() command, you can also use WaitJoy(), which will pause the program until a joystick button is pressed, or WaitMouse(), which will pause the program until a mouse button is pressed.
Typically, when you pause a program, you’ll want something on the screen to indicate that the game has been paused—for example, the words “Game Paused.” Earlier in this chapter you added text using the Text command, which is how we’ll indicate that the game is paused.
Replace the code If KeyDown(P_KEY) Then WaitKey() with this:
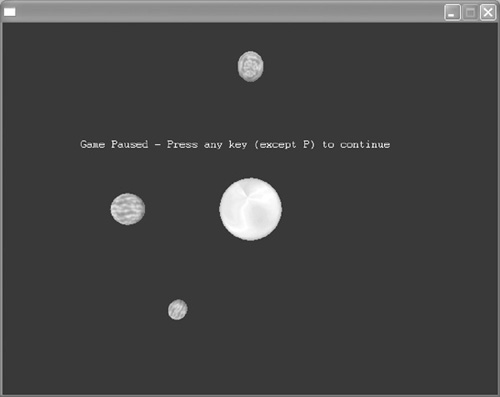
If KeyDown(P_KEY) Then
						Text 100,150, 'Game
						Flip
						WaitKey()
						EndIf
Run the program now, and press the letter P. The game should pause, and you should see the same text that appears in Figure 13.30. Notice in the code that we added the command called Flip. We need this command because the text is drawn on the back buffer, and we wouldn’t be able to see it otherwise. To bring it to the front buffer (directly onscreen), we need to use the Flip command.
Figure 13.30. When the game is paused, this text should appear. It will disappear as soon as the game is resumed.
Note: Pause Function
Rather than putting the pause code in the main game loop, you should create a function for it. It’s always the best practice to put as little code in the main game loop as possible. Look back to Part I for instructions on how to use functions.
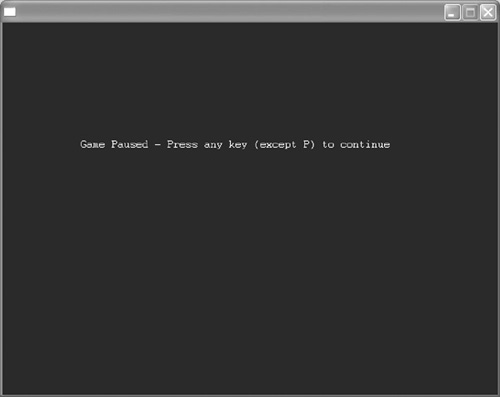
One other option you might want to use when creating a pause in your program is to clear the screen of action while the game is paused. To do this, you can use the Cls command. This command will clear the front buffer (everything on the screen) until the game is resumed. Simply add the Cls command as seen here in
bold. After you’ve added the code, run the program and then press the P key. The screen should be clear, except for the text shown in Figure 13.31.
Figure 13.31. Using the Cls command clears the front buffer so that all you will see is the text we created until the game is resumed.
If KeyDown(P_KEY) Then
Cls
Text 100,150, "Game Paused - Press any key (except P) to continue"
Flip
WaitKey()
EndIf
Earlier in the book we created a fancy looking Pause screen that we can incorporate when the game is paused rather than just having boring text. Make sure that the image pause.bmp is saved to the same location as the program. Replace the existing pause code with the following to load your pause image whenever the letter P is pressed:
If KeyDown(P_KEY) Then
Cls
pause=LoadImage ("pause.bmp")
DrawImage pause,0,0
Flip
WaitKey()
EndIf
You can see that all of the code created here is almost identical to the pause code that just contained text. The difference is that we used the command pause= LoadImage ("pause.bmp") to load the image into the program. We then drew it, starting at point 0,0 (the top-left corner of the screen) by using the code DrawImage pause,0,0. Once again, notice how we used the Flip command to bring the image to the front buffer. Since our image is exactly the same size as the screen of our program, when we placed it starting at point 0,0, it took up the entire screen. When you run the program now and press P, you should see the Pause screen image appear.
Note: Exit Screen
You can use the same technique covered here to create an Exit screen, asking users if they are sure they want to quit before exiting.