Exporting the Bottle
Now we need to convert the bottle into a format that Blitz3D can understand. Before we do that, the bottle needs to be resized since it is currently huge.
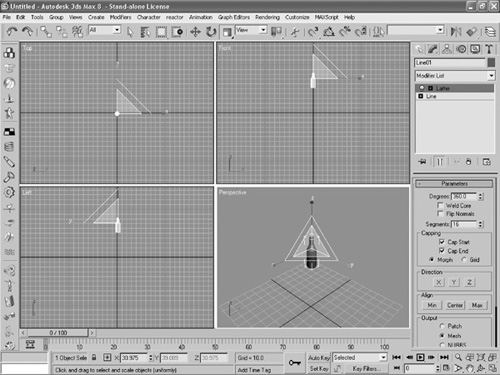
Click the Select and Uniform Scale button. It looks like a square within a square. A series of yellow shaded triangles will appear around your bottle.
Position the mouse pointer over the middle of the yellow triangle in the Perspective window (see Figure 10.6).
Figure 10.6. After you’ve selected the Select and Uniform Scale button, drag downward on the inner yellow triangle that appears.
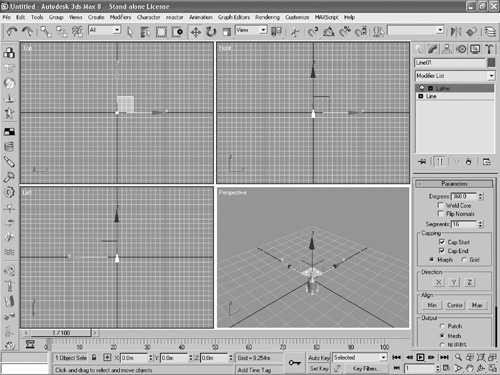
Click and drag downward. As you drag, the bottle will shrink (see Figure 10.7). Doing this also moves the bottle off center, so we’ll now move it back.
Click the Select and Move button from the toolbar. A yellow rectangle and several axes will appear around your object.
Position the mouse pointer over the middle of the yellow rectangle in the Perspective window.
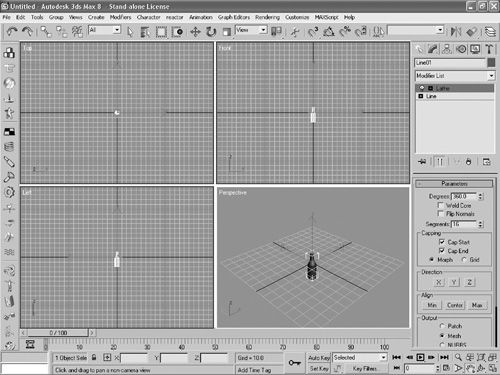
Click and drag the bottle until it is in the middle of the grid (see Figure 10.8). Alternatively, you can just enter 0 in the X, Y, and Z fields at the bottom of the screen.
Note: Object Position
It’s very important that you move your object to the middle of the grid before you export it. When you insert the object into your program, Blitz3D will remember its location from the point where it was exported. If the object was not in the center of the grid, you’ll have a hard time positioning it within your game.
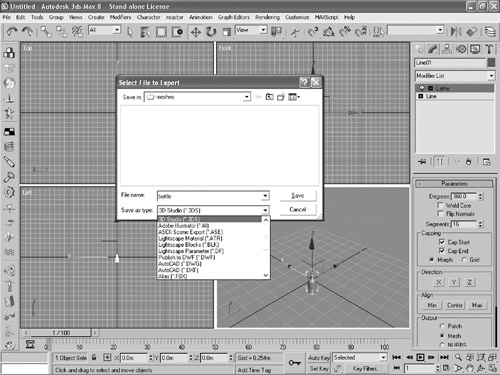
Click the Save As Type drop-down arrow and choose 3D Studio (*.3ds). This will save your file to the .3ds format, which can be read by Blitz3D.
Navigate to the folder where you would like to save the file, give it a name, and then click Save (see Figure 10.9). You’ve now successfully saved the file so that it can be used in Blitz3D.
Figure 10.9. Save your file to the .3ds format that Blitz3D can easily understand.
