Creating Heightmaps with Textured Fills
Corel PHOTO-PAINT comes with a library of textures that are perfect for creating heightmaps. With a few clicks of the mouse button, you can create your perfect heightmap. Start off by launching PHOTO-PAINT. A Welcome screen will appear.
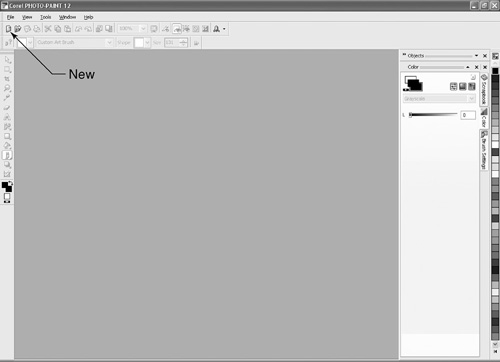
Click the New icon (see Figure 8.2). If the Welcome screen doesn’t appear, or if you are already in PHOTO-PAINT, just click File > New. A new document dialog box will now appear where you can set the parameters for your heightmap.
Take a look at Figure 8.3 and make sure that your settings are the same. You want the Color mode to be 8-bit Grayscale, the width and height to be 256 pixels, and the resolution to be 72 dpi. You’ll probably have to change the units of measurement to pixels to be able to enter these numbers. Click OK once you have all the settings entered.
Figure 8.3. Enter your image settings for color, size, and resolution.

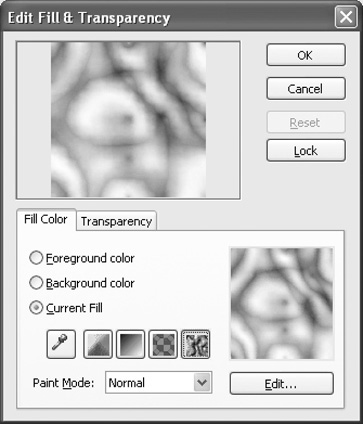
Press the Ctrl key and the Backspace key at the same time. This will open the Fill dialog box.
Now click the Edit button. This will open a dialog box where you can choose a texture for your heightmap (see Figure 8.4).
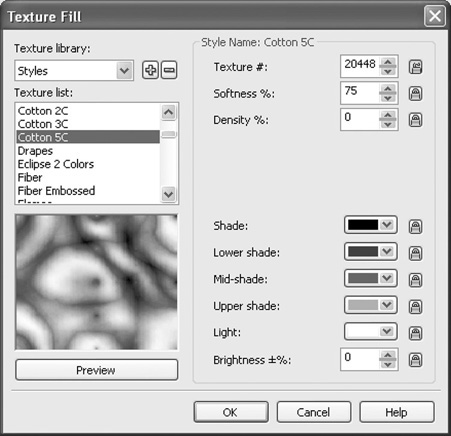
Figure 8.4. Choose a texture for your heightmap.
Scroll through the different textures and click on a texture name to see a preview of it. The textures are grouped into seven different categories. You can change categories by clicking on the Texture Library drop-down arrow. There are dozens of different textures to choose from with literally millions of combinations. That’s right, I said millions! Every time you click on the Preview button in this dialog box, the pattern will be changed slightly so you can choose from an infinite number of different combinations (see Figure 8.5).
Figure 8.5. You can create millions of different combinations by clicking the Preview button.
Once you find a pattern that you like, you can click the OK button to return to the last dialog box. You’ll have to click OK again to be returned to PHOTO-PAINT where you will now see your heightmap. As you make your decision on a heightmap, keep in mind again that the darker an area is, the flatter it will be, while the lighter an area is, the more it will be raised.
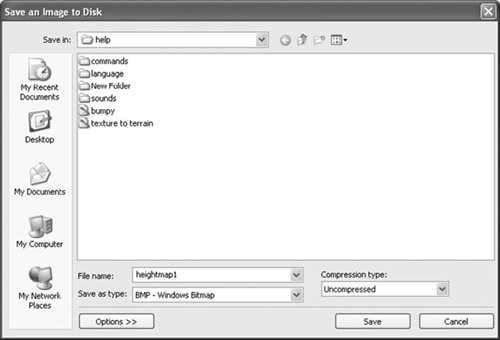
Now that your heightmap is created, it is a good idea to save it. Generally speaking, you should save it as a .bmp file. In PHOTO-PAINT, click File > Save As to open a dialog box (see Figure 8.6) where you can save your file. Click the Save As Type drop-down arrow and scroll until you can select Windows BMP—Windows Bitmap. Now give your file a name—call this heightmap1.bmp—and then click the Save button. That’s it. You’ve created your first heightmap.