
Walls
How can you create a wall? Let me count the ways. The truth is that PHOTO-PAINT provides several dozen options for creating a wall. Below you’ll find two samples, but again, I encourage you to experiment on your own to create all types of walls.
Brick Walls
There is actually an effect in PHOTO-PAINT that will allow you to instantly create a brick wall.
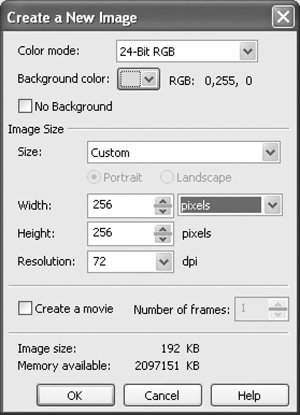
Set the Color mode to 24-bit RGB and click the Background color drop-down arrow and select a color for your brick wall (see Figure 8.14).
For the rest of the settings, take a look at Figure 8.15 and make sure that your settings are the same. You want the width and height to be 256 pixels and the resolution to be 72 dpi. You’ll probably have to change the units of measurement to pixels to be able to enter these numbers. Click OK once you have all the settings entered.
Figure 8.15. Enter your image settings for color, size, and resolution.
Click Effects > Texture > Brick Wall. This will open a dialog box (see Figure 8.16), and at the same time you’ll be able to preview the effect. You can click and drag the Roughness slider and adjust other settings like the width and height of the brick and grout. Once you’ve got the brick wall the way you like it, click OK.
Now that your brick wall is created, it is a good idea to save it. Generally speaking, you should save it as a.jpg file. In PHOTO-PAINT, click File > Save As to open a dialog box where you can save your file. Click the Save As Type drop-down arrow and scroll until you can select JPG—JPEG Bitmaps. Now give your file a name—call this wall1.jpg—and then click the Save button.

Plaster Wall
You can create the look of a plaster wall by using the same technique used for the brick wall but just applying a different effect.
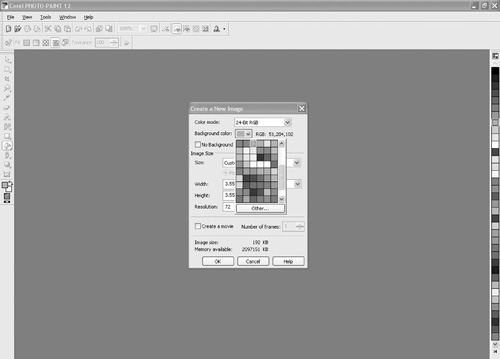
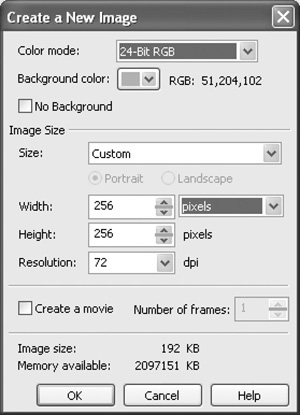
Click the Background color drop-down arrow and select a color for your plaster wall. For the rest of the settings, take a look at Figure 8.17 and make sure that your settings are the same. You want the Color mode to be 24-bit RGB, the width and height to be 256 pixels, and the resolution to be 72 dpi. You’ll probably have to change the units of measurement to pixels to be able to enter these numbers. Click OK once you have all the settings entered.
Figure 8.17. Enter your image settings for color, size, and resolution.
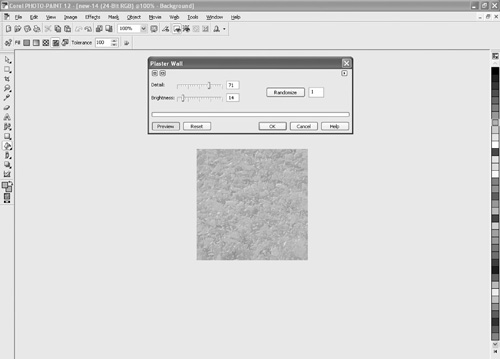
Click Effects > Texture > Plaster Wall. This will open a dialog box (see Figure 8.18), and at the same time you’ll be able to preview the effect. You can click and drag the sliders to adjust the wall. Once you’ve got the plaster wall the way you’d like it, click OK.
Now that your plaster wall is created, it is a good idea to save it. Generally speaking, you should save it as a .jpg file. In PHOTO-PAINT, click File > Save As to open a dialog box where you can save your file. Click the Save As Type drop-down arrow and scroll until you can select JPG—JPEG Bitmaps. Now give your file a name—call this wall1.jpg—and then click the Save button.
Note: Why Not Photos?
Rather than having to create textures, terrains, and skies from scratch, you can always use your own photos when texture mapping. Imagine that you wanted to create a realistic looking building in your game. Why not take a photo of a building and wrap it around a stretched cube? A great resource for finding photos of different objects is the Image search on Google. Just keep in mind that most images are copyrighted, so if you plan on distributing your game, make sure you have permission to use the images.