
Code Snippets You Can Use
Although it would take a book this size to explore the VBA object model for just one of the Office applications, most of the programming chores you'll encounter boil down to a handful of common techniques. This section gives you working code you can plug into your macros to overcome the most common problems.
Tip from 
If you want to see more examples of VBA code in action, we recommend that you purchase Platinum Edition Using Microsoft Office XP, also published by Que. You'll find real-world, premade code snippets, which you can drop in and use today. Used in tandem with this book, you truly can take control of Office and make it work your way.
Using VBA to Navigate Office Documents
One of the first tasks most beginning VBA programmers undertake is to figure out how to move around a document using VBA commands. Navigation is a fundamental capability of all the versions of VBA in Office XP.
Navigating Word Documents with VBA
In Word, you will frequently want to move the insertion point (VBA calls it the "Selection") within a document. It's easiest to understand how VBA/Word accomplishes this navigation by trying a few different VBA/Word commands, and watching what happens on the screen:
Open (or create) a Word document that has several paragraphs of text as a test document, so you can see what is going on with each of the different commands.
Bring up the VBA Editor by pressing Alt+F11. Arrange the screen so that you can see both the VBA Editor and the Word document at the same time.
Find a convenient project in the Project Explorer (say, MyMacros.dot or Normal) and double-click it. Navigate down to a Module. Use Insert, Procedure and create a new subroutine called Navigate.
In between the Sub/End Sub pair, type each of these commands, one at a time. Press F8 to step through the subroutine. Watch where your cursor ends up in the Word document:
Selection.HomeKey unit:=wdStory, Extend:=wdMove   'Moves to the beginning of the doc
Selection.EndKey unit:=wdStory, Extend:=wdMove    'Moves to the end of the doc
Selection.MoveLeft unit:=wdCharacter, Count:=1, Extend:=wdMove 'Move left one char
Selection.MoveRight unit:=wdWord, Count:=1, Extend:=wdMove 'Move right one word
Selection.MoveUp unit:=wdParagraph, Count:=1, Extend:=wdMove 'Move up one para
ActiveDocument.Bookmarks("test").Select  'Selects the bookmark "test"
Navigating Excel Workbooks with VBA
In Excel, you're less likely to use the insertion point, and will most frequently refer to cells by name or location. Use the method in the preceding section (working with a project such as Personal.xls or Macros.xls) to write and test each of these commands:
Range("A1") = "First Cell" 'Put the text "First Cell" in cell A1
Cells.SpecialCells(xlLastCell) = "Last Cell" 'Put the text "Last cell" in the last used cell
Range("test").Rows(1) = "First Row" 'Put "First Row" in top cells of the range "test"
Range("test").Rows(1).Columns(1) = "First Cell in test"  åUpper left cell of "test"
Navigating PowerPoint Presentations with VBA
With the possible exception of Publisher, PowerPoint presents the greatest challenge in navigating the object model. For example, to change the title of the third slide to "Hello," you have to resort to this kludgy technique:
ActivePresentation.Slides(3).Shapes.Title.TextFrame.TextRange = "Hello"
Navigating Publisher Publications with VBA
Publisher's nascent object model makes it difficult to navigate through a publication, unless you know in advance what the publication looks like, which text boxes appear in what sequence, what the text boxes contain, and so on. This command, for example, replaces the text in the currently selected text box with "Hello Publisher!":
Selection.TextRange.Text = "Hello Publisher!"
Use VBA to Augment Find and Replace
Another common activity, Finding and Replacing text from a VBA program, can be challenging. The primary difficulty lies in figuring out precisely when VBA performs the Find (or Replace). Much of the work in implementing a Find is in setting up all the parameters properly.
Using Find and Replace VBA Code in Word
In Word, if you want to find and replace all occurrences of one string with another, you needn't resort to looping through the document. Instead, the simple VBA snippet in Listing 41.1 will suffice.
Listing 41.1. ReplaceOldWithNewString
With ActiveDocument.Content.Find
    .ClearFormatting
    .Replacement.ClearFormatting
    .Text = "old string"
    .Replacement.Text = "new string"
    .Execute Replace:=wdReplaceAll
End With
|
Note
Be sure to use the .ClearFormatting property to modify both the Find and Replacement objects. Otherwise, you might inadvertently search for formatted text using leftover settings from a previous search.
Because this succinct piece of code doesn't refer to the Selection, the user won't see the document scroll and the mouse pointer move while the macro runs. That has its advantages and disadvantages. On the plus side, the macro will run faster because the screen isn't updated each time you find the string. On the minus side, the user might think the macro has frozen her PC because there's no visible sign of life until the macro finishes (unless the macro writes updates to, for example, the status bar).
If you want to loop through a document and count the number of occurrences of, say, "string," moving the selection as you go, use a program like that in Listing 41.2.
Listing 41.2. CountOccurrencesOfString
Using Find and Replace VBA Code in Excel
In Excel, the general approach is similar. For example, to replace "old string" with "new string" in all the cells of the active worksheet, use this:
Cells.Replace What:="old string", Replacement:="new string", LookAt:= xlPart, SearchOrder:=xlByRows, MatchCase:=False
Always explicitly include values for LookAt (whether Excel must match the contents of the entire cell, or if only a partial match suffices), SearchOrder, and MatchCase, to avoid picking up leftover settings from a previous Find/Replace operation.
If you want to restrict the replacing to a specific named range (such as Database), try this technique:
Range("Database").Replace What:="old string", Replacement:="new string", LookAt:=xlPart,
 SearchOrder:=xlByRows, MatchCase:=False
Using VBA to Apply Formatting
VBA gives you full control over formatting, although the mechanics of applying formatting can be obscure. For example, if you want to change a selection of text to italic in Word or Excel, this command does the trick:
Selection.Font.Italic = True
But to turn selected text italic in PowerPoint, you have to jump through this hoop:
ActiveWindow.Selection.TextRange.Font.Italic = True
Similarly in Publisher:
Selection.TextRange.Font.Italic = True
Formatting text as you place in it a document, spreadsheet, or presentation is a more complex process. Say you want to insert this sentence into a Word document:
Please join us at the Three Dog Delight gala.
It's easiest to "type" text into the document, interrupting the macro's typing to switch to italic and back. Listing 41.3 has the code that will do it.
Listing 41.3. TypeWordFormattedString
With Selection
    .TypeText "Please join us at the "
    .Font.Italic = True
    .TypeText "Three Dog Delight"
    .Font.Italic = False
    .TypeText " gala."
End With
|
Excel's in-cell formatting works in a completely different way. Instead of interrupting the typing to switch to italic and back, Excel requires you to dump all the text into the cell, and then go back and make selected characters italic. To put that same sentence in the selected Excel cell, use the code in Listing 41.4.
Listing 41.4. InsertExcelFormattedString
With Selection
    .Value = "Please join us at the Three Dog Delight gala."
    .Characters(23, 17).Font.Italic = True
End With
|
The same concepts apply in PowerPoint as in Excel, although the actual commands vary a bit, as in Listing 41.5.
Listing 41.5. InsertPowerPointFormattedString
With ActiveWindow.Selection.TextRange
    .Text = "Please join us at the Three Dog Delight gala."
    .TextRange.Characters(23, 17).Font.Italic = True
End With
|
Publisher works similarly:
.TextRange.Characters(23, 17).Font.Italic = True
Sometimes you want to use formatting as a selection criterion. Say you want to loop through a Word document and make sure that all the "Heading 4"-style paragraphs start with the text "(d)". The program in Listing 41.6 will do it.
Listing 41.6. AddDToHeading4
The .Format = True setting in the Find loop in Listing 41.6 ensures that Word looks for paragraphs with the specified formatting.
Using VBA to Loop Through Collections
VBA abounds with collections. All the files currently open in an application, for example, define one common collection. Other collections include all the bookmarks in a document, or all the named ranges in a workbook.
Sometimes you know exactly which member of a collection you're trying to find. For example, the VBA/Excel command
Workbooks("Book1.xls").Activate
scans the Workbooks collection, and brings up the workbook called Book1.xls.
At other times, however, you want your program to look at all the members of a collection, one at a time, to see which one meets certain criteria. For example, you might want to loop through all the slides in a presentation to select the one with the most verbiage in a text placeholder.
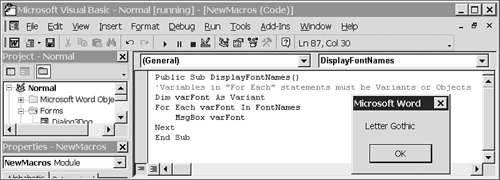
The VBA command For Each enables you to step through all the members of a collection. In Word, the FontNames collection contains a list of all the fonts available in Word. Listing 41.7 shows you how to loop through the collection, displaying the name of each font in its own message box (see Figure 41.6).
Figure 41.6. Use the VBA/Word FontNames collection to display the names of all available fonts.
Listing 41.7. DisplayFontNames
'Variables in "For Each" statements must be Variants or Objects
Dim varFont As Variant
For Each varFont In FontNames
    MsgBox varFont
Next
|
After you see how For Each works, it's only a small step to write a VBA/Word program that prints a list of all the fonts available on your machine. Taking input from the user for point size and a test sentence, Listing 41.8 shows you how that might be done.
→ To add VBA code that asks the user to enter information, see "Displaying Messages".
Listing 41.8. PrintFontNames
If you run the program shown in Listing 41.8, you'll be struck by one severe shortcoming: The font names aren't alphabetized. That problem is solved in the next section.
Using VBA to Sort an Array
Unfortunately, collections aren't sorted. When you retrieve items from a collection, as in the preceding section, they can appear randomly. In many cases, that won't do. If you print a list of fonts, especially on a machine with hundreds of installed fonts, you expect to see a neat, alphabetized list. If you present a list of open workbooks and invite the user to choose one, it makes the user's job much easier if you alphabetize the list.
Adding insult to injury, only Word has a built-in Sort function, and it's so well hidden that you're unlikely to find it on your own. The command to sort an array called strFonts() looks like this:
WordBasic.sortarray strFonts()
VBA/Word's Sort works only on arrays, so if you want to sort a collection (such as the FontNames collection), you first must transfer all the members of the collection into an array. It isn't as complicated as it sounds, as Listing 41.9 demonstrates.
Listing 41.9. TransferCollectionToArray
If you combine this technique for transferring a collection to an array with the sort method and the PrintFontNames routine shown earlier in Listing 41.8, and put the "With Selection" command into service, you'll come up with the macro called PrintSortedFontNames, shown in Listing 41.10.