
After using the standard built-in text and visual reports for several reviews and meetings, you might come up with some new ideas for customizing your presentation and content. You can tweak a built-in report a little (or a lot) to make it better suit your needs. You can either change an existing report or create an entirely new report.
You can create a new text report by basing it on a copy of an existing report, leaving the original version intact. You can directly modify an existing report. You can also change the page layout of a report so that it prints the way you want.
Copying an existing text report and modifying the copy is the easiest and safest method for creating a new report. The original report remains unfettered, and you can feel free to go wild with the copy. It will probably turn out great, but it’s good to know you can experiment without dire consequences. If you get into any trouble, you can always delete the copy and start over again with a fresh copy.
To copy and modify an existing text report, follow these steps:
Click Report, Reports.
Double-click Custom.
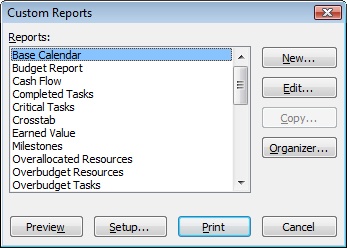
The Custom Reports dialog box appears (see Figure 12-26).
In the Reports box, click the report you want to copy and then click Copy.
One of three possible dialog boxes appears, depending on the format of the report you’re copying: Task Report, Resource Report, or Crosstab Report (see Figure 12-27).
In the Name box, which shows Copy Of <Report Name>, enter the name of your new custom report.
Make sure it’s a name that’s different than those already in the Reports list.
In the other fields and tabs of the dialog box, make any changes you want to the report content.
Use the Definition tab to set the fields, time periods, and filters to be used. Use the Details tab to specify additional information you want to add to the report. Use the Sort tab to specify which field should dictate the order of information in the report.
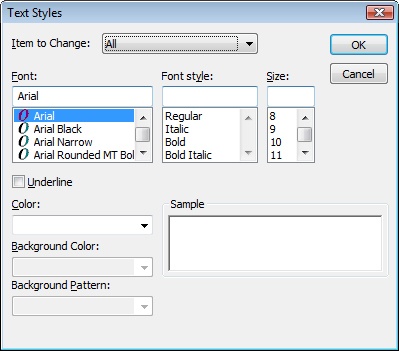
Make any changes you want to the report fonts by clicking the Text button.
The Text Styles dialog box appears (see Figure 12-28).
In the Item To Change box, click the report element whose text you want to format and then specify the changes throughout the rest of the dialog box. When finished, click OK.
When finished with your new report’s definition and changes, click OK in the report definition dialog box.
The name of your new text report appears in the Reports list in the Custom Reports dialog box.
Select your new report if necessary and then click Preview to generate the report and see what it looks like.
If you want to make further changes, click the Close button in the Preview window and then click Edit.
The report definition dialog box appears again.

Your new report is saved with your project file and is available whenever you work in this particular project.
You can directly edit the definition properties of a built-in text report. The elements available for editing vary by report. In some reports, all you can change is the font. In other reports, you can change the reporting period, filter for specific types of information, specify that information be drawn from a specific table, and more.
When you change an existing report, your changes are saved only with the project file. If you open the same text report in any other project file, the original default report properties will still be present there.
To edit a text report, follow these steps:
Click Report, Reports.
In the Reports dialog box, double-click the report category you want.
Click the report you want and then click Edit.
One of four possible dialog boxes appears, showing the options available for this report: Task Report, Resource Report, Crosstab Report, or Report Text.
In the other fields and tabs of the dialog box, make the changes you want to the report content or format.
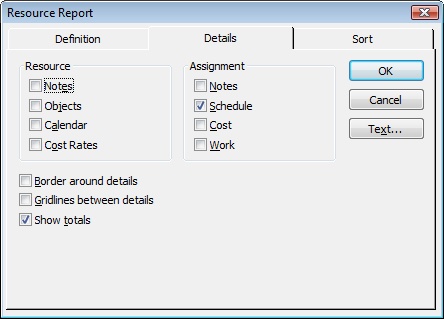
If available, use the Definition tab to set the fields, time periods, and filters to be used. Use the Details tab to specify additional information you want to add to the report (see Figure 12-29). Use the Sort tab to specify which field should dictate the order of information in the report.
Make any changes you want to the report fonts by clicking the Text button.
When finished editing the report, click OK in the report definition dialog box.
Select the edited report if necessary and then click Preview to generate the report and see what it now looks like.
If you want to make further changes, click the Close button in the Preview window and then click Edit again to reopen the report definition dialog box.
You can modify the header, footer, page numbering, and other general page setup elements of a built-in report, a copied report, or a brand-new report. To do this, follow these steps:
Click Report, Reports.
Double-click Custom.
In the Custom Reports box, click the report whose page setup you want to modify and then click Page Setup.
Use the options on the Page, Margins, Header, and Footer tabs to make the changes you want.
Note
For more information about page setup options, see the sidebar titled Set Options for Printed Views earlier in this chapter, in Chapter 12.
The changes you make apply to the selected report in the current project and are saved with the project for the next time you need to print this report.
Whether you edit a built-in template or create your own, you specify the fields you want to work with and the type of data on which you want to report.
To edit a built-in visual report template, do the following:
Click Report, Visual Reports.
Click the built-in visual report template you want to edit and then click Edit Template.
The Visual Reports - Field Picker dialog box appears.
To add fields to the OLAP cube for the visual report, select the fields you want in the Available Fields list. Then click Add.
The fields appear in the Selected Fields list.
To remove fields from the Selected Fields list, select the fields and then click Remove.
You can select multiple fields to add or remove by holding the Ctrl key and clicking the fields.
Click the Edit Template button.
Microsoft Project builds the OLAP cube based on the fields you selected. Depending on the type of report, Excel or Visio generates the report based on your modified template.
Make the changes you want to the settings in Excel or Visio.
In Excel or Visio, save the template.
The changes you’ve made to the template are saved for future use, replacing the previous version of the template. This modified template is available to any Microsoft Project file you use.
Note
For more information, see the section titled Configuring a Visual Report in Excel in Chapter 17, and the section titled Configuring a Visual Report in Visio in Chapter 19.