
In this section, we will explore how to unpack a firmware and update it with our custom firmware. We have noted that the firmware images will not include all the files to construct a complete system. Typically, we find the following:
- Bootloader (1st/2nd stage)
- Kernel
- File-system images
- User-land binaries
- Resources and support files
- Web-server/web-interface
In this section, we will utilize USBJTAG NT, while the USB connected to our Kali Linux and the JTAG is connected on the circuit board of the device. JTAG stands for Joint Test Action Group. It is an industry standard for verifying designs and testing printed circuit boards after manufacture.
JTAG can be used more from a TAP perspective no matter how restricted the device is. The manufacturer will usually leave either a serial port or a few TAPs (Test Access Port). In our experience, if the serial access is not yielding good results or the device is too locked down, it might be easier to go for a JTAG port (but this is not always the case as the device might be completely locked down).
JTAG architecture is specified by the chip maker and in most cases, even with a daisy-chained JTAG, the JTAG follows the main chipset's specifications for command and control. All the products are assigned with a FCC ID that provides the device details. The FCC ID can be searched by visiting https://www.fcc.gov/oet/ea/fccid. We must get the right voltage or else we will end up either breaking the device or making the hardware faulty. Once the type of JTAG architecture has been identified, one can start looking at the specifications and commands that are required to configure the connection.
In this section, we will utilize USBJTAGNT, which is preconfigured with a list of devices and different categories and type. This tool can be directly downloaded from https://www.usbjtag.com/filedownload/usbjtagnt-for-linux.php?d=1 and we will be utilizing the USBJTAG NT cable for this example. The physical connective to the router will look like the following image:

Since USBJTAGNT heavily uses these libraries, to successfully run it on Kali Linux, one has to ensure libqtgui and libqtnetwork are installed, this can be achieved by issuing apt-get install libqt4-network:i386 libqtgui4:i386.
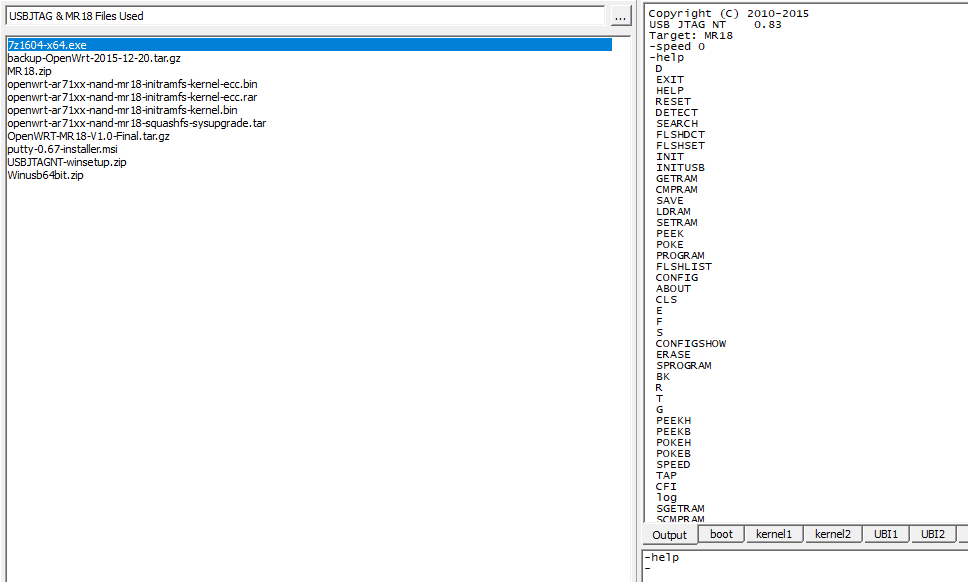
Then, you should successfully be able to launch the application without any problem as shown in the following screenshot:

Once you select the Category, Protocol type, and Target, we will utilize Router, EJTAG as Protocol and then select the model of the router from target. If the connected JTAG physically works fine, then we are good to debug the device as shown in the following screenshot:
The program command is utilized to flush the OEM (Original Equipment Manufacturer) operating system. Once the program is complete, we can upload a new .bin file to the device and that will load OpenWRT to the selected router and have full privileges. OpenWRT is an open source firmware for residential gateways, originally created for Linksys WRT54G wireless routers. It has grown into an embedded Linux distribution and now supports a wide range of devices.
This can be verified by direct SSH access to the device with root privileges as shown in the following screenshot (ensure you have a physical ethernet cable connected to your router and laptop and set a static IP):
