Using Xamarin.Mobile to track a user's GPS location is as simple as accessing their contacts. There is a similar process for setting up access on iOS and Android, but in the case of location, you don't have to request permission using code. iOS will automatically show the standard alert requesting permission, and Android requires a manifest setting.
As an example, let's create an application that displays a list of GPS location updates over time. Let's begin with an iOS example by creating a Single View Application project. This can be done by navigating to iOS | iPhone Storyboard and clicking on Single View Application, just like in the previous section. Make sure you add Xamarin.Mobile to the project from the Component Store.
Now, let's implement UITableView to display a list of GPS updates as follows:
- Open the
MainStoryboard.storyboardfile. Delete any existing controllers created by the project template. - Create
UINavigationControllerwithUITableViewControlleras its root child controller. - Set the class of
UITableViewControllertoLocationControllerfound under the Identity Inspector in Xcode. - Save the storyboard file and return to Xamarin Studio.
Open LocationController.cs and let's start by setting up our GPS to update a table view over time. Add using Xamarin.Geolocation; to the top of the file; we can set up some member variables and create our Geolocator object in the controller's constructor as follows:
Geolocator locator;
List<string> messages = new List<string>();
public LocationController (IntPtr handle) : base (handle)
{
  Title = "GPS";
  locator = new Geolocator();
  locator.PositionChanged += OnPositionChanged;
  locator.PositionError += OnPositionError;
}
Next, we can set up our event handlers as follows:
void OnPositionChanged (object sender, PositionEventArgs e)
{
  messages.Add(string.Format("Long: {0:0.##} Lat: {1:0.##}",e.Position.Longitude, e.Position.Latitude));
  TableView.ReloadData();
}
void OnPositionError (object sender, PositionErrorEventArgs e)
{
  messages.Add(e.Error.ToString());
  TableView.ReloadData();
}
These will add a message to the list when there is an error or a location change. We used string.Format to only display the longitude and latitude up to two decimal places.
Next, we have to actually tell Geolocator to start listening for GPS updates. We can do this in ViewDidLoad as follows:
public override void ViewDidLoad()
{
  base.ViewDidLoad();
  locator.StartListening(1000, 50);
}
In the preceding code, 1000 is a hint for the minimum time to update the GPS location, and the value 50 is a hint for the number of meters that will trigger a position update.
Last but not least, we need to set up the table view. Set up LocationController to implement IUITableViewDataSource and add the following methods to the controller:
public override int RowsInSection(UITableView tableview, int section)
{
return messages.Count;
}
public override UITableViewCell GetCell(UITableView tableView, NSIndexPath indexPath)
{
var cell = tableView.DequeueReusableCell(CellName);
if (cell == null)
cell = new UITableViewCell(UITableViewCellStyle.Default, CellName);
cell.TextLabel.Text = messages [indexPath.Row];
return cell;
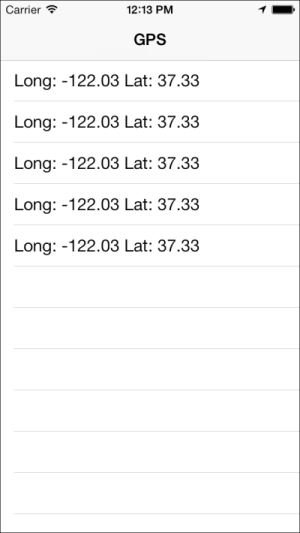
}If you compile and run the application, you should see an iOS permission prompt followed by the longitude and latitude in the table view over time, as shown in the following screenshot:
Just as in the previous section, using Xamarin.Mobile for GPS location is almost identical to the APIs we used in iOS. To begin with our Android example, go to Android | Android Application in Xamarin Studio. Make sure you add Xamarin.Mobile to the project from the Component Store.
Let's create ListView to display a list of messages of the GPS location updates as follows:
- Open the
Main.axmlfile from thelayoutfolder under theResourcesdirectory in the Android designer. - Remove the default button from the project template and add
ListViewto the layout. - Set Id to
@+id/messages. - Save the file and open
MainActivity.csso that we can make some code changes.
As usual, remove any extra code that was created by the project template. Next, add a using statement for Xamarin.Geolocation. Then, add a simple BaseAdapter<string> inside the MainActivity class as follows:
class Adapter : BaseAdapter<string>
{
  List<string> messages = new List<string>();
  public void Add(string message)
  {
    messages.Add(message);
    NotifyDataSetChanged();
  }
  public override long GetItemId(int position)
  {
    return position;
  }
  public override View GetView(int position, View convertView, ViewGroup parent)
  {
    var textView = convertView as TextView;
    if (textView == null)
      textView = new TextView(parent.Context);
    textView.Text = messages [position];
    return textView;
  }
  public override int Count
  {
    get { return messages.Count; }
  }
  public override string this[int index]
  {
    get { return messages [index]; }
  }
}
This is similar to other Android adapters we have set up in the past. One difference here is that we made a member variable that contains a List<string> of messages and a method to add new messages to the list.
Now, let's add a few methods to the MainActivity class in order to set up the GPS location updates as follows:
Geolocator locator;
Adapter adapter;
protected override void OnCreate(Bundle bundle)
{
  base.OnCreate(bundle);
  SetContentView(Resource.Layout.Main);
  var listView = FindViewById<ListView>(Resource.Id.messages);
  listView.Adapter =adapter = new Adapter();
  locator = new Geolocator(this);
  locator.PositionChanged += OnPositionChanged;
  locator.PositionError += OnPositionError;
}

protected override void OnResume()
{
  base.OnResume();
  locator.StartListening(1000, 50);
}
protected override void OnPause()
{
  base.OnPause();
  locator.StopListening();
}
void OnPositionChanged (object sender, PositionEventArgs e)
{
  adapter.Add(string.Format("Long: {0:0.##} Lat: {1:0.##}",e.Position.Longitude, e.Position.Latitude));
}
void OnPositionError (object sender, PositionErrorEventArgs e)
{
  adapter.Add(e.Error.ToString());
}
Again, this looks identical to the code for iOS except for the constructor for Geolocator. If you ran the application at this point, it would start with no errors. However, no events would be fired from the Geolocator object. We first need to add permission to access the location from the Android Manifest file. It is also a good idea to start the locator in OnResume and stop it in OnPause. This will conserve battery by stopping the GPS location when this activity is no longer on the screen.
Let's create an AndroidManifest.xml file and declare two permissions as follows:
- Open the project options for the Android project.
- Select the Android Application tab under Build.
- Click on Add Android manifest.
- Under the Required permissions section, check AccessCoarseLocation and AccessFineLocation.
- Click on OK to save your changes.
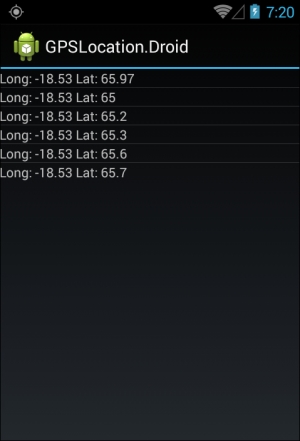
Now if you compile and run the application, you will get the GPS location updates over time as shown in the following screenshot: