The next screen is a bit more complicated; we will need to create a ListView that uses multiple layout files for each row, depending on the type of the row. We'll also need to perform some layout tricks to place a view below the ListView and set up ListView to autoscroll.
For the next screen, let's begin by creating a new layout named Messages.axml in the layout folder of the Resources directory and then perform the following steps:
- Drag a new ListView onto the layout. Set Id to
@+id/messageList. - Check the box for Stack From Bottom and set Transcript Mode to
alwaysScroll. This will set it up to display items from the bottom up. - Set the Weight value to
1for ListView in the Layout tab under the LinearLayout section. - Drag a new RelativeLayout control onto the layout. Let Id be the default value, or remove it.
- Drag a new Button control inside RelativeLayout. Set Id to
@+id/sendButton. - Check the box for Align Parent Right in the Layout tab.
- Drag a new Plain Text control found in the Text Field section inside RelativeLayout to the left of the button. Set Id to
@+id/messageText. - In the Layout tab, set To Left Of to
@+id/sendButton, and set Width tomatch_parent. - Check the box for Center in Parent to fix the vertical centering.
When completed, the XML file will be as follows:
<?xml version="1.0" encoding="utf-8"?>
<LinearLayout
  xmlns:android="http://schemas.android.com/apk/res/android"
  android:orientation="vertical"
  android:layout_width="match_parent"
  android:layout_height="match_parent">
  <ListView
    android:minWidth="25px"
    android:minHeight="25px"
    android:layout_width="fill_parent"
    android:layout_height="wrap_content"
    android:id="@+id/messageList"
    android:layout_weight="1"
    android:stackFromBottom="true"
    android:transcriptMode="alwaysScroll" />
  <RelativeLayout
    android:minWidth="25px"
    android:minHeight="25px"
    android:layout_width="fill_parent"
    android:layout_height="wrap_content">
  <Button
    android:text="Send"
    android:layout_alignParentRight="true"
    android:layout_width="wrap_content"
    android:layout_height="wrap_content"
    android:id="@+id/sendButton" />
  <EditText
    android:layout_width="match_parent"
    android:layout_height="wrap_content"
    android:layout_toLeftOf="@id/sendButton"
    android:layout_centerInParent="true"
    android:id="@+id/messageText" />
  </RelativeLayout>
</LinearLayout>
Next, perform the following steps to make two more Android layouts:
- Create a new layout named
MyMessageListItem.axmlin thelayoutfolder of theResourcesdirectory. - Open the layout and switch to the Source tab. Change the root XML element to a
RelativeLayout. - Switch back to the Content tab and drag two TextView controls onto the layout.
- In the Id field, enter
@+id/myMessageTextand@+id/myMessageDaterespectively. - For both the views, set Margin to
3dp, and Width and Height towrap_content. - For the first TextView, set Color under the Style tab to
@android:color/holo_blue_bright. - For the second TextView, check the Align Parent Right checkbox under the Layout tab.
- Create a new layout named
TheirMessageListItem.axmland repeat the process. Select a different color for the first TextView in the new layout.
Finally, we'll need to create a new activity for the screen. Create a new Android Activity named MessagesActivity.cs in the Activities directory. Begin with the standard code to set up an activity as follows:
[Activity(Label = "Messages")]
public class MessagesActivity : BaseActivity<MessageViewModel>
{
  protected override void OnCreate(Bundle bundle)
  {
    base.OnCreate(bundle);
  }
}
Next, let's implement a more complicated adapter than we implemented earlier, as follows:
class Adapter : BaseAdapter<Message>
{
  readonly MessageViewModel messageViewModel =
    ServiceContainer.Resolve<MessageViewModel>();
  readonly ISettings settings =
    ServiceContainer.Resolve<ISettings>();
  readonly LayoutInflater inflater;
  const int MyMessageType = 0, TheirMessageType = 1;
  public Adapter (Context context)
  {
    inflater = (LayoutInflater)context.GetSystemService (
      Context.LayoutInflaterService);
  }
  public override long GetItemId(int position)
  {
    return messageViewModel.Messages [position].Id;
  }
  public override int Count
  {
    get { return messageViewModel.Messages == null ? 0
      : messageViewModel.Messages.Length; }
  }
  public override Message this[int index]
  {
    get { return messageViewModel.Messages [index]; }
  }
  public override int ViewTypeCount
  {
    get { return 2; }
  }
  public override int GetItemViewType(int position)
  {
    var message = this [position];
    return message.UserId == settings.User.Id ?
      MyMessageType : TheirMessageType;
  }
}
This includes everything except our implementation of GetView, which we'll get to shortly. The first changes here are some constants for MyMessageType and TheirMessageType. We then implemented ViewTypeCount and GetItemViewType. This is Android's mechanism for using two different layouts for list items in a list view. We use one type of layout for the user's messages and a different one for the other user in the conversation.
Next, let's implement GetView as follows:
public override View GetView(
  int position, View convertView, ViewGroup parent)
{
  var message = this [position];
  int type = GetItemViewType(position);
  if (convertView == null)
  {
    if (type == MyMessageType)
    {
      convertView = inflater.Inflate(
        Resource.Layout.MyMessageListItem, null);
    }
    else
    {
      convertView = inflater.Inflate(
        Resource.Layout.TheirMessageListItem, null);
    }
  }
  TextView messageText, dateText;
  if (type == MyMessageType)
  {
    messageText = convertView.FindViewById<TextView>(
      Resource.Id.myMessageText);
    dateText = convertView.FindViewById<TextView>(
      Resource.Id.myMessageDate);
  }
  else
  {
    messageText = convertView.FindViewById<TextView>(
      Resource.Id.theirMessageText);
    dateText = convertView.FindViewById<TextView>(
      Resource.Id.theirMessageDate);
    }
  messageText.Text = message.Text;
  dateText.Text = message.Date.ToString("MM/dd/yy HH:mm");
  return convertView;
}
Let's break down our implementation through the following steps:
- We first pull out the
messageobject for the position of the row. - Next, we grab the view type that determines whether it is the current user's message or the other user in the conversation.
- If
convertViewisnull, we inflate the appropriate layout based on the type. - Next, we pull the two text views,
messageTextanddateText, out ofconvertView. We have to use the type value to make sure we use the correct resource IDs. - We set the appropriate text on both text views using the
messageobject. - We return
convertView.
Now let's finish MessagesActivity by setting up the rest of the adapter. First, let's implement some member variables and the OnCreate method as follows:
ListView listView;
EditText messageText;
Button sendButton;
Adapter adapter;
protected override void OnCreate(Bundle bundle)
{
  base.OnCreate(bundle);
  Title = viewModel.Conversation.Username;
  SetContentView(Resource.Layout.Messages);
  listView = FindViewById<ListView>(Resource.Id.messageList);
  messageText = FindViewById<EditText>(Resource.Id.messageText);
  sendButton = FindViewById<Button>(Resource.Id.sendButton);
  listView.Adapter =
    adapter = new Adapter(this);
  sendButton.Click += async (sender, e) =>
  {
    viewModel.Text = messageText.Text;
    try
    {
      await viewModel.SendMessage();
      messageText.Text = string.Empty;
      adapter.NotifyDataSetInvalidated();
      listView.SetSelection(adapter.Count);
    }
    catch (Exception exc)
    {
      DisplayError(exc);
    }
  };
}
So far, this activity is fairly standard compared to our previous activities in this chapter. We also had to wire up the Click event of sendButton in OnCreate so that it sends the message and refreshes the list. We also used a trick to scroll the list view to the end by setting its selection to the last item.
Next, we'll need to implement OnResume to load the messages, invalidate the adapter, and then scroll the list view to the end, as follows:
protected async override void OnResume()
{
base.OnResume();
try
{
await viewModel.GetMessages();
adapter.NotifyDataSetInvalidated();
listView.SetSelection(adapter.Count);
}
catch (Exception exc)
{
DisplayError(exc);
}
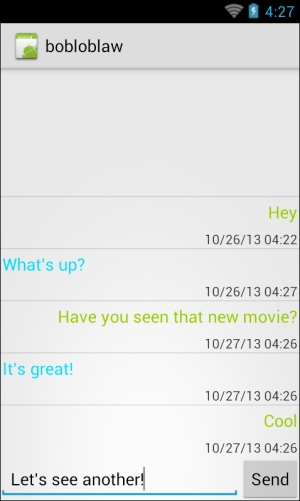
}So finally, if you compile and run the app, you will be able to navigate to the messages screen and add new messages to the list, as shown in the following screenshot: